My husband did not trust chicken thighs cooked in a single pan with rice. He said it would turn into mush—soggy, flavorless, the kind of dinner you eat because you have to, not because you want to. Honestly, I couldn’t blame him. I’d messed up enough one-pan rice dishes to know the risk. They always looked so promising in the photos, all golden and steamy, but mine usually came out gummy or, worse, with a layer of burnt rice cemented to the bottom of my favorite skillet.
But here’s the thing. I had a pack of bone-in, skin-on chicken thighs sitting in the fridge, a head of garlic that was starting to sprout, and exactly zero energy left after a long Tuesday. The thought of washing a separate pot for rice made me want to cry. So I took a chance. I browned those thighs until the skin was crackling, then I tossed in some rice, some broth, and a frankly reckless amount of garlic butter. I covered it, walked away, and prayed.
Thirty minutes later, the smell alone had him wandering into the kitchen. The rice was tender, not mushy. The chicken was fall-apart juicy. And the bottom of the pan? Clean. No burning, no sticking, just a little bit of golden crust that scraped right up. He took one bite and said, “Okay, this is different.” That was three years ago. This dish has been in regular rotation ever since. It’s the kind of recipe that earns its place quietly—not by being fancy, but by being exactly what you need on a night when you just need dinner to work.
Why You’ll Love This Recipe
Let’s be real for a second. There are a million chicken and rice recipes out there. What makes this one different? I’ve tested it more times than I care to count, tweaking the liquid ratio, the heat level, the garlic-to-butter balance. This is the version that works every single time, no special skills required.
- One Pan, Minimal Mess: You brown the chicken, cook the rice, and finish everything in the same skillet. That means fewer dishes, less scrubbing, and more time sitting down.
- Simple Pantry Ingredients: Chicken thighs, rice, garlic, butter, broth, and a few seasonings. That’s it. No trips to a specialty store, no obscure spices gathering dust in your cabinet.
- Perfect for Busy Weeknights: From start to finish, this comes together in about 40 minutes. Most of that time is hands-off while the rice cooks.
- Crowd-Pleasing Flavor: The garlic butter seeps into every grain of rice, and the chicken stays impossibly moist. My kids clean their plates, and my husband asks for seconds. That’s a win in my book.
- Foolproof Technique: The secret is browning the chicken first. That step builds a flavor base that plain boiled chicken just can’t match. Plus, the rendered fat from the skin makes the rice taste like you spent hours in the kitchen.
This isn’t just another weeknight dinner. It’s the kind of meal that makes you look forward to cooking again, even on the tiredest days.
What Ingredients You Will Need
This recipe relies on a short list of everyday ingredients, each playing a specific role. Get these right, and the dish practically cooks itself.
- Chicken Thighs (bone-in, skin-on): About 4 to 6 thighs, depending on size. The bone keeps the meat juicy during cooking, and the skin crisps up beautifully. If you only have boneless, skinless thighs, reduce the cooking time by about 10 minutes and add a tablespoon of oil to compensate for the missing fat.
- Unsalted Butter: 4 tablespoons, divided. We use half for browning the chicken and half for the garlic rice. Unsalted gives you control over the final salt level.
- Garlic: 6 to 8 cloves, minced. Don’t skimp here. The garlic mellows as it cooks, so a generous amount creates that rich, savory backbone. I use fresh garlic every time—the jarred stuff just doesn’t hit the same.
- Long-Grain White Rice: 1 cup. Basmati or jasmine work best. They stay separate and fluffy, unlike short-grain rice which can turn sticky. Rinse the rice in a fine-mesh strainer until the water runs clear—this removes excess starch and prevents gumminess.
- Chicken Broth: 1 ½ cups. Use low-sodium if you can. The broth adds depth that water alone can’t provide. I’ve used Better Than Bouillon in a pinch, and it works great.
- Dried Thyme: 1 teaspoon. It pairs beautifully with garlic and chicken. If you have fresh thyme, use 2 teaspoons of leaves.
- Paprika: 1 teaspoon. Adds a subtle smokiness and a nice color to the chicken skin. Smoked paprika is even better if you have it.
- Salt and Black Pepper: To taste. Season the chicken generously before browning—that’s your best chance to build flavor from the outside in.
- Fresh Parsley (optional): For garnish. It adds a pop of color and a fresh finish, but the dish is perfectly delicious without it.
I recommend using a good-quality broth for this. I’ve noticed the cheaper ones can make the rice taste a little flat. If you’re looking for another one-pan meal that uses similar ingredients, you might enjoy this crispy lemon rosemary salmon sheet pan dinner—it follows the same low-effort, high-reward philosophy.
Equipment Needed
You don’t need a fancy kitchen to pull this off. Here’s what you’ll need:
- A Large, Heavy-Bottomed Skillet or Dutch Oven: 12 inches is ideal. Cast iron or stainless steel works best because they hold heat evenly. Avoid nonstick for the browning step—you won’t get that golden crust. I use my trusty Lodge cast iron skillet, and it’s never let me down.
- A Tight-Fitting Lid: This is crucial. The rice needs steam to cook properly. If your skillet doesn’t have a lid, use a sheet of aluminum foil crimped tightly around the edges.
- A Fine-Mesh Strainer: For rinsing the rice. You can use a bowl and your hands if you don’t have one, but the strainer makes it easier.
- Measuring Cups and Spoons: Precision matters here, especially with the liquid-to-rice ratio.
- Tongs: For flipping the chicken without tearing the skin. A spatula works too, but tongs give you more control.
If you’re just starting out, don’t stress about having the perfect skillet. A heavy-bottomed pot works just fine. The key is even heat distribution, which prevents hot spots that can burn the rice.
Preparation Method
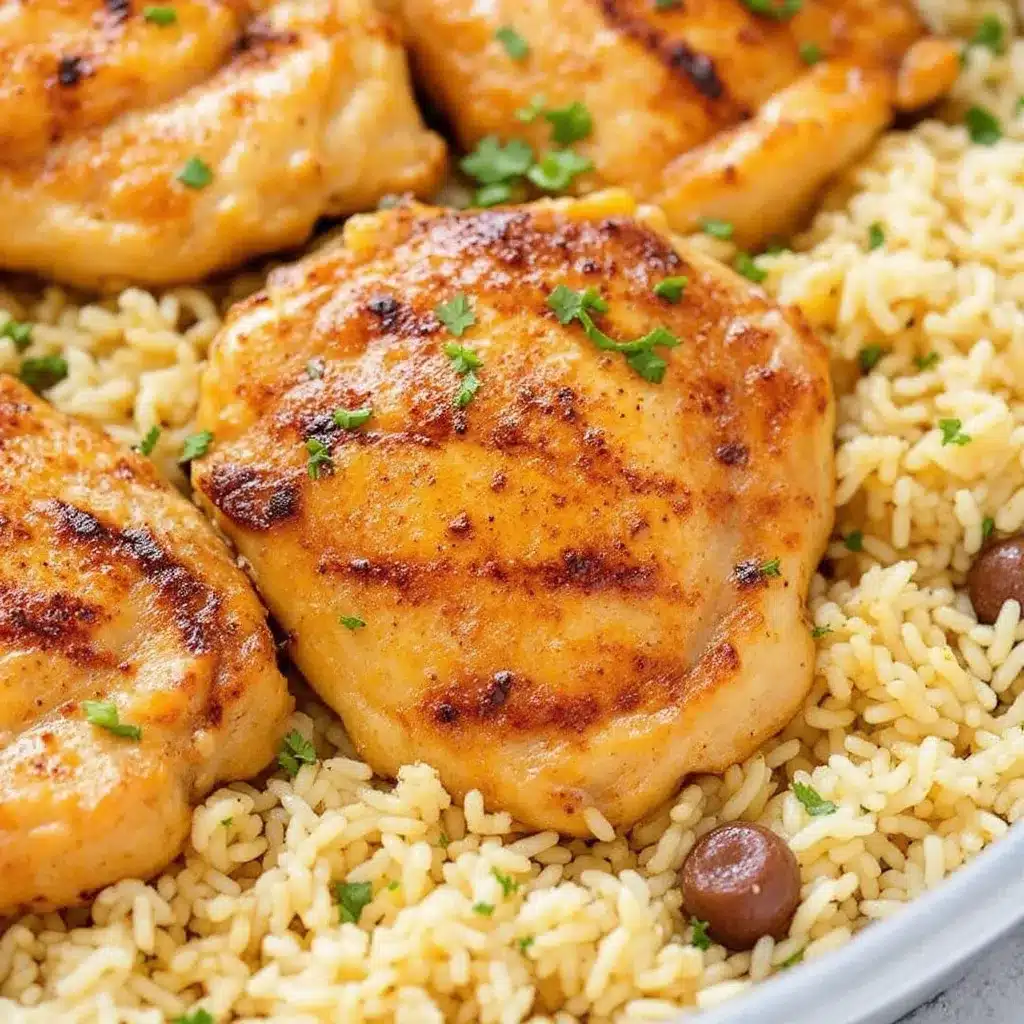
Here’s where the magic happens. Follow these steps closely, and you’ll have a perfect dinner on the table.
- Prep the Chicken: Pat the chicken thighs dry with paper towels. This is non-negotiable—wet skin won’t brown. Season both sides generously with salt, pepper, and paprika. Let them sit at room temperature for 10 minutes while you get everything else ready.
- Brown the Chicken: Heat 2 tablespoons of butter in your skillet over medium-high heat. Once the butter stops foaming, place the chicken thighs skin-side down. Don’t crowd the pan—if your skillet is small, work in batches. Cook for 5 to 6 minutes without moving them. The skin should be deep golden and crispy. Flip and cook for another 3 minutes on the other side. Transfer the chicken to a plate. Don’t worry if it’s not fully cooked through—it will finish in the rice.
- Cook the Aromatics: Reduce the heat to medium. Add the remaining 2 tablespoons of butter to the pan. Once melted, add the minced garlic. Stir constantly for 30 seconds until fragrant. Be careful not to burn the garlic—it turns bitter fast.
- Toast the Rice: Add the rinsed and drained rice to the pan. Stir it around in the garlic butter for about 2 minutes. You’ll notice the grains turn slightly translucent at the edges. This step adds a nutty flavor and helps the rice stay separate.
- Add the Liquid: Pour in the chicken broth and add the dried thyme. Stir once to combine. Scrape up any browned bits from the bottom of the pan—that’s pure flavor. Bring the liquid to a gentle boil.
- Nestle the Chicken Back In: Place the chicken thighs on top of the rice, skin-side up. Any juices from the plate should go into the pan too. Don’t submerge the skin—you want it to stay crispy.
- Cover and Cook: Put the lid on tightly. Reduce the heat to low. Let it cook undisturbed for 20 minutes. I know it’s tempting to peek, but every time you lift that lid, steam escapes and your rice suffers.
- Rest and Serve: After 20 minutes, turn off the heat. Keep the lid on and let it rest for 5 minutes. This allows the rice to absorb any remaining moisture. Remove the lid, fluff the rice gently with a fork, and garnish with fresh parsley if you’re using it.
If you’re a fan of set-it-and-forget-it cooking, you’ll also love this tender slow cooker honey garlic chicken and vegetables. It’s another one of those meals that feels like a hug in a bowl.
Cooking Tips & Techniques
I’ve made this recipe enough times to know exactly where things can go wrong. Here’s what I’ve learned:
Don’t skip the browning step. I know it adds an extra 10 minutes, but it’s the difference between good chicken and unforgettable chicken. That golden crust is packed with umami, and the rendered fat seasons the rice in a way that butter alone can’t replicate.
Watch your heat. Medium-high for browning, low for simmering. If you cook the rice on too high a heat, the liquid evaporates before the grains have a chance to soften. I learned this the hard way—burnt rice, undercooked middles, and a very sad dinner.
Let the rice rest. That 5-minute rest at the end isn’t optional. It allows the steam to redistribute, making the rice fluffy instead of wet. I once skipped it because I was starving, and the rice was noticeably stickier.
Use a timer. Set one for the browning and another for the simmering. It’s easy to get distracted, especially on busy nights. I keep a small kitchen timer magnetized to my hood, and it saves me constantly.
Double-check your lid seal. If steam is escaping, your rice will be dry. I sometimes place a piece of foil under the lid to create a tighter seal. It looks a little janky, but it works.
Variations & Adaptations
This recipe is a great base for experimentation. Here are a few ways I’ve adapted it over the years:
Spicy Garlic Butter Version: Add ½ teaspoon of red pepper flakes along with the garlic. The heat cuts through the richness beautifully. I serve this with a dollop of yogurt on the side to cool things down.
Vegetable-Packed Version: After removing the chicken, toss in a cup of sliced mushrooms and a handful of spinach. Cook until the mushrooms are softened and the spinach wilts before adding the rice. It adds bulk and nutrients without changing the core recipe.
Herb and Lemon Twist: Add the zest of one lemon and 2 tablespoons of fresh dill or parsley to the rice before covering. The brightness balances the butter. I made this version last summer, and it was perfect with a side salad.
Creamy Version: Stir in ¼ cup of heavy cream or full-fat coconut milk after the rice has cooked. It turns the dish into a creamy, risotto-like comfort meal. This is my go-to on cold winter nights.
Gluten-Free Note: This recipe is naturally gluten-free as long as you use a certified gluten-free broth. Double-check your seasonings too—some spice blends contain hidden gluten.
For another quick and healthy meal idea, take a look at these Mediterranean chickpea and feta stuffed mini peppers. They make a great side dish or a light lunch.
Serving & Storage Suggestions
This dish is best served fresh, straight from the skillet. The chicken skin stays crispy for about 10 minutes after cooking, so I like to serve it immediately. Spoon the rice onto plates and top each portion with a chicken thigh. A sprinkle of fresh parsley or a squeeze of lemon juice right before serving brightens everything up.
For sides, I keep it simple. A crisp green salad with a lemony vinaigrette balances the richness. Steamed green beans or roasted broccoli also work well. If I’m feeling indulgent, I’ll serve it with a side of crusty bread to soak up any extra garlic butter from the pan.
Storage: Let leftovers cool completely before transferring to an airtight container. Store in the refrigerator for up to 4 days. The rice will absorb some moisture, so it won’t be quite as fluffy, but the flavor holds up well.
Reheating: The best way to reheat is in a skillet over medium-low heat with a splash of broth or water. Cover and cook for 5 to 7 minutes, stirring occasionally. The microwave works in a pinch, but it tends to dry out the chicken skin. For crispy skin, I reheat the chicken separately in a hot oven at 375°F for about 10 minutes.
Freezing: This dish freezes surprisingly well. Place portions in freezer-safe containers, leaving a little room for expansion. Freeze for up to 3 months. Thaw overnight in the refrigerator before reheating. I’ve done this multiple times for meal prep, and it’s been a lifesaver on extra-busy weeks.
Nutritional Information & Benefits
Here’s an approximate breakdown per serving (based on 4 servings):
| Nutrient | Amount |
|---|---|
| Calories | 485 |
| Protein | 32g |
| Fat | 22g |
| Saturated Fat | 9g |
| Carbohydrates | 38g |
| Fiber | 1g |
| Sugar | 1g |
| Sodium | 680mg |
Chicken thighs are a great source of protein, iron, and B vitamins, which support energy metabolism. The garlic in this recipe isn’t just for flavor—it contains compounds that may support immune health. Using bone-in, skin-on thighs adds natural collagen to the dish, which is great for joint and skin health. If you’re watching your sodium, use low-sodium broth and reduce the added salt. This recipe is also naturally gluten-free and can be made dairy-free by swapping the butter for a high-quality vegan butter or olive oil.
Conclusion
This one-pan garlic butter chicken thighs with rice has become my go-to answer for the eternal question, “What’s for dinner?” It’s reliable without being boring, simple without being plain. The garlic butter infuses every bite, the chicken stays juicy, and the rice comes out perfect every time. I love that I can make it on a Tuesday night with ingredients I already have, and it still feels like a special meal.
I hope you give this recipe a try and make it your own. Maybe you’ll add extra garlic like I do, or throw in some vegetables you need to use up. That’s the beauty of a good base recipe—it leaves room for your creativity. If you make it, I’d love to hear how it turned out. Drop a comment below, tag me in your photos, or share your favorite variation. Happy cooking, friends.
Frequently Asked Questions
Can I use boneless, skinless chicken thighs?
Yes, you can. Reduce the browning time to about 3 minutes per side, and check the internal temperature after the rice has cooked. Boneless thighs cook faster, so they may be done before the 20-minute mark. Use an instant-read thermometer to confirm 165°F.
Why is my rice still hard after 20 minutes?
This usually happens if the heat was too low or the lid didn’t seal properly. Next time, make sure your liquid is at a gentle boil before covering, and check that your lid fits tightly. If the rice is still hard, add 2 tablespoons of water, cover, and cook on low for another 5 minutes.
Can I make this in a Dutch oven?
Absolutely. A Dutch oven is actually perfect for this recipe because it holds heat so well. Follow the same steps—just make sure your pot is large enough to hold the chicken and rice without crowding.
Can I use brown rice instead of white rice?
You can, but you’ll need to adjust the liquid and cooking time. Use 1 ½ cups of broth and increase the simmering time to 40 minutes. Brown rice also benefits from an extra 10-minute rest after cooking. The texture will be chewier, but the flavor is still great.
How do I prevent the rice from burning on the bottom?
Use low heat during the simmering stage and make sure your pan is heavy-bottomed. If you have a thin pan, try using a heat diffuser. Also, resist the urge to stir the rice once it’s covered—stirring can cause the grains to stick and burn.
Pin This Recipe!
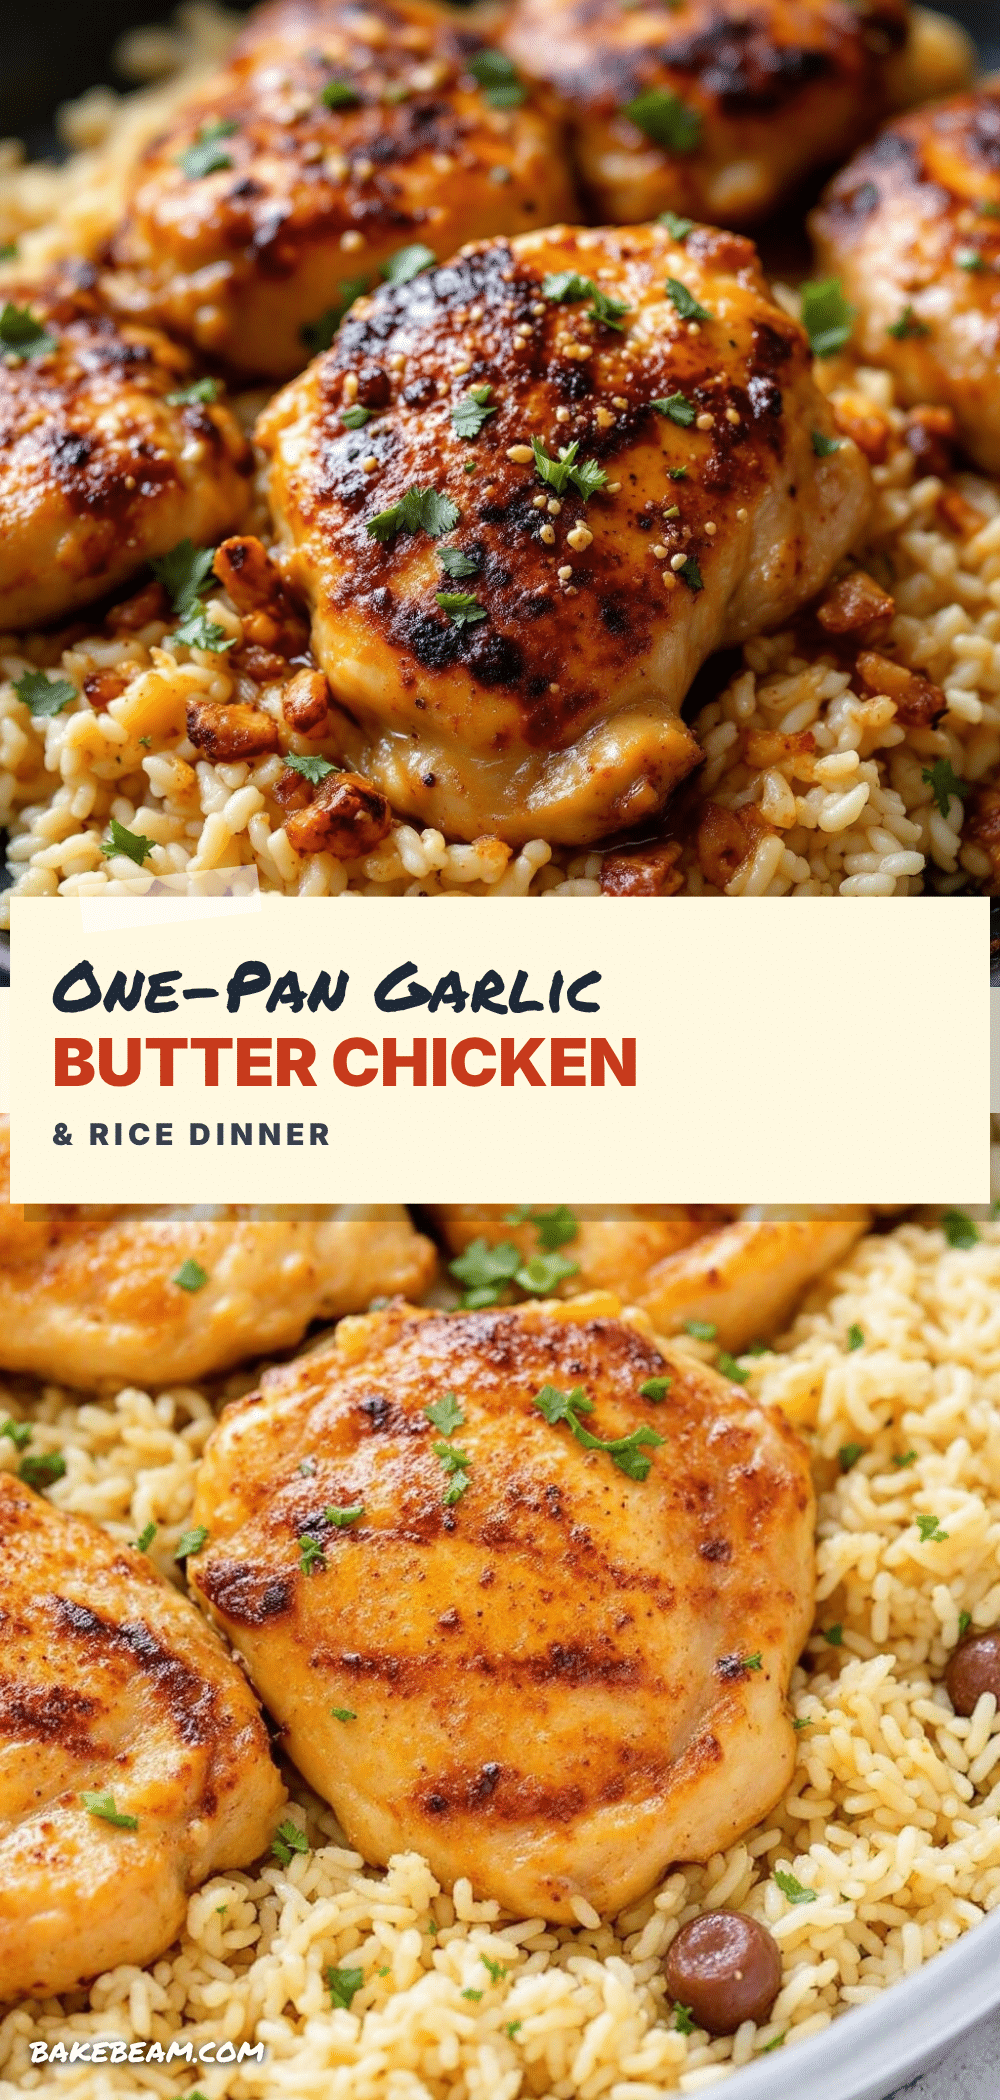
Easy One-Pan Garlic Butter Chicken Thighs with Rice

Juicy bone-in, skin-on chicken thighs and fluffy rice cook together in one skillet with a rich garlic butter sauce. This foolproof weeknight dinner is packed with flavor and requires minimal cleanup.
- Prep Time: 10 minutes
- Cook Time: 30 minutes
- Total Time: 40 minutes
- Yield: 4 servings 1x
- Category: Main Course
- Cuisine: American
Ingredients
- 4 to 6 bone-in, skin-on chicken thighs
- 4 tablespoons unsalted butter, divided
- 6 to 8 cloves garlic, minced
- 1 cup long-grain white rice (basmati or jasmine), rinsed
- 1 ½ cups low-sodium chicken broth
- 1 teaspoon dried thyme
- 1 teaspoon paprika
- Salt and black pepper to taste
- Fresh parsley for garnish (optional)
Instructions
- Pat the chicken thighs dry with paper towels. Season both sides generously with salt, pepper, and paprika. Let sit at room temperature for 10 minutes.
- Heat 2 tablespoons of butter in a large heavy-bottomed skillet or Dutch oven over medium-high heat. Once the butter stops foaming, place the chicken thighs skin-side down. Cook for 5 to 6 minutes without moving, until the skin is deep golden and crispy. Flip and cook for another 3 minutes. Transfer the chicken to a plate.
- Reduce the heat to medium. Add the remaining 2 tablespoons of butter to the pan. Once melted, add the minced garlic and stir constantly for 30 seconds until fragrant.
- Add the rinsed and drained rice to the pan. Stir in the garlic butter for about 2 minutes until the grains turn slightly translucent at the edges.
- Pour in the chicken broth and add the dried thyme. Stir once to combine, scraping up any browned bits from the bottom of the pan. Bring the liquid to a gentle boil.
- Nestle the chicken thighs back into the pan, skin-side up, along with any accumulated juices. Do not submerge the skin.
- Cover the skillet tightly with a lid. Reduce the heat to low and cook undisturbed for 20 minutes.
- Turn off the heat and let the skillet rest, covered, for 5 minutes. Remove the lid, fluff the rice gently with a fork, and garnish with fresh parsley if desired.
Notes
Don’t skip browning the chicken—it builds flavor and renders fat that seasons the rice. Use low heat for simmering to prevent burning. Let the rice rest for 5 minutes after cooking for fluffier texture. For a tighter lid seal, place foil under the lid.
Nutrition
- Serving Size: 1 chicken thigh with
- Calories: 485
- Sugar: 1
- Sodium: 680
- Fat: 22
- Saturated Fat: 9
- Carbohydrates: 38
- Fiber: 1
- Protein: 32
Keywords: one-pan chicken and rice, garlic butter chicken thighs, easy weeknight dinner, skillet chicken and rice, chicken thighs with rice