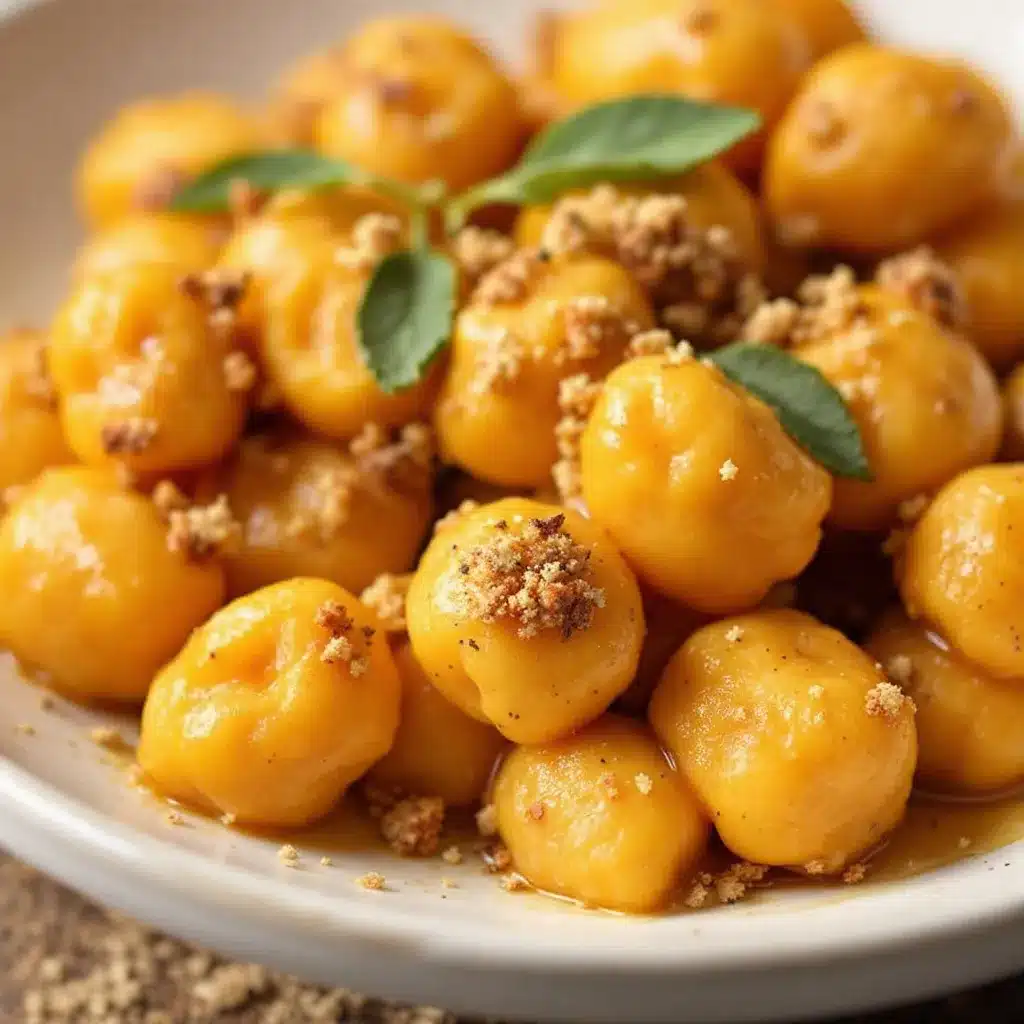
The faintest crisp on the outside of each pillow, and that’s the whole point. I mean, honestly, gnocchi can be a little sad when it’s just boiled — all soft and doughy with no personality. But this? These little guys get pan-seared until they develop that delicate, golden-brown crust while staying impossibly tender inside. It’s the kind of texture that makes you stop mid-bite and just look at your fork for a second. Everything else — the nutty brown butter, the crackling sage — is just supporting the main act.
I stumbled onto this recipe during a particularly gray October afternoon when the kitchen was the only warm room in the house. I had a leftover roasted pumpkin sitting on the counter (from a pie experiment that went sideways, honestly) and a bag of flour that felt like it was judging me. I wanted something that felt like fall but wasn’t another sweet thing. You know how it gets — you just crave something savory and rich that wraps around you like a good sweater.
The first batch was a disaster. Too wet, too sticky, fell apart in the water. But that second attempt? That’s the one that stuck. The brown butter sauce happened by accident — I got distracted by my phone and let the butter go a shade too dark, and suddenly the kitchen smelled like toasted hazelnuts and caramel. I threw in some sage leaves from the plant I’d been neglecting on the windowsill, and something clicked. This wasn’t just dinner. This was the kind of meal you text your friends about.
So here it is — the version I’ve made at least a dozen times since, tweaking and testing until every step felt right. It’s not fussy or complicated. It’s just honest food that happens to taste like a really good hug.
Why You’ll Love This Recipe
Look, I’ve tested a lot of gnocchi recipes over the years. Some are too heavy, some fall apart, and some just lack that something that makes you want to make them again. This one? It’s different. Here’s why:
- Restaurant-quality at home : The brown butter and sage combination is classic for a reason — it’s elegant without being pretentious, and it makes your kitchen smell like a fancy Italian trattoria.
- Surprisingly simple ingredients : Pumpkin, flour, egg, butter, sage, and a little salt. That’s it. You probably have most of this already if you’ve been doing any fall baking.
- Perfect for fall entertaining : This dish looks impressive on a plate but comes together in under an hour. Great for a cozy dinner party or when you want to impress someone without breaking a sweat.
- Texture heaven : That contrast between the crispy exterior and the pillowy, tender inside is honestly addictive. I’ve watched people who “don’t like pumpkin” go back for seconds.
- Naturally gluten-free adaptable : With a simple flour swap, this works beautifully for gluten-free diets. I’ll tell you exactly how below.
What really sets this apart from other pumpkin gnocchi recipes is the technique. Most recipes just boil the gnocchi and call it done. But taking the extra few minutes to pan-sear them in that brown butter? That’s the game-changer. It transforms a good dish into something you’ll crave on cold November nights. Plus, the roasted pumpkin adds a subtle sweetness that plays off the nutty, toasty brown butter in a way that canned pumpkin just can’t replicate.
This isn’t just another fall recipe. It’s the one I make when I want to feel like I’ve got my life together, even if the rest of the house is a mess and I’m wearing sweatpants. It’s comfort food that makes you feel a little fancy, and honestly, we all deserve that sometimes.
What Ingredients You Will Need
This recipe relies on simple, whole ingredients that work together to create something truly special. The quality of each component matters here, so let’s talk about what to look for and why.
For the Pumpkin Gnocchi
- 1 cup roasted pumpkin puree (not canned pumpkin pie filling — look for 100% pure pumpkin or better yet, roast your own). Roasting your own pumpkin gives a deeper, sweeter flavor and less moisture than canned. I prefer sugar pie pumpkins for this; they’re smaller, sweeter, and less watery than carving pumpkins.
- 1 large egg , lightly beaten (room temperature works best — it incorporates more evenly into the dough)
- 1 ½ cups all-purpose flour , plus more for dusting (you might need a little more or less depending on your pumpkin’s moisture content — I’ll explain how to tell below)
- ½ teaspoon salt (fine sea salt is my preference here; it dissolves more evenly)
- ¼ teaspoon freshly grated nutmeg (please don’t skip this — it’s subtle but essential, and pre-ground nutmeg just doesn’t hit the same)
- Pinch of black pepper (trust me on this — it balances the sweetness)
For the Brown Butter Sage Sauce
- 6 tablespoons unsalted butter (use good quality butter here — it’s the star of the sauce, and you’ll taste the difference)
- 10-12 fresh sage leaves (look for leaves that are vibrant green and fragrant — avoid any that look wilted or have brown spots)
- ¼ cup grated Parmesan cheese , plus more for serving (freshly grated from a block, not the stuff in the green can — I promise it matters)
- Salt and freshly ground black pepper , to taste
For Serving (Optional but Recommended)
- Extra Parmesan for grating at the table
- Crushed red pepper flakes for a little heat
- Toasted pumpkin seeds for crunch (I love the texture contrast)
A quick note on pumpkin: if you’re using canned pumpkin puree, look for brands like Libby’s or Farmer’s Market Foods. They tend to have a thicker, more consistent texture. If your puree seems watery at all, spread it on a paper towel-lined plate for about 10 minutes to absorb some of the excess moisture. This step alone can save your gnocchi from turning into sad, mushy blobs.
For the sage, I’ve found that the smaller, younger leaves crisp up better in the brown butter. If your sage leaves are large and mature, consider tearing them in half before frying. And if you can’t find fresh sage? Dried sage works in a pinch, but you’ll miss that crackly texture. Honestly, fresh sage is worth seeking out for this one.
Equipment Needed
You don’t need a lot of fancy equipment for this recipe, which is part of its charm. Here’s what you’ll need:
- Large pot for boiling the gnocchi (at least 4 quarts — they need room to float without crowding)
- Large skillet (a 12-inch skillet is ideal — non-stick works great, but stainless steel gives better browning)
- Slotted spoon for transferring gnocchi from water to skillet
- Rimmed baking sheet for holding the shaped gnocchi (lightly dusted with flour)
- Fork or gnocchi board for creating those classic ridges (a fork works perfectly — I actually prefer it)
- Sharp knife or bench scraper for cutting the dough
- Large bowl for mixing the dough
- Measuring cups and spoons
If you don’t have a gnocchi board, don’t worry about it. I used a fork for years before I finally bought one, and honestly? The fork gives you more control. The ridges are mostly about helping the sauce cling to the gnocchi anyway, and a fork does that job just fine. One thing I’ve learned the hard way: don’t use a silicone spatula for mixing this dough. It’s too soft and flexible. A wooden spoon or your hands work much better for bringing everything together.
Preparation Method
Let’s walk through this step by step. I’ve made this recipe enough times to know where things can go wrong, so I’ll point out the pitfalls along the way.
Step 1: Roast the Pumpkin (If Using Fresh)
Preheat your oven to 400°F. Cut a sugar pie pumpkin in half, scoop out the seeds and strings, and place the halves cut-side down on a baking sheet. Roast for 35-45 minutes until the flesh is fork-tender. Let it cool, then scoop out the flesh and puree it in a food processor or mash it thoroughly with a potato masher. You want it smooth — no stringy bits. Measure out 1 cup and save any extra for another use (it’s great stirred into oatmeal or yogurt).
Step 2: Make the Gnocchi Dough
In a large bowl, combine the pumpkin puree, beaten egg, salt, nutmeg, and pepper. Stir until smooth and well combined. Add the flour, about ¼ cup at a time, stirring gently after each addition. Here’s where it gets personal: you might not need all the flour, or you might need a little more. The dough should come together into a soft, slightly sticky ball that holds its shape. If it’s too sticky to handle, add flour a tablespoon at a time. If it’s too dry and crumbly, add a tiny splash of water.
Turn the dough out onto a lightly floured surface and knead it gently — and I mean gently — about 8 to 10 times. Over-kneading develops the gluten and makes your gnocchi tough. You want it just combined, soft, and slightly tacky to the touch. Cover the dough with a clean kitchen towel and let it rest for 10 minutes. This rest is important — it lets the flour fully hydrate and makes the dough easier to work with.
Step 3: Shape the Gnocchi
Dust your work surface and hands with flour. Divide the dough into 4 equal pieces. Roll each piece into a long rope about ¾ inch thick — think of it as being about the width of your thumb. Cut the rope into 1-inch pieces using a sharp knife or bench scraper.
Now for the ridges: take each piece and gently roll it down the tines of a fork (or a gnocchi board if you have one). Apply light, even pressure — you’re not trying to crush it, just create those little indentations. The gnocchi should curl slightly as it rolls. Place the shaped gnocchi on a floured baking sheet in a single layer, making sure they’re not touching each other. Repeat with the remaining dough.
If you’re not cooking them right away, pop the baking sheet in the fridge for up to 2 hours. You can also freeze them on the sheet, then transfer to a freezer bag for up to 3 months. Don’t thaw before cooking — just add an extra minute to the boiling time.
Step 4: Cook the Gnocchi
Bring a large pot of generously salted water to a rolling boil. Drop the gnocchi in gently, working in batches if needed — you don’t want to crowd the pot. They’ll sink to the bottom at first, then float to the surface when they’re done, which takes about 2 to 3 minutes. Let them bob around for about 30 seconds after they float, then scoop them out with a slotted spoon.
Here’s a pro tip: don’t drain them in a colander. The residual water helps create steam in the skillet later, which keeps the gnocchi tender. Just lift them straight from the water to the skillet.
Step 5: Make the Brown Butter Sage Sauce
While the gnocchi are cooking, melt the butter in a large skillet over medium heat. Swirl the pan occasionally as the butter melts. It will foam up, then the foam will subside, and you’ll start to see little brown specks forming at the bottom of the pan. This is the milk solids toasting — and it’s where the magic happens. The butter will smell nutty and fragrant. This takes about 3 to 4 minutes from start to finish.
As soon as you see those brown specks and smell that nutty aroma, drop in the sage leaves. They’ll sizzle and crisp up in about 30 seconds. Be careful not to let the butter burn — once it goes from brown to black, it’s bitter and you have to start over. I’ve done this more times than I’d like to admit.
Step 6: Pan-Sear the Gnocchi
Add the cooked gnocchi directly to the skillet with the brown butter and sage. Let them cook undisturbed for about 2 minutes — I know it’s tempting to stir, but resist! You want a nice golden crust to form on one side. Gently flip them and cook for another 1 to 2 minutes. Sprinkle with the grated Parmesan, toss gently to coat, and remove from heat.
The gnocchi should be golden on the outside, pillowy on the inside, and coated in that nutty, sage-infused butter. Taste and adjust salt and pepper as needed.
Cooking Tips & Techniques
After making this recipe more times than I can count, here are the things I wish someone had told me from the start:
Don’t overwork the dough. This is the number one mistake people make with gnocchi. The more you handle it, the tougher it gets. Mix until just combined, knead gently and briefly, and shape with a light hand. Tough gnocchi is sad gnocchi.
Test one gnocchi before cooking the whole batch. Boil a single piece first. If it falls apart, your dough needs more flour. If it’s too dense and heavy, you’ve added too much flour. This test takes 2 minutes and can save you from ruining an entire batch.
Keep your workspace floured but not too floured. Too much flour on the surface gets incorporated into the dough as you roll, making it dry and heavy. Use just enough to prevent sticking, and brush off excess flour before boiling.
Use a wide pot for boiling. Gnocchi need room to move around. A narrow pot crowds them, lowers the water temperature, and leads to gummy results. Give them space — they’ll thank you.
Brown butter happens fast. Once you see those brown specks, you have about 15 seconds before it goes from perfect to burnt. Have your sage leaves ready and drop them in immediately. The sage will cool the butter slightly and give you a little more time.
Save some pasta water. If your sauce seems too thick or dry, add a splash of the starchy pasta water to loosen it up. It helps the sauce cling to the gnocchi beautifully.
Variations & Adaptations
One of the best things about this recipe is how adaptable it is. Here are some variations I’ve tried and loved:
Gluten-Free Version: Substitute the all-purpose flour with a good quality gluten-free flour blend that contains xanthan gum. I’ve had great results with Bob’s Red Mill 1-to-1 Baking Flour. The dough will be a little stickier, so dust your hands generously with the gluten-free flour. The texture is slightly more delicate, but still delicious.
Vegan Adaptation: Replace the egg with a flax egg (1 tablespoon ground flaxseed mixed with 3 tablespoons water, let sit for 5 minutes). Use vegan butter for the sauce and nutritional yeast instead of Parmesan. The gnocchi will be a bit more fragile, so handle them gently.
Sweet Potato Gnocchi: Swap the pumpkin for roasted sweet potato. The flavor is slightly sweeter and earthier, and it pairs beautifully with the brown butter and sage. You might need a touch more flour since sweet potatoes can be more moist.
Add Some Greens: Toss in a handful of fresh spinach or chopped kale during the last minute of cooking the gnocchi in the skillet. It wilts down beautifully and adds a pop of color and nutrition.
Make it Spicy: Add a pinch of red pepper flakes to the brown butter along with the sage. The heat cuts through the richness and adds a lovely warmth.
Nutty Crunch: Toast some walnuts or pecans in a dry skillet until fragrant, then sprinkle them over the finished dish. The crunch is a wonderful contrast to the soft gnocchi.
Serving & Storage Suggestions
This dish is best served immediately, fresh from the skillet, when the gnocchi are at their crispiest and the sauce is still warm and glossy. Spoon the gnocchi onto warm plates, making sure each serving gets a few crispy sage leaves. Finish with an extra shower of Parmesan and a crack of black pepper.
For a complete meal, serve alongside a simple fresh garden tomato basil bruschetta for a bright, acidic contrast to the rich gnocchi. Or start with a perfect roasted fig and goat cheese crostini for an elegant fall appetizer. If you’re in the mood for something sweet afterward, the best chocolate chip pumpkin bread with brown butter glaze would be a natural follow-up — more brown butter, more pumpkin, more happiness.
If you have leftovers (which honestly doesn’t happen often in my house), store them in an airtight container in the refrigerator for up to 3 days. The gnocchi will soften, but they’re still delicious. To reheat, warm them in a skillet over medium heat with a little extra butter or olive oil until heated through and slightly crispy again. The microwave works in a pinch, but you’ll lose that lovely texture.
For freezing, I recommend freezing the uncooked gnocchi on a baking sheet, then transferring to a freezer bag. Cook directly from frozen, adding about a minute to the boiling time. The sauce is best made fresh, but you can make the gnocchi weeks ahead and have them ready for a quick weeknight dinner.
Flavors do develop over time — the brown butter and sage meld together overnight, making leftovers almost better the next day. Cold gnocchi straight from the fridge? I won’t judge if you sneak a few.
Nutritional Information & Benefits
Here’s an approximate nutritional breakdown per serving (based on 4 servings):
- Calories: 385
- Protein: 10g
- Fat: 20g
- Carbohydrates: 44g
- Fiber: 3g
- Sugar: 4g
- Sodium: 480mg
This dish offers some surprising nutritional benefits. Pumpkin is packed with vitamin A (in the form of beta-carotene), which supports eye health and immune function. It’s also a good source of fiber, which aids digestion and helps you feel full and satisfied. The sage in the sauce isn’t just for flavor — it’s been used for centuries in traditional medicine for its anti-inflammatory properties. And while brown butter isn’t exactly health food, using high-quality butter from grass-fed cows provides beneficial fatty acids and fat-soluble vitamins.
If you’re watching your sodium, go easy on the salt in the pasta water and use unsalted butter. The Parmesan adds plenty of saltiness on its own. For a lighter version, you can reduce the butter to 4 tablespoons and use a non-stick spray in the skillet, but honestly? This is a treat. Enjoy it as-is and balance it with lighter meals the rest of the week.
This recipe is vegetarian as written, and with the gluten-free adaptation mentioned above, it can work for those with celiac disease or gluten sensitivity. It contains dairy from the butter and Parmesan, but the vegan variation covers that base.
Conclusion
This perfect brown butter pumpkin gnocchi with sage is the kind of recipe that makes you feel like you’ve really accomplished something in the kitchen — even though it’s surprisingly simple to pull off. It’s fall on a plate, with all those cozy, warm, earthy flavors that make this season so special. The nutty brown butter, the crispy sage, the tender pumpkin pillows with their golden crusts — it all comes together in a way that feels both rustic and elegant.
I love that this recipe doesn’t require any special skills or fancy equipment. It’s just good ingredients treated with care and a little bit of patience. Whether you’re making it for a quiet dinner at home, a special occasion, or just because you want to feel like you’ve got your culinary act together, it delivers every single time.
I’d love to hear how yours turns out! Did you try any variations? Did you burn the butter like I did the first three times? Drop a comment below and let me know — and don’t forget to share your photos. Tag me so I can see your beautiful gnocchi in all their glory. Happy cooking!
Frequently Asked Questions
Can I use canned pumpkin instead of fresh?
Absolutely. Just make sure you’re using 100% pure pumpkin puree, not pumpkin pie filling. If the canned puree seems watery, blot it with paper towels before using to remove excess moisture. This helps prevent the dough from becoming too sticky.
Why did my gnocchi fall apart in the water?
This usually happens when the dough is too wet or wasn’t mixed enough. Make sure your pumpkin puree isn’t too watery, and don’t skip the resting step. If your first test gnocchi falls apart, add a little more flour to the dough and try again.
Can I make the gnocchi ahead of time?
Yes! You can shape the gnocchi and refrigerate them on a floured baking sheet for up to 2 hours before cooking. For longer storage, freeze them on the sheet, then transfer to a freezer bag. Cook directly from frozen, adding about a minute to the boiling time.
What can I substitute for sage?
If you don’t have fresh sage, you can use fresh thyme or rosemary for a different but delicious flavor profile. Dried sage works in a pinch, but use about half the amount and add it to the butter earlier so it has time to rehydrate. The crispy texture won’t be the same, but the flavor will still be lovely.
How do I know when the brown butter is done?
Watch for the butter to foam up, then the foam will subside. You’ll see little brown specks forming at the bottom of the pan, and the butter will smell nutty and toasty. This happens quickly — once you see those specks and smell that nutty aroma, add your sage immediately. If the butter turns dark brown or smells burnt, start over. Trust your nose — it’s the best indicator.
Pin This Recipe!
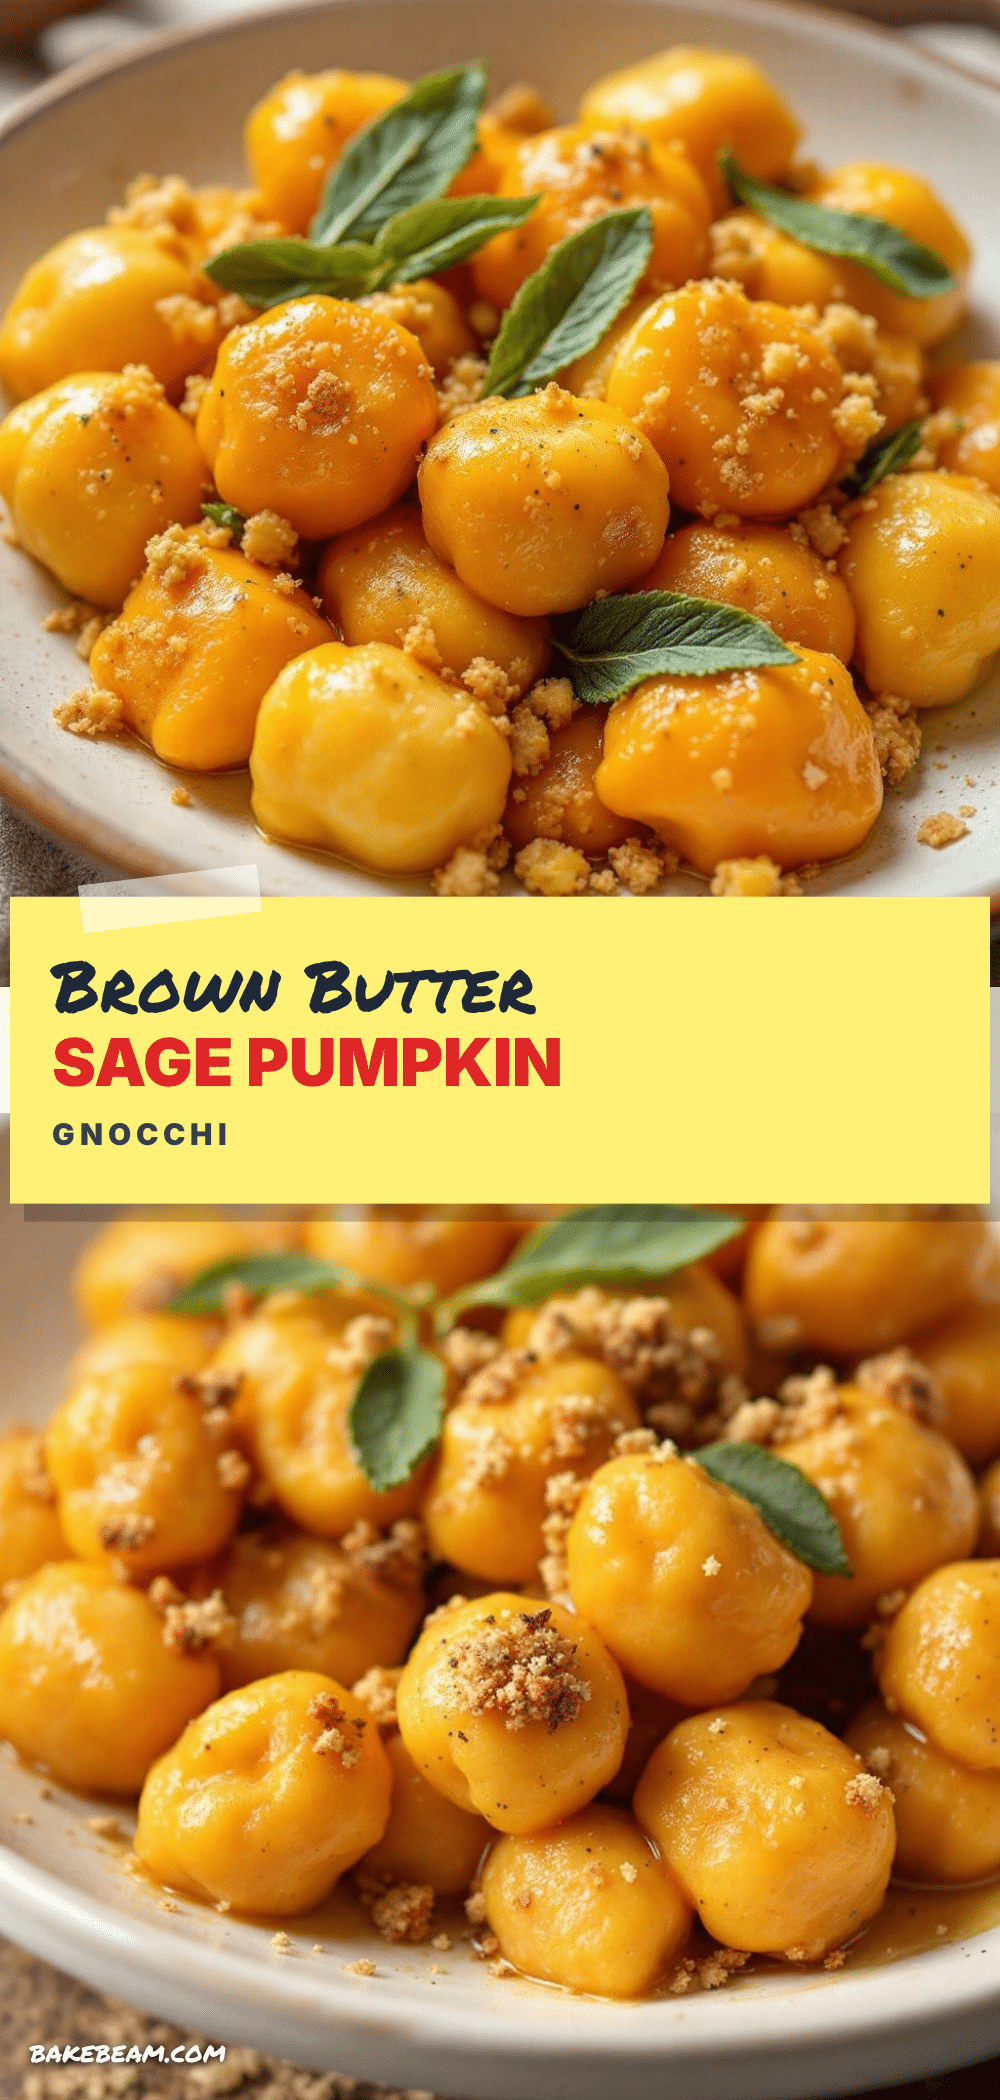
Perfect Brown Butter Pumpkin Gnocchi with Sage

Pan-seared pumpkin gnocchi in a nutty brown butter and sage sauce, with a delicate golden crust and pillowy interior. A cozy, elegant fall dish that comes together in under an hour.
- Prep Time: 30 minutes
- Cook Time: 20 minutes
- Total Time: 50 minutes
- Yield: 4 servings 1x
- Category: Main Course
- Cuisine: Italian
Ingredients
- 1 cup roasted pumpkin puree (not canned pumpkin pie filling; 100% pure pumpkin or homemade)
- 1 large egg, lightly beaten (room temperature)
- 1 ½ cups all-purpose flour, plus more for dusting
- ½ teaspoon fine sea salt
- ¼ teaspoon freshly grated nutmeg
- Pinch of black pepper
- 6 tablespoons unsalted butter
- 10–12 fresh sage leaves
- ¼ cup grated Parmesan cheese, plus more for serving
- Salt and freshly ground black pepper, to taste
- Optional: extra Parmesan, crushed red pepper flakes, toasted pumpkin seeds
Instructions
- Roast the pumpkin (if using fresh): Preheat oven to 400°F. Cut a sugar pie pumpkin in half, scoop out seeds and strings, place cut-side down on a baking sheet. Roast 35-45 minutes until fork-tender. Cool, scoop out flesh, and puree until smooth. Measure 1 cup.
- Make the gnocchi dough: In a large bowl, combine pumpkin puree, beaten egg, salt, nutmeg, and pepper. Stir until smooth. Add flour ¼ cup at a time, stirring gently, until a soft, slightly sticky ball forms. Turn onto a floured surface and knead gently 8-10 times. Cover with a towel and rest 10 minutes.
- Shape the gnocchi: Divide dough into 4 pieces. Roll each into a ¾-inch thick rope. Cut into 1-inch pieces. Roll each piece down the tines of a fork to create ridges. Place on a floured baking sheet in a single layer.
- Cook the gnocchi: Bring a large pot of generously salted water to a rolling boil. Drop gnocchi in gently (work in batches). Cook until they float, about 2-3 minutes, then let them bob 30 seconds. Scoop out with a slotted spoon.
- Make the brown butter sage sauce: While gnocchi cook, melt butter in a large skillet over medium heat. Swirl occasionally. Butter will foam, then subside, and brown specks will form (3-4 minutes). Immediately add sage leaves; sizzle 30 seconds.
- Pan-sear the gnocchi: Add cooked gnocchi to the skillet. Cook undisturbed 2 minutes until golden crust forms. Gently flip and cook 1-2 minutes more. Sprinkle with Parmesan, toss gently, and remove from heat. Season with salt and pepper to taste.
Notes
Don’t overwork the dough; tough gnocchi results from too much handling. Test one gnocchi before cooking the whole batch. Brown butter happens fast—have sage leaves ready. Save some pasta water to loosen the sauce if needed. For gluten-free, use a 1-to-1 gluten-free flour blend with xanthan gum. For vegan, use a flax egg, vegan butter, and nutritional yeast.
Nutrition
- Serving Size: 1 serving (about 1/4
- Calories: 385
- Sugar: 4
- Sodium: 480
- Fat: 20
- Saturated Fat: 12
- Carbohydrates: 44
- Fiber: 3
- Protein: 10
Keywords: pumpkin gnocchi, brown butter sage, fall pasta, homemade gnocchi, vegetarian dinner