My sister-in-law, a woman who once declared that “cold desserts are a waste of a good sugar craving,” showed up to our family barbecue with a glass dish full of what looked like a science experiment gone wrong. Layers of soft cookies, pale custard, and banana slices that had already started to brown around the edges. Honestly, I thought she had finally lost it. She is a pie person through and through, the kind who spends three hours on a lattice crust without blinking. So when she told me this was an easy no-bake banana pudding icebox cake and that it was the only thing she was bringing from now on, I smiled and nodded while mentally planning to grab a slice of the store-bought angel food cake someone else had brought.
Then I tried it. That first bite was a quiet, confusing moment. The vanilla wafers had softened into something almost like a cake layer, the banana flavor had soaked into every single crumb, and the pudding filling was so cold and creamy it felt like eating dessert in slow motion. I went back for seconds before I had even finished my burger. She just looked at me, not smug exactly, but satisfied in that way people get when they know something is good and they don’t need to argue about it. I asked for the recipe before she left, and she told me it took about five minutes of actual work. Five minutes (I timed it the first time I made it myself). That was three summers ago, and I have not made a single baked dessert for a summer gathering since.
This is that recipe. It is the kind of dessert that makes you wonder why you ever bothered turning on the oven in July. And honestly, it is better than any banana pudding I have ever had that required cooking.
Why You Will Love This Recipe
I have tested this easy no-bake banana pudding icebox cake at least a dozen times, tweaking the ratios, trying different brands of vanilla wafers, and even testing it with homemade pudding (spoiler: the box mix wins for texture). It is the dessert I bring to every summer cookout, every last-minute potluck, and every time I need to impress people without breaking a sweat. Here is why it works so well:
- Five Minutes of Prep: No kidding. If you can stir, you can make this. The hardest part is waiting for it to chill.
- Pantry-Friendly Ingredients: Bananas, vanilla wafers, instant pudding mix, milk, and whipped topping. That is it. No special trips to the store for obscure ingredients.
- Perfect for Summer Heat: No oven, no stove, no sweat. This is the kind of dessert you make when the air conditioner is struggling and you refuse to turn on the kitchen oven.
- Crowd-Pleasing Texture: The cookies soften into a cake-like layer, the bananas stay tender, and the pudding filling is impossibly creamy. Everyone from kids to grandparents loves it.
- Better the Next Day: This is a make-ahead dream. It actually tastes better after sitting overnight in the fridge, which means you can prep it the day before your party and forget about it.
What makes this recipe different from the other versions floating around the internet? It is the ratio. Most recipes use too many cookies or not enough pudding, leaving you with a dry, crumbly mess. I spent several batches figuring out the exact balance so that every single bite has that perfect soft-yet-structured texture. And I use a trick with the banana slices that keeps them from turning into brown mush, which I will share in the preparation section.
This is not just another no-bake dessert. It is the one that makes people ask for the recipe before they leave. And it is the one you will make on repeat all summer long.
What Ingredients You Will Need
This recipe relies on simple, everyday ingredients that work together to create something surprisingly elegant. Here is what you need and why each one matters:
- 1 (3.4 oz) box instant vanilla pudding mix (I use Jell-O brand for the smoothest texture, but store brands work fine too. Do not use cook-and-serve pudding, it will not set properly in the fridge.)
- 2 cups cold whole milk (Whole milk gives the richest, creamiest pudding. You can use 2% in a pinch, but do not go lower than that or the filling will be thin. For a dairy-free version, use full-fat oat milk or canned coconut milk.)
- 1 (8 oz) tub frozen whipped topping, thawed (Cool Whip is my go-to because it holds its structure well. If you prefer homemade whipped cream, use 2 cups of heavy cream whipped with 3 tablespoons of powdered sugar until stiff peaks form.)
- 1 (11 oz) box vanilla wafers (Nilla Wafers are the classic choice and they work perfectly. Do not use the mini wafers for the layers, they are too small and will disintegrate. Save those for snacking.)
- 4-5 ripe but firm bananas (This is the trickiest ingredient. You want bananas that are yellow with just a few brown spots. If they are too green, they will be starchy and lack sweetness. If they are too ripe, they will turn into brown sludge in the fridge. Look for bananas that are fragrant but still hold their shape when you squeeze them gently.)
- Optional: 1/2 cup cold water (This is for thinning the pudding slightly. I will explain why in the preparation section.)
A quick note on the pudding mix: I have tested this with sugar-free vanilla pudding and it works fine, though the texture is slightly less creamy. If you are watching your sugar intake, it is a perfectly good swap. I have also used banana-flavored instant pudding for an extra punch of banana flavor, and it was delicious, though it can be hard to find in some stores.
For the whipped topping, let it thaw in the fridge overnight rather than on the counter. It stays fluffier that way and incorporates more evenly into the pudding mixture.
Equipment Needed
You do not need much for this recipe, which is part of the appeal. Here is what you will need:
- 9×13 inch baking dish (Glass or ceramic works best because it chills evenly. Metal dishes can sometimes give a metallic taste if the dessert sits for more than a day.)
- Large mixing bowl (Any medium-to-large bowl will work for whisking the pudding.)
- Whisk (A wire whisk is best for getting the pudding smooth. A fork will work in a pinch, but expect a few lumps.)
- Rubber spatula (For folding the whipped topping into the pudding and for spreading layers evenly.)
- Sharp knife (A dull knife will bruise the bananas. Use a sharp chef’s knife or a serrated knife for clean slices.)
- Cutting board
- Measuring cups and spoons
- Plastic wrap or aluminum foil (For covering the dish while it chills.)
I have made this in a 9-inch square dish before when I wanted a smaller batch, and it works fine, just adjust the layering to fit the smaller surface area. You will end up with more layers, which is never a bad thing.
Preparation Method
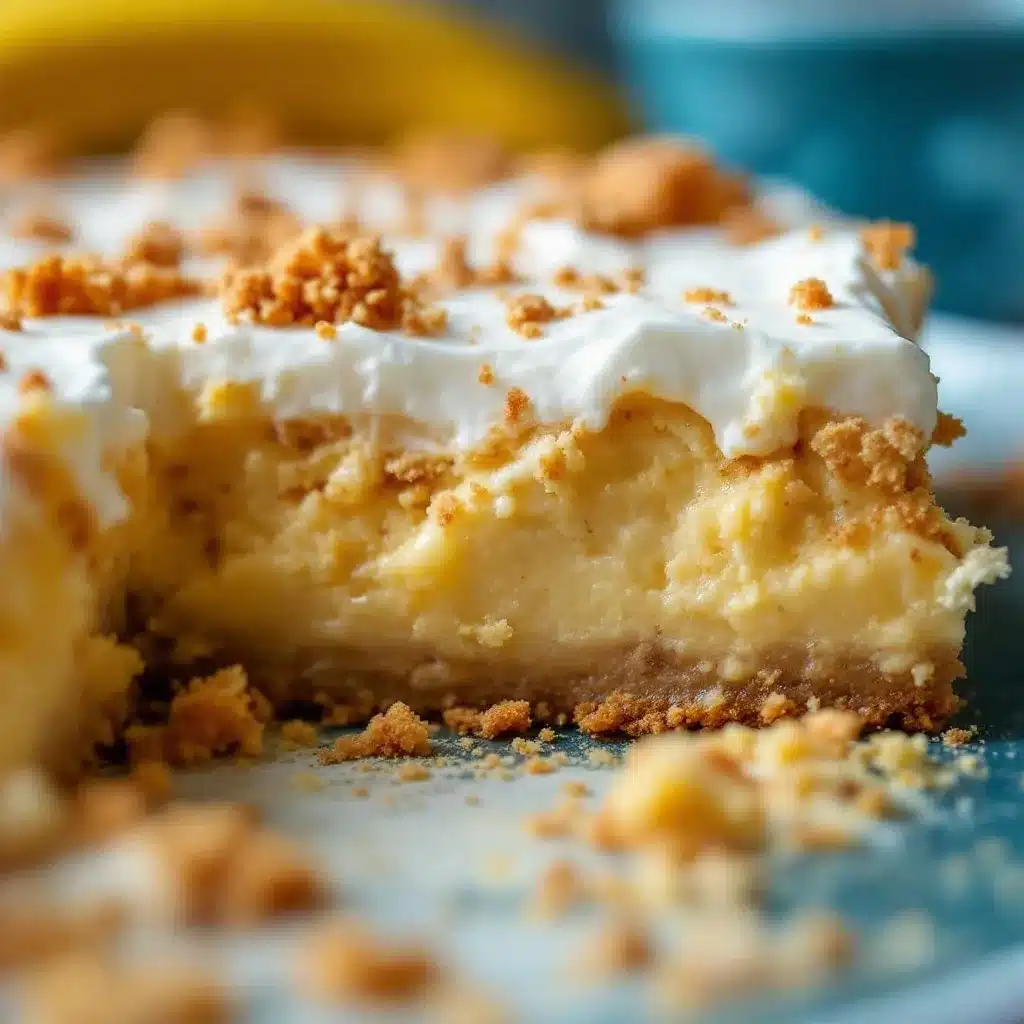
This is the part where people usually ask me, “Wait, that is it?” Yes. That is it. But the details matter, so pay attention to the little things.
- Make the pudding base. In your large mixing bowl, whisk together the instant vanilla pudding mix and 2 cups of cold whole milk. Whisk for about 2 minutes until the mixture thickens. It will be quite thick, almost like a soft pudding. Now here is my trick: add the 1/2 cup of cold water and whisk again. This thins the pudding just enough that it will soak into the vanilla wafers properly without making them mushy. I learned this after my first batch came out with crunchy cookies in the middle because the pudding was too thick to penetrate. Let the pudding sit for 5 minutes to fully set.
- Fold in the whipped topping. Take your thawed whipped topping and gently fold it into the pudding mixture using your rubber spatula. Do not stir vigorously, you want to keep the airiness. Fold until no white streaks remain. The mixture should be smooth, creamy, and pale yellow. Taste it here if you want. I do every time.
- Slice the bananas. This is where most people mess up. Slice your bananas into rounds about 1/4 inch thick. Not paper-thin, they will disappear into the pudding. Not too thick either, they will not soften properly. I slice them directly over the dish I am using so they do not brown from sitting on the cutting board. And here is the pro tip: toss the banana slices with a tablespoon of lemon juice or pineapple juice. Just a tiny amount. It keeps them from browning without adding any noticeable flavor. I have been doing this for years and no one has ever noticed.
- Layer one: cookies. Spread a single layer of vanilla wafers across the bottom of your 9×13 dish. Cover the entire bottom, touching each other but not overlapping. You will use about a third of the box for this layer.
- Layer two: bananas. Arrange half of your banana slices evenly over the cookies. Try to cover as much surface area as possible so every bite gets banana.
- Layer three: pudding mixture. Spread half of the pudding mixture over the bananas. Use your spatula to spread it gently, do not push too hard or you will disturb the cookies underneath.
- Repeat layers. Add another layer of vanilla wafers, the remaining banana slices, and the rest of the pudding mixture. Spread it evenly to the edges.
- Top with crushed wafers. Take the remaining vanilla wafers from the box and crush a handful of them (about 10-12 cookies) in your hand or in a plastic bag. Sprinkle the crumbs over the top for texture. If you want a prettier presentation, reserve a few whole wafers to arrange on top before serving.
- Chill. Cover the dish tightly with plastic wrap and refrigerate for at least 4 hours. Overnight is better. The cookies need time to soften completely and the flavors need time to meld. I have made this at 8 AM for a 2 PM party and it was perfect.
A few warnings: do not skip the chilling time. If you serve this too early, the cookies will be crunchy and the pudding will be loose. It needs those hours in the fridge to become the cohesive, sliceable dessert it is meant to be. Also, do not overmix the pudding when you add the water. Just whisk until combined, then let it sit.
Cooking Tips & Techniques
I have made this easy no-bake banana pudding icebox cake more times than I can count, and I have definitely made my share of mistakes. Here is what I have learned:
The chilling time is non-negotiable. I once tried to rush it by putting the dish in the freezer for an hour. The edges froze while the middle stayed soupy. It was not good. Stick to the fridge and give it the full four hours. Overnight is genuinely better because the cookies continue to soften and the banana flavor infuses the entire dessert.
Banana placement matters. If you pile all the bananas in the center, you will end up with bites that are all cookie and no fruit. Spread them out evenly. I actually count my slices sometimes, about 40 slices per layer if I am being precise.
Use cold milk. This is crucial for instant pudding. If your milk is warm, the pudding will not set properly. I keep my milk in the fridge until the moment I need it.
Do not over-soften the whipped topping. If you let it thaw on the counter, it can become runny. Thaw it in the fridge overnight and it will be perfectly fluffy. If you forget, you can microwave it for 10 seconds at a time, but watch it carefully.
The water trick is real. I mentioned this in the preparation section, but it bears repeating. Most recipes do not add water, which is why their icebox cakes turn out dry in the middle. The extra liquid ensures the cookies soften evenly from top to bottom.
Make two at once. This dessert keeps well in the fridge for up to three days, so I often make two dishes at the same time. One for the party and one for the week ahead. It is the same amount of work and twice the reward.
Variations & Adaptations
This recipe is incredibly forgiving and adaptable. Here are some variations I have tried and loved:
Chocolate Banana Version: Swap the vanilla pudding for chocolate instant pudding. Use chocolate wafers instead of vanilla wafers if you can find them. The combination of chocolate and banana is a classic for a reason. I made this for a friend who claimed she did not like banana desserts, and she ate three servings.
Peanut Butter Twist: Add 1/2 cup of creamy peanut butter to the pudding mixture before folding in the whipped topping. Whisk it in well so it is fully incorporated. The peanut butter adds richness and a savory note that balances the sweetness. This version is dangerously good.
Individual Servings: Instead of a 9×13 dish, use small mason jars or dessert cups. Layer the ingredients in the cups, starting with cookies, then bananas, then pudding. Repeat until the cup is full. These are perfect for parties where people are standing and mingling. Plus, they look adorable.
Gluten-Free Option: Use gluten-free vanilla wafers. There are several brands available now, and they work exactly the same way. Just check the package to make sure the pudding mix is also gluten-free (most instant pudding is, but always verify).
Berry Banana Version: Add a layer of fresh strawberries or raspberries between the banana layers. The tartness of the berries cuts through the sweetness of the pudding beautifully. I did this for a Fourth of July party and it was a hit, especially when I topped it with blueberries and strawberries for a red, white, and blue effect. If you are looking for more festive summer dessert ideas, this red, white, and blue berry trifle is another crowd-pleaser that uses similar ingredients.
Less Sweet Version: Use sugar-free pudding mix and sugar-free whipped topping. The bananas add enough natural sweetness that you will not miss the sugar. I have made this for a diabetic friend and she loved it.
Serving & Storage Suggestions
This dessert is best served cold, straight from the fridge. I like to let it sit on the counter for about 10 minutes before serving, just to take the edge off the chill, but it is not necessary.
Presentation: Scoop it out with a large spoon or spatula, making sure to get all the layers in each serving. I garnish each plate with a whole vanilla wafer and a fresh banana slice right before serving. It makes the plate look intentional and pretty.
What to serve with it: This dessert is rich enough to stand alone, but it pairs beautifully with a cup of coffee or a glass of cold milk. If you are serving it after a heavy meal, keep the portions small. If you are serving it as a standalone treat, go ahead and be generous. For a summer barbecue spread, I often serve it alongside something savory like these crispy bacon-wrapped jalapeno poppers for a sweet-and-spicy contrast.
Storage: Cover the dish tightly with plastic wrap or aluminum foil and store in the refrigerator for up to 3 days. The texture actually improves after day one as the flavors continue to meld. By day three, the bananas will start to soften more and the cookies will be very soft, almost like a pudding cake. It is still delicious, just different.
Freezing: You can freeze this dessert, but the texture changes. The pudding becomes icy and the bananas turn mushy when thawed. I do not recommend it. If you have leftovers that you cannot finish in three days, I suggest portioning them out and sharing with neighbors or coworkers. Trust me, they will be happy to take them off your hands.
Reheating: Do not reheat this. It is meant to be eaten cold. If you want a warm banana dessert, make a banana bread or a banana foster instead.
Nutritional Information & Benefits
This is a dessert, so let us be honest about what we are dealing with. It is not health food. But it does have some redeeming qualities, especially if you make smart substitutions.
Per serving (based on 12 servings):
- Calories: approximately 320
- Fat: 12g
- Carbohydrates: 52g
- Protein: 4g
- Fiber: 2g
- Sugar: 32g
Health benefits to highlight: Bananas are a good source of potassium, vitamin B6, and vitamin C. They also contain fiber, which helps with digestion. The milk in the pudding provides calcium and vitamin D. If you use low-fat milk and sugar-free pudding, you can reduce the calorie count significantly without sacrificing much flavor.
Dietary considerations: This recipe is vegetarian. To make it gluten-free, use gluten-free vanilla wafers. To make it lower in sugar, use sugar-free pudding mix and sugar-free whipped topping. To make it dairy-free, use oat milk or coconut milk and a dairy-free whipped topping. The texture will be slightly different, but it will still be delicious.
Potential allergens: This recipe contains dairy (milk, whipped topping) and gluten (vanilla wafers). It may also contain soy depending on the brands you use. Always check labels if you are cooking for someone with allergies.
I am not a nutritionist, and I do not pretend to be one. But I do believe that dessert has a place in a balanced life. This one is worth the indulgence, especially when you consider how little effort it takes to make.
Frequently Asked Questions
Can I use homemade pudding instead of instant?
You can, but I do not recommend it. Homemade pudding has a thinner consistency that does not set as firmly in the fridge. The instant pudding mix is specifically designed to thicken without heat, which is what makes this recipe work. If you insist on using homemade, cook it until it is very thick and let it cool completely before layering.
How do I keep the bananas from turning brown?
Toss them with a small amount of lemon juice, pineapple juice, or even orange juice before layering. You only need about a teaspoon per batch. The acid prevents oxidation without changing the flavor. I have also used a product called Fruit-Fresh, which is a powdered antioxidant, and it works great.
Can I make this in advance for a party?
Absolutely. In fact, I prefer to make it the day before. The flavors meld and the texture becomes perfect after 12-24 hours in the fridge. Just cover it tightly and keep it refrigerated until you are ready to serve. If you are worried about the bananas browning on top, add the garnish (fresh banana slices and whole wafers) right before serving.
What if I do not have a 9×13 dish?
You can use any dish that holds about 3 quarts of liquid. A 9-inch square dish works, but you will have more layers. A 9-inch round cake pan also works, though the layers will be thicker. You can even use a trifle bowl for a pretty presentation, just layer the ingredients in the bowl and let it chill.
Can I use other fruits besides bananas?
Yes, but the recipe is called banana pudding icebox cake for a reason. Strawberries, raspberries, and peaches all work well, but the texture will be different because they release more liquid. If you use berries, add a layer of cookies between the fruit and the pudding to prevent sogginess. I have also made a version with sliced mango and coconut pudding that was incredible.
Conclusion
This easy no-bake banana pudding icebox cake is the dessert I turn to when I want to impress people without actually trying. It looks like you spent hours in the kitchen, but the truth is, you spent five minutes and then let the fridge do the work. That is my favorite kind of recipe.
I love that this dessert brings people together. I have brought it to family reunions, neighborhood block parties, and casual weeknight dinners with friends. Every single time, someone asks for the recipe. And every single time, I smile and tell them it is the easiest thing they will ever make.
Try it for your next summer gathering. Customize it with your favorite add-ins, make it in individual cups for a party, or keep it classic and simple. However you make it, I promise it will disappear faster than you expect. If you have leftover bananas, you might also enjoy this cozy pumpkin banana bread with pecan streusel for a fall twist.
Have you made this recipe? I would love to hear how it turned out. Leave a comment below and let me know if you tried any variations or if you kept it classic. And do not forget to share this post with someone who needs a no-bake dessert in their life. Happy summer cooking, friends.
Pin This Recipe!
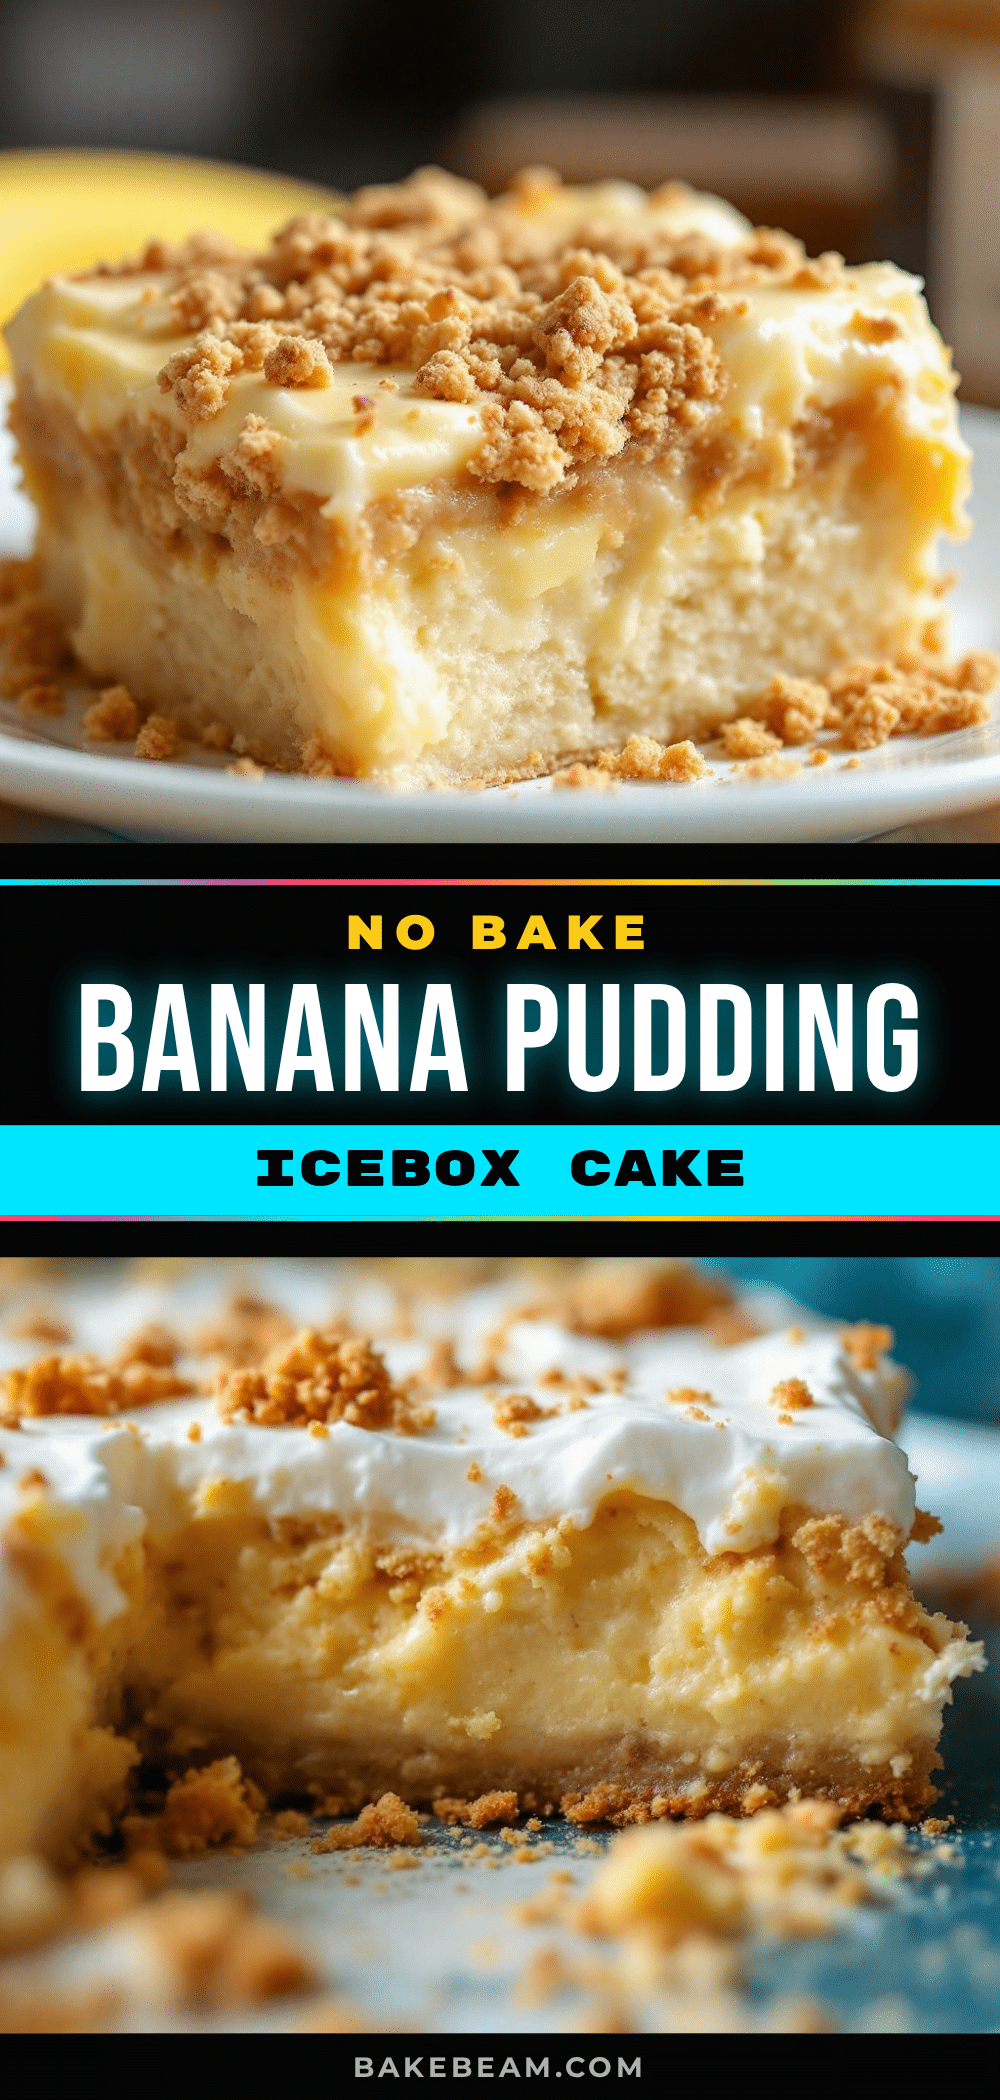
Easy No-Bake Banana Pudding Icebox Cake: Best Summer Dessert
This easy no-bake banana pudding icebox cake is the perfect summer dessert with only five minutes of prep. Layers of soft vanilla wafers, creamy pudding filling, and fresh bananas create a crowd-pleasing treat that gets better overnight.
- Prep Time: 5 minutes
- Cook Time: 0 minutes
- Total Time: 4 hours 5 minutes (includes chilling)
- Yield: 12 servings 1x
- Category: Dessert
- Cuisine: American
Ingredients
- 1 (3.4 oz) box instant vanilla pudding mix
- 2 cups cold whole milk
- 1/2 cup cold water
- 1 (8 oz) tub frozen whipped topping, thawed
- 1 (11 oz) box vanilla wafers
- 4–5 ripe but firm bananas
- 1 tablespoon lemon juice or pineapple juice (optional, to prevent browning)
Instructions
- In a large mixing bowl, whisk together the instant vanilla pudding mix and 2 cups of cold whole milk for about 2 minutes until thickened. Add 1/2 cup cold water and whisk again. Let sit for 5 minutes to fully set.
- Gently fold the thawed whipped topping into the pudding mixture using a rubber spatula until no white streaks remain. The mixture should be smooth and creamy.
- Slice the bananas into rounds about 1/4 inch thick. Toss with a small amount of lemon juice or pineapple juice to prevent browning if desired.
- Spread a single layer of vanilla wafers across the bottom of a 9×13 inch baking dish, covering the entire bottom without overlapping.
- Arrange half of the banana slices evenly over the cookies.
- Spread half of the pudding mixture over the bananas, using a spatula to spread gently.
- Repeat layers: another layer of vanilla wafers, remaining banana slices, and remaining pudding mixture. Spread evenly to the edges.
- Crush about 10-12 vanilla wafers and sprinkle the crumbs over the top. Reserve a few whole wafers for garnish if desired.
- Cover tightly with plastic wrap and refrigerate for at least 4 hours, preferably overnight. Serve cold.
Notes
Chilling time is non-negotiable for proper texture. The water trick helps cookies soften evenly. Bananas should be ripe but firm. For best results, make a day ahead. Do not freeze as texture changes.
Nutrition
- Serving Size: 1 serving
- Calories: 320
- Sugar: 32
- Fat: 12
- Carbohydrates: 52
- Fiber: 2
- Protein: 4
Keywords: no-bake dessert, banana pudding, icebox cake, summer dessert, easy dessert, vanilla wafers, no-bake cake