I honestly didn’t think I liked trifle for years. Not because I hated it, but because I’d only ever had the sad, soggy versions from grocery store deli counters—you know the ones, where the cake has turned into a weird paste and the fruit is kind of flavorless. I wrote off the whole category as a dessert that looked better than it tasted. Then my neighbor brought one to a block party a few summers ago, and I nearly ate the entire bowl myself. That’s when I realized I’d been missing out on something genuinely special.
This Labor Day red white and blue berry trifle changed everything for me. It’s not just a pretty dessert for the holiday table—it’s the one that made me understand why people get so excited about layered desserts. The first time I made it, I was terrified of messing up the custard. I stood over the stove stirring like a maniac, convinced I’d end up with scrambled eggs. It turned out perfect, and I’ve been making it every Labor Day since. There’s something about the combination of tender cake, creamy vanilla custard, and fresh, juicy berries that just works. It’s honest, unfussy, and somehow feels both special and completely relaxed—exactly what a holiday weekend should be.
I’ve tweaked the recipe over the years to make it as foolproof as possible. No complicated techniques, no weird ingredients, just straightforward steps that deliver a dessert that looks like you spent hours on it. The truth is, it’s actually one of the easiest impressive desserts you can make. And once you taste that first spoonful with all the layers together, you’ll understand why I went from trifle skeptic to true believer.
Why You’ll Love This Recipe
This isn’t just another berry trifle recipe. After testing this thing more times than I care to admit—including one memorable disaster where I used stale pound cake and ended up with a bowl of mush—I can confidently say this version is the one worth making. Here’s what makes it special:
- Comes Together in Under 30 Minutes : No baking required if you use store-bought pound cake or angel food cake. The custard takes about 10 minutes on the stove, and assembly is just layering. Perfect for when you’re already juggling burgers on the grill and a cooler full of drinks.
- Simple Ingredients You Can Find Anywhere : No specialty grocery runs needed. Fresh berries, basic dairy, a box of pudding mix (or homemade custard if you’re feeling fancy), and store-bought cake. That’s it.
- Perfect for Labor Day Gatherings : It’s red, white, and blue without being tacky. The colors come from real ingredients, not food coloring, so it feels natural and elegant on a holiday table.
- Feeds a Crowd Without Stress : This recipe makes a generous 12 servings. One big bowl, no plating individual desserts, and everyone helps themselves. My kind of entertaining.
- Make-Ahead Friendly : You can assemble it the night before and let it chill in the fridge. The flavors actually get better as the cake soaks up the custard and berry juices.
What really sets this recipe apart is the texture. The key is using slightly stale cake and letting it sit just long enough to soften without turning to mush. I learned that trick the hard way after serving a trifle that collapsed into soup at a family barbecue. Now I know exactly how to layer it so each spoonful gives you tender cake, creamy custard, and bursts of fresh fruit. It’s the kind of dessert that makes people close their eyes after the first bite. And honestly, that’s the best compliment a cook can get.
What Ingredients You Will Need
This recipe relies on simple, fresh ingredients that work together to create layers of flavor and texture. Most of these are pantry staples or easy to find at any grocery store. I’ve included notes on what to look for and what substitutions work well.
For the Custard Layer
- 2 cups whole milk (adds richness; 2% works in a pinch but won’t be as creamy)
- 1/2 cup granulated sugar
- 4 large egg yolks (room temperature, so they incorporate smoothly)
- 3 tablespoons cornstarch (this thickens the custard without lumps)
- 1 teaspoon vanilla extract (use pure, not imitation, for the best flavor)
- 2 tablespoons unsalted butter (adds shine and richness at the end)
For the Berry Layer
- 2 cups fresh strawberries, hulled and sliced (look for bright red, fragrant berries)
- 2 cups fresh blueberries (wild blueberries are sweeter and smaller, which I prefer)
- 2 cups fresh raspberries (handle gently—they bruise easily)
- 2 tablespoons granulated sugar (helps draw out the berries’ natural juices)
- 1 tablespoon fresh lemon juice (brightens the berries and balances sweetness)
For the Cake Layer
- 1 store-bought pound cake or angel food cake (about 12 ounces) (I prefer Sara Lee pound cake for its dense, sturdy texture; day-old is actually better here)
- 2 tablespoons berry jam or preserves (optional, but adds another layer of flavor between cake and fruit)
For the Topping
- 1 1/2 cups heavy cream (cold, for whipping)
- 2 tablespoons powdered sugar
- 1/2 teaspoon vanilla extract
- Fresh mint leaves for garnish (optional, but pretty)
For a shortcut version, you can use a 3.4-ounce box of instant vanilla pudding mix prepared with 2 cups of milk instead of making homemade custard. The homemade version is better, but the pudding mix works in a pinch and saves about 15 minutes. I’ve done both, and honestly, nobody has ever complained about the shortcut version at a cookout.
Equipment Needed
You don’t need fancy equipment for this recipe, which is part of why I love it for holiday gatherings. Here’s what you’ll need:
- A large glass trifle bowl or 4-quart clear glass bowl (the clear bowl shows off the layers, which is half the fun)
- A medium saucepan (for the custard; avoid aluminum, which can react with dairy and give a metallic taste)
- A whisk (a good balloon whisk makes lump-free custard much easier)
- A large mixing bowl (for whipping cream)
- A hand mixer or stand mixer (you can whip cream by hand, but your arm will thank you for using a mixer)
- A sharp knife and cutting board (for slicing strawberries and cake)
- A rubber spatula (for scraping every last bit of custard into the bowl)
If you don’t have a trifle bowl, a large glass mixing bowl works fine. I’ve even used a wide-mouth Mason jar for individual servings, which looks adorable for a picnic. The key is being able to see the layers. As for the saucepan, I use a heavy-bottomed stainless steel one. It distributes heat evenly and prevents the custard from scorching on the bottom. Budget-friendly tip: a basic Farberware saucepan from Target works just as well as a fancy All-Clad for this job.
Preparation Method
Let me walk you through this step by step. I’ve included all the little details I wish someone had told me the first time I made it.
Step 1: Make the Custard (About 15 minutes)
In a medium saucepan, whisk together the sugar, cornstarch, and a pinch of salt. In a separate bowl, whisk the egg yolks until they’re smooth and slightly lighter in color. Slowly pour the milk into the egg yolks while whisking constantly—this tempers the eggs so they don’t scramble when you heat them. Pour the egg mixture into the saucepan with the dry ingredients and whisk until smooth.
Place the saucepan over medium heat and cook, whisking constantly, until the mixture thickens and comes to a gentle boil. This takes about 5-7 minutes. You’ll feel it get heavier in the whisk, and it’ll start bubbling. Let it boil for exactly 1 minute while whisking—this cooks out the cornstarch taste. Remove from heat, stir in the vanilla and butter until melted and smooth.
Pour the custard through a fine-mesh strainer into a bowl to catch any lumps (trust me on this one). Press plastic wrap directly onto the surface of the custard to prevent a skin from forming. Refrigerate until cool, about 30 minutes. It’ll thicken more as it chills.
Step 2: Prep the Berries (About 10 minutes)
While the custard cools, wash and dry all the berries gently. Strawberries get hulled and sliced into 1/4-inch thick pieces. Leave blueberries and raspberries whole. In a medium bowl, toss all the berries with the sugar and lemon juice. Let them sit for 10-15 minutes. This maceration process draws out their natural juices, creating a light syrup that will soak into the cake layers. You’ll see the berries start to glisten and release liquid.
Step 3: Whip the Cream (About 5 minutes)
In a large mixing bowl, combine the cold heavy cream, powdered sugar, and vanilla. Beat with a hand mixer on medium-high speed until soft peaks form—meaning when you lift the beaters, the cream holds a gentle peak that flops over slightly. Don’t over-whip or you’ll end up with butter. If you’re making this ahead, whip the cream just before assembling.
Step 4: Prepare the Cake (About 5 minutes)
Cut the pound cake into 1-inch cubes. If the cake is fresh, you can toast the cubes in a 350°F oven for 5 minutes to dry them out slightly. This helps them absorb the custard and berry juices without turning into mush. Let the cubes cool completely before assembling.
Step 5: Assemble the Trifle (About 10 minutes)
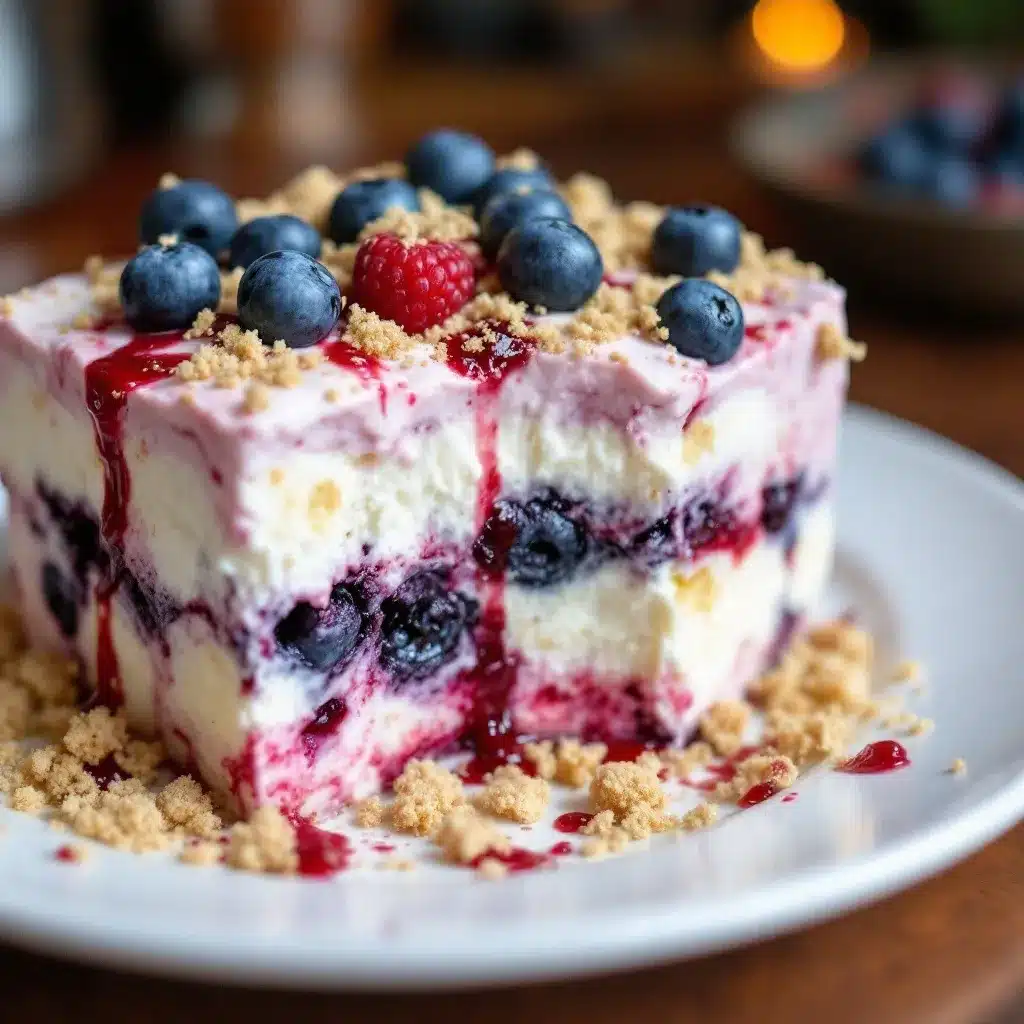
Now for the fun part. Start with a layer of cake cubes on the bottom of your trifle bowl—about one-third of the total. If you’re using the berry jam, spread a thin layer on the cake cubes now. Spoon one-third of the macerated berries over the cake, including some of the juice. Pour one-third of the cooled custard over the berries, spreading it gently. Repeat the layers: cake, berries, custard, two more times. You should end with a custard layer on top.
Cover the bowl with plastic wrap and refrigerate for at least 4 hours, but overnight is better. This resting time is crucial—it lets the flavors meld and the cake soften to that perfect spoonable texture. Right before serving, spread the whipped cream over the top and garnish with fresh mint leaves and a few reserved berries for color.
Cooking Tips & Techniques
After making this trifle more times than I can count, I’ve collected a few hard-won lessons. The biggest mistake I made early on was rushing the assembly. I wanted to serve it immediately, but a trifle needs time to become more than the sum of its parts. Patience is the secret ingredient here.
Temperature matters more than you’d think. Cold custard layered with room-temperature berries creates condensation inside the bowl, which can make the top layer watery. I let the custard cool completely and make sure the berries are at room temperature before assembling. Also, don’t skip straining the custard. That one step separates a silky dessert from a lumpy one, and it only takes 30 seconds.
For the whipped cream topping, make sure your bowl and beaters are cold. I pop them in the freezer for 10 minutes before starting. And if you’re making this for a crowd that includes non-dairy folks, coconut cream whipped with a little powdered sugar works beautifully as a substitute. I tested this for a friend with dairy issues, and it held up perfectly overnight.
One more thing: if you’re transporting this to a potluck, assemble it in the bowl you’ll serve it in and secure the lid tightly. I learned this the hard way when my trifle ended up all over the back seat of my car. Now I use a trifle bowl with a locking lid, or I wrap the whole thing in plastic wrap and then foil for extra security.
Variations & Adaptations
This recipe is endlessly adaptable, which is one of the reasons it’s become my go-to for holiday gatherings. Here are a few versions I’ve tried and loved:
Dairy-Free Version
Use full-fat coconut milk for the custard (same method, just substitute 1:1) and coconut cream for the whipped topping. I’ve made this for a friend with severe dairy allergies, and it was a hit. The coconut flavor pairs surprisingly well with the berries. Use a dairy-free pound cake or make a simple vegan vanilla cake from scratch.
Gluten-Free Version
Swap the pound cake for a gluten-free vanilla cake or use gluten-free ladyfingers. I’ve tested this with both, and the ladyfingers actually absorb the custard better. Just be careful not to let them sit too long, as gluten-free baked goods can get mushy faster. Assemble no more than 6 hours ahead for best results.
Boozy Adult Version
Brush the cake cubes with a mixture of 2 tablespoons of Grand Marnier or limoncello mixed with 1 tablespoon of simple syrup before layering. The orange liqueur in the Grand Marnier version complements the berries beautifully. I made this for a Labor Day party last year, and it disappeared in 20 minutes. Just label it clearly so nobody accidentally serves it to kids.
Seasonal Berry Swap
In summer, use a mix of blackberries and peaches along with the strawberries. In fall, try sliced apples sautéed in butter and cinnamon. The technique stays the same—you’re just changing the fruit. I’ve even made a winter version with poached pears and cranberries that was surprisingly good.
Serving & Storage Suggestions
This trifle is best served chilled, straight from the refrigerator. I like to let it sit at room temperature for about 10 minutes before serving to take the edge off the cold, which lets the flavors open up. Scoop it into bowls or onto plates, making sure each serving gets a good cross-section of all the layers.
For presentation, I garnish with fresh mint leaves and a few whole berries on top of the whipped cream. A light dusting of powdered sugar over the berries adds a nice finishing touch. If you’re feeling extra fancy, drizzle a little berry syrup or honey over each serving.
Storage is straightforward. Cover the trifle bowl tightly with plastic wrap or a lid and refrigerate for up to 3 days. The flavors continue to meld, and the cake absorbs more moisture, which some people actually prefer. After 3 days, the cake starts to break down and the texture becomes less appealing. I don’t recommend freezing this dessert—the custard and cream separate when thawed, and the berries turn to mush.
For reheating, you don’t actually want to heat this dessert. It’s meant to be served cold. But if you have leftover trifle that’s been in the fridge for a day, the texture is actually better than fresh. The cake softens just enough, and the flavors marry beautifully. I always make mine the night before and let it rest overnight in the fridge for this reason.
Nutritional Information & Benefits
Here’s the honest truth: this is a dessert, not a health food. But it does have some redeeming qualities. Berries are packed with antioxidants, vitamin C, and fiber. One serving of this trifle gives you about a full cup of fresh fruit, which is more than most desserts can claim. The homemade custard uses whole milk and eggs, providing protein and calcium.
Here are the estimated nutritionals per serving (based on 12 servings):
- Calories: 385
- Total Fat: 22g
- Saturated Fat: 13g
- Cholesterol: 145mg
- Sodium: 210mg
- Total Carbohydrates: 42g
- Dietary Fiber: 4g
- Sugars: 28g
- Protein: 6g
For dietary considerations, this recipe contains dairy, eggs, and gluten (from the cake). It can be made gluten-free and dairy-free using the substitutions mentioned above. The berries are naturally low in sugar and high in fiber, which helps balance out the dessert’s overall glycemic load. I like to think of this as a dessert that’s more about celebrating fresh summer fruit than about indulgence—though it’s definitely indulgent too.
FAQs
Can I use frozen berries instead of fresh?
You can, but I don’t recommend it for this recipe. Frozen berries release a lot more liquid when they thaw, which can make the trifle watery and turn the cake into a soggy mess. If you’re in a pinch, thaw the frozen berries completely, drain off the excess liquid, and pat them dry before using. But fresh berries really do make a noticeable difference in texture and flavor.
How far ahead can I make this trifle?
You can assemble the entire trifle up to 24 hours in advance. In fact, it’s better after resting overnight. The cake absorbs the custard and berry juices, and the flavors meld together. Just wait to add the whipped cream topping until right before serving, or it’ll deflate and look less pretty. If you’re making it more than 24 hours ahead, I’d recommend preparing the components separately and assembling the day before.
Can I use a different type of cake?
Absolutely. Angel food cake gives a lighter, airier texture. Ladyfingers work well and create a more traditional British-style trifle. Vanilla sponge cake is another great option. Just avoid anything too dense or oily, like a heavy butter cake, which won’t absorb the custard properly. Day-old cake is actually ideal—it’s slightly dried out and soaks up the liquid without turning to mush.
Why did my custard turn out lumpy?
This usually happens for one of two reasons: the heat was too high, or you stopped whisking. Custard needs constant attention over medium heat. If you look away for even 30 seconds, it can scorch on the bottom or develop lumps. The fix is to strain it through a fine-mesh sieve, which catches the lumps and gives you smooth custard. I’ve rescued many a lumpy custard this way. Also, make sure your cornstarch is fresh—expired cornstarch won’t thicken properly.
Can I make this into individual servings?
Yes, and I actually love this for parties. Use 8-ounce Mason jars or small glass cups. Layer the ingredients the same way, but in smaller portions. Individual trifles are great for portion control and look adorable on a dessert table. They also eliminate the need for a big serving bowl and make cleanup easier. Just assemble them in the jars and refrigerate until ready to serve.
Conclusion
This Labor Day red white and blue berry trifle has become my signature holiday dessert, and I think it deserves a spot in your rotation too. It’s the kind of recipe that looks like you fussed but actually comes together with minimal effort—my favorite kind of cooking. The combination of tender cake, silky custard, and bright, juicy berries is just unbeatable, especially when you let it rest overnight and all those flavors get to know each other.
I love that this recipe is flexible enough to adapt to whatever you have on hand. Use whatever berries look best at the market, swap in a different cake, or make it dairy-free for your guests. The structure is forgiving, and the result is always crowd-pleasing. If you make this for your Labor Day gathering, I’d love to hear how it turns out. Drop a comment below and let me know what variations you tried—I’m always looking for new ideas.
Here’s to a holiday weekend filled with good food, good company, and desserts that make everyone smile. Happy Labor Day, friends. Go make something beautiful.
Pin This Recipe!
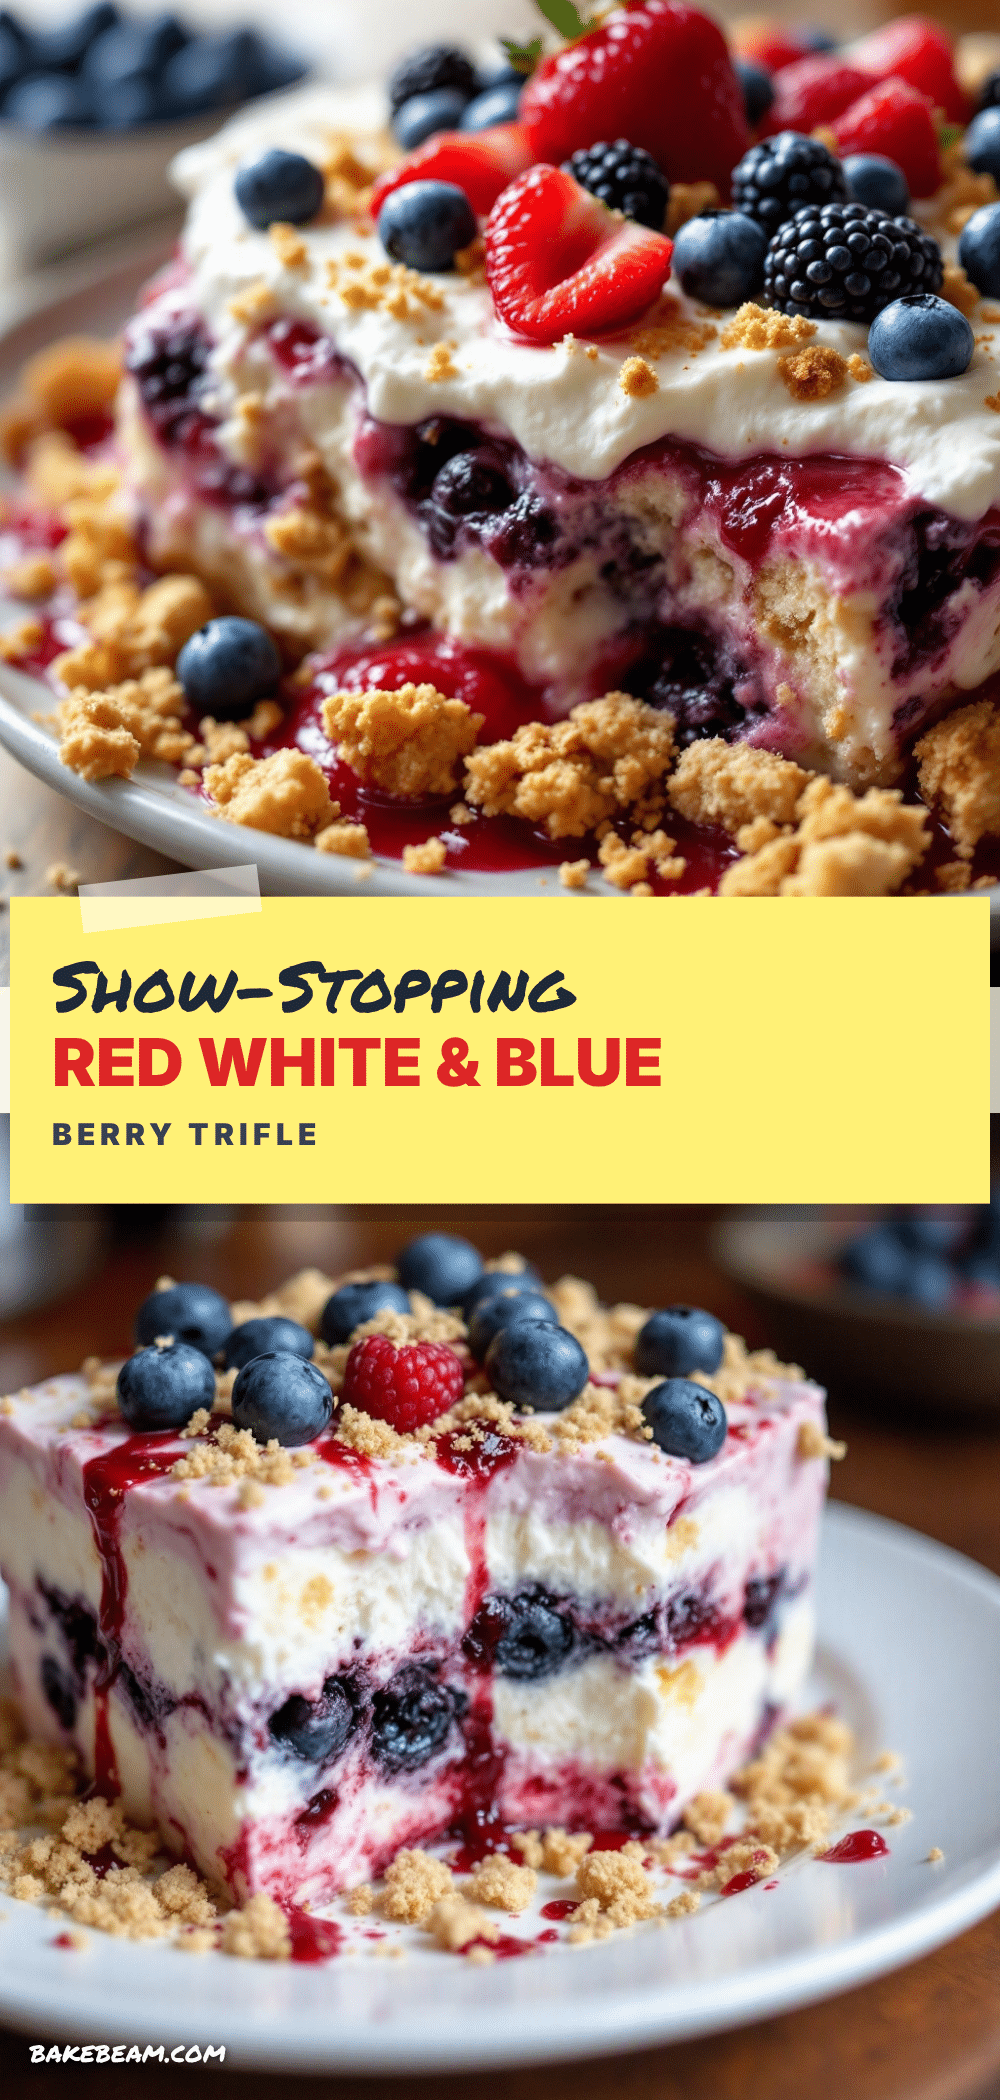
Labor Day Red White and Blue Berry Trifle

A stunning no-bake dessert featuring layers of tender cake, creamy vanilla custard, and fresh berries. Perfect for Labor Day gatherings, this trifle comes together in under 30 minutes and feeds a crowd.
- Prep Time: 15 minutes
- Cook Time: 15 minutes
- Total Time: 30 minutes (plus 4 hours chilling)
- Yield: 12 servings 1x
- Category: Dessert
- Cuisine: American
Ingredients
- 2 cups whole milk
- 1/2 cup granulated sugar
- 4 large egg yolks
- 3 tablespoons cornstarch
- 1 teaspoon vanilla extract
- 2 tablespoons unsalted butter
- 2 cups fresh strawberries, hulled and sliced
- 2 cups fresh blueberries
- 2 cups fresh raspberries
- 2 tablespoons granulated sugar
- 1 tablespoon fresh lemon juice
- 1 store-bought pound cake or angel food cake (about 12 ounces)
- 2 tablespoons berry jam or preserves (optional)
- 1 1/2 cups heavy cream
- 2 tablespoons powdered sugar
- 1/2 teaspoon vanilla extract
- Fresh mint leaves for garnish (optional)
Instructions
- Make the custard: In a medium saucepan, whisk together sugar, cornstarch, and a pinch of salt. In a separate bowl, whisk egg yolks until smooth. Slowly pour milk into yolks while whisking constantly. Pour egg mixture into saucepan with dry ingredients and whisk until smooth. Cook over medium heat, whisking constantly, until thickened and gently boiling (5-7 minutes). Boil for 1 minute. Remove from heat, stir in vanilla and butter until melted. Strain through a fine-mesh sieve into a bowl. Press …
- Prep the berries: Wash and dry berries. Hull and slice strawberries into 1/4-inch pieces. Leave blueberries and raspberries whole. In a medium bowl, toss berries with sugar and lemon juice. Let sit for 10-15 minutes.
- Whip the cream: In a large mixing bowl, combine cold heavy cream, powdered sugar, and vanilla. Beat with a hand mixer on medium-high speed until soft peaks form. Do not over-whip.
- Prepare the cake: Cut pound cake into 1-inch cubes. If cake is fresh, toast cubes in a 350°F oven for 5 minutes to dry slightly. Let cool completely.
- Assemble the trifle: In a large glass trifle bowl, layer one-third of the cake cubes. If using jam, spread a thin layer on cake. Spoon one-third of the macerated berries over cake, including some juice. Pour one-third of the cooled custard over berries. Repeat layers two more times, ending with custard on top. Cover with plastic wrap and refrigerate for at least 4 hours or overnight.
- Before serving, spread whipped cream over top. Garnish with fresh mint leaves and reserved berries.
Notes
For a shortcut, use a 3.4-ounce box of instant vanilla pudding mix prepared with 2 cups of milk instead of homemade custard. Assemble up to 24 hours ahead for best flavor. Wait to add whipped cream until just before serving.
Nutrition
- Serving Size: 1 serving
- Calories: 385
- Sugar: 28
- Sodium: 210
- Fat: 22
- Saturated Fat: 13
- Carbohydrates: 42
- Fiber: 4
- Protein: 6
Keywords: Labor Day, red white and blue, berry trifle, no-bake dessert, summer dessert, patriotic dessert