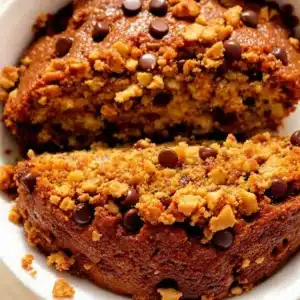
For years, I just accepted that the dessert table at a cookout was going to be a letdown. You know the scene—a sad tray of store-bought cookies, maybe some watermelon, and if you were lucky, a half-melted ice cream cake that nobody really wanted to fight with. I wanted something that actually tasted like it belonged at the end of a smoky, happy afternoon. Something chewy, buttery, and just sweet enough to feel like a treat without being cloying. I tried a dozen blondie recipes, and they were all fine. But fine wasn’t what I was after. I wanted a bar that people would walk across the yard for, that would get that little “oh, these are good” murmur after the first bite. So I started playing with brown butter, and honestly, I haven’t looked back since. These brown butter blondie bars are the result of that quiet, stubborn search.
Why You’ll Love This Recipe
These aren’t just another blondie recipe. They’re the kind of bar that makes you close your eyes after the first bite. Here’s why they’ll become your go-to for every cookout, potluck, and casual gathering.
- Quick & Easy: From start to finish, these come together in under 40 minutes. No stand mixer required, and the batter is a one-bowl wonder.
- Simple Ingredients: You probably already have everything in your pantry. No fancy extracts or hard-to-find flours here.
- Perfect for Labor Day Cookouts: These bars travel well, don’t need refrigeration, and hold up beautifully in a cooler or on a picnic table. They’re the kind of dessert you can make the night before and just grab on your way out the door.
- Crowd-Pleaser: Kids love the chewy, buttery sweetness, and adults appreciate the nutty depth from the brown butter. I’ve watched these disappear at every gathering I’ve brought them to.
- Unbelievably Delicious: The brown butter adds a toasty, caramel-like richness that regular butter just can’t match. It’s the difference between a good blondie and a memorable one.
What makes these different from the rest? It’s the technique. Browning the butter isn’t just a fancy step—it’s what gives these bars their deep, almost nutty flavor. I’ve tested this recipe a dozen times to get the perfect balance of chewy edges and soft, tender centers. Plus, the ratio of brown sugar to white sugar is dialed in for maximum moisture and that classic blondie texture. This isn’t just another version. It’s the best version.
These bars are comfort food reimagined—faster, simpler, but with the same soul-soothing satisfaction. Perfect for impressing guests without stress, or turning a simple cookout into something memorable.
What Ingredients You Will Need
This recipe uses simple, wholesome ingredients to deliver bold flavor and satisfying texture without the fuss. Most of these are pantry staples, which makes these bars perfect for last-minute cravings.
- Unsalted butter, ½ cup (1 stick, 113g) — Browning this is the key to the whole recipe. I prefer using unsalted so I can control the salt level myself.
- Light brown sugar, 1 cup (200g), packed — This gives the blondies their moisture and that deep, molasses-like sweetness. Don’t substitute dark brown sugar here unless you want a stronger flavor.
- Granulated sugar, ¼ cup (50g) — Just a little white sugar helps the edges get slightly crisp while keeping the center soft.
- Large egg, 1, at room temperature — The egg binds everything together. If your egg is cold, place it in a bowl of warm water for 5 minutes before using.
- Egg yolk, 1, at room temperature — This extra yolk is my secret for an extra chewy, fudgy texture. It’s worth the extra step.
- Vanilla extract, 2 teaspoons — Use pure vanilla if you have it. It really does make a difference in the depth of flavor.
- All-purpose flour, 1 cup (120g) — Spoon and level your flour for the best results. Don’t scoop directly from the bag, or you’ll end up with dry blondies.
- Baking powder, ½ teaspoon — Just enough to give them a little lift without making them cakey.
- Salt, ½ teaspoon — I use fine sea salt. It balances the sweetness and brings out the nutty notes of the brown butter.
- Optional mix-ins: ½ cup (85g) white chocolate chips, ½ cup (60g) chopped pecans, or ½ cup (85g) butterscotch chips — I love adding white chocolate chips for little pockets of sweetness, but feel free to customize.
Equipment Needed
You don’t need a lot of fancy tools for this recipe, which is part of what makes it so great. Here’s what you’ll need:
- 8×8-inch baking pan — A light-colored metal pan works best for even browning. Glass or ceramic pans will work, but they may need a few extra minutes in the oven.
- Parchment paper — This makes lifting the blondies out of the pan so much easier. I leave an overhang on two sides for handles.
- Saucepan (light-colored preferred) — A light-colored saucepan makes it easier to see the butter as it browns so you don’t burn it. I learned this the hard way.
- Mixing bowls — One medium bowl for the wet ingredients and one small bowl for the dry.
- Whisk and spatula — A whisk for combining the wet ingredients and a rubber spatula for folding in the flour and mix-ins.
- Cooling rack — Not strictly necessary, but it helps the bars cool evenly and prevents the bottoms from getting soggy.
If you don’t have an 8×8 pan, a 9×9 will work too—just check them a few minutes early since they’ll bake faster. And if you’re using a dark nonstick pan, reduce the oven temperature by 25 degrees to prevent over-browning.
Preparation Method
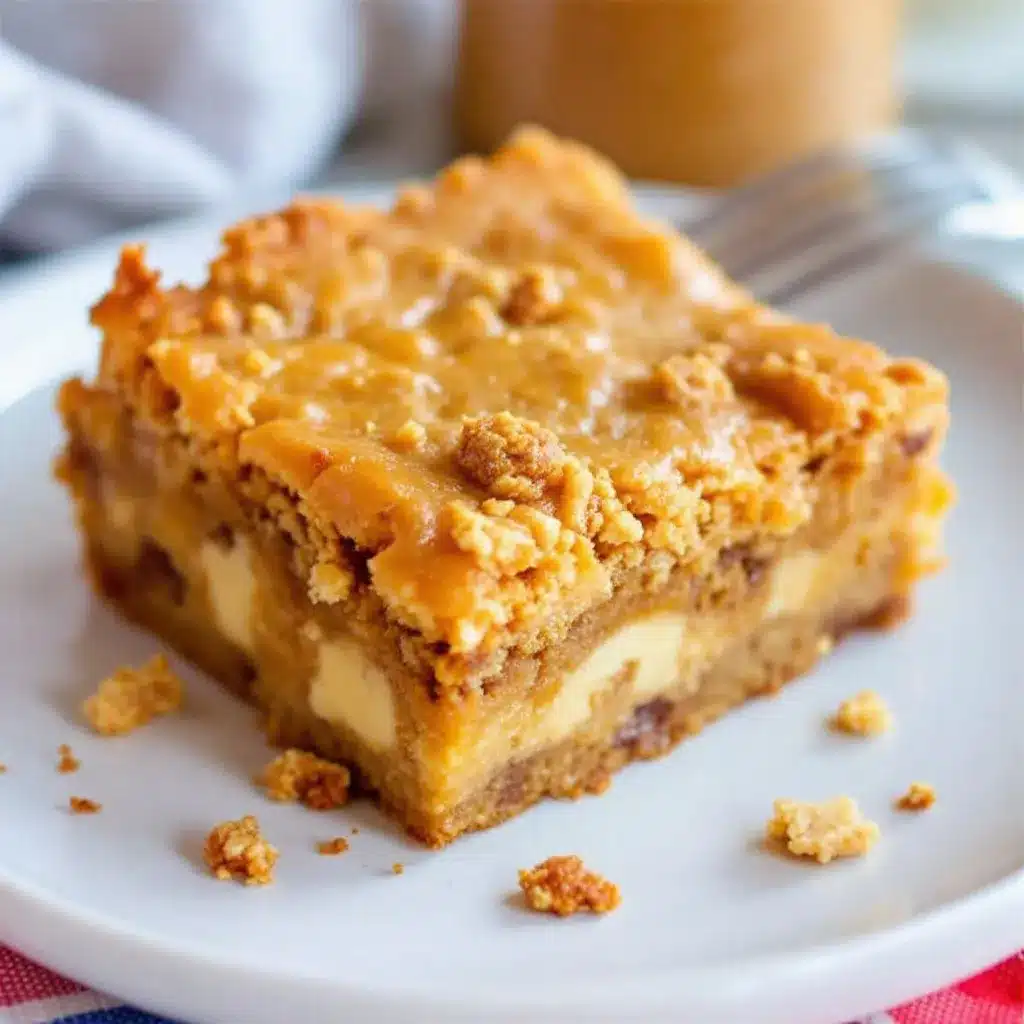
Let’s get to it. This recipe comes together quickly, so have all your ingredients measured and ready before you start.
- Preheat your oven to 350°F (175°C). Line your 8×8 baking pan with parchment paper, leaving an overhang on two opposite sides. This creates handles that will make lifting the blondies out a breeze later.
- Brown the butter. Place the ½ cup (1 stick) of unsalted butter in a light-colored saucepan over medium heat. Stir frequently with a spatula or wooden spoon. The butter will melt, then foam, then start to sizzle. Keep stirring. After about 4-6 minutes, you’ll see brown specks forming at the bottom of the pan, and the butter will smell nutty and toasty. As soon as it turns a golden amber color and smells amazing, remove it from the heat immediately. Pour it into a medium mixing bowl to stop the cooking process. Let it cool for 5 minutes.
- Combine the sugars. Add the packed light brown sugar and granulated sugar to the warm brown butter. Whisk until well combined. The mixture will look a bit grainy, and that’s totally fine.
- Add the eggs and vanilla. Add the room temperature egg, the extra egg yolk, and the vanilla extract. Whisk vigorously for about 1 minute until the mixture is smooth, glossy, and slightly thickened. This step is important—it helps create that crackly top that blondies are known for.
- Fold in the dry ingredients. In a small bowl, whisk together the all-purpose flour, baking powder, and salt. Add this to the wet mixture. Use a rubber spatula to fold everything together gently. Mix just until you no longer see streaks of flour. Overmixing will make the blondies tough.
- Add your mix-ins. If you’re using white chocolate chips, pecans, or butterscotch chips, fold them in now. Reserve about 2 tablespoons to sprinkle on top for a prettier finish.
- Transfer to the pan. Scrape the batter into your prepared baking pan. It will be thick and slightly sticky. Use your spatula to spread it evenly into all corners. Sprinkle the reserved mix-ins on top.
- Bake. Place the pan on the middle rack of your preheated oven. Bake for 20-25 minutes. The edges should be golden brown and set, but the center should still look slightly soft and underdone. A toothpick inserted into the center should come out with a few moist crumbs, not wet batter. I start checking at 20 minutes.
- Cool completely. Place the pan on a cooling rack and let the blondies cool completely in the pan. This takes about 1-2 hours. I know it’s tempting to cut into them warm, but they’ll be too soft to slice cleanly. Patience pays off here.
- Slice and serve. Once completely cool, use the parchment handles to lift the entire block of blondies out of the pan. Place on a cutting board and slice into 16 squares. For the cleanest cuts, use a sharp chef’s knife and wipe it clean between slices.
Cooking Tips & Techniques
I’ve made these blondies more times than I can count, and I’ve learned a few things along the way. Here are my best tips for perfect results every time.
Don’t rush the brown butter. This is the most important step. If you pull it off the heat too early, you won’t get that nutty flavor. If you leave it too long, you’ll have burnt butter, and there’s no coming back from that. Watch for the color change and that distinct toasty smell. It happens fast, so don’t walk away from the stove.
Room temperature eggs matter. Cold eggs will seize up the brown butter and create a lumpy batter. I learned this the hard way during a late-night baking session. If you forgot to take your eggs out ahead of time, place them in a bowl of warm water for 5 minutes.
Underbake slightly. Blondies continue to cook from residual heat after they come out of the oven. If you bake them until a toothpick comes out completely clean, they’ll be dry and cakey. You want that toothpick to have a few moist crumbs clinging to it. Trust the jiggle—the center should have a slight wobble when you gently shake the pan.
Use a light-colored pan. Dark or nonstick pans absorb more heat and can cause the edges to over-brown before the center is done. If you only have a dark pan, reduce the oven temperature to 325°F (160°C) and check a few minutes early.
Let them cool completely. I know, I know. But warm blondies are soft and crumbly. If you cut into them too soon, you’ll end up with a delicious mess instead of clean squares. If you’re in a hurry, you can pop the pan in the fridge for 30 minutes after they’ve cooled for 30 minutes at room temperature.
Variations & Adaptations
One of the best things about this recipe is how easy it is to adapt. Here are some of my favorite variations.
Gluten-Free Version: Swap the all-purpose flour with a good quality 1:1 gluten-free flour blend. I’ve had great results with Bob’s Red Mill and King Arthur brands. The texture will be slightly more tender, but still delicious. Add an extra tablespoon of flour if the batter seems too loose.
Nutty Delight: Add ½ cup of toasted chopped walnuts or pecans along with ½ cup of dark chocolate chips. The combination of toasted nuts and brown butter is absolutely divine. I made this version for a fall baking roundup and it was the first thing to disappear.
Sea Salt Finish: Sprinkle a pinch of flaky sea salt (like Maldon) over the top of the blondies right after they come out of the oven. The salty-sweet contrast is incredible and makes them feel fancy with zero extra effort.
Citrus Twist: Add the zest of one orange to the batter along with the vanilla. The bright citrus notes cut through the richness of the brown butter beautifully. This version is especially lovely for spring and summer gatherings.
Dairy-Free Option: Use vegan butter sticks (I like Miyoko’s or Country Crock Plant Butter) in place of regular butter. The browning process works the same, though it may take a minute or two longer. Use dairy-free chocolate chips if you’re adding mix-ins.
Serving & Storage Suggestions
These blondies are incredibly versatile when it comes to serving. Here’s how I like to enjoy them.
Serving: I serve these at room temperature, straight from the pan or arranged on a platter. For a Labor Day cookout, they’re perfect alongside a scoop of vanilla ice cream or a drizzle of caramel sauce. They also pair beautifully with a tall glass of cold milk or a cup of coffee. If you’re feeling extra, warm them in the microwave for 10 seconds before serving—it brings back that fresh-from-the-oven softness.
Storage: Store leftover blondies in an airtight container at room temperature for up to 5 days. Place a piece of parchment paper between layers if you’re stacking them to prevent sticking. Do not refrigerate them, as the cold will dry them out. If your kitchen is very hot, you can store them in the fridge, but let them come to room temperature before serving for the best texture.
Freezing: These blondies freeze beautifully. Wrap individual bars tightly in plastic wrap, then place them in a freezer-safe bag or container. They’ll keep for up to 3 months. To thaw, just leave them at room temperature for about 30 minutes, or pop them in the microwave for 15-20 seconds.
Flavor Development: Honestly, these blondies taste even better the next day. The brown butter flavor deepens and the texture becomes perfectly chewy. I often make them a day ahead of a cookout for this reason. They’re also a great make-ahead option if you’re planning a big spread of appetizers and desserts.
Nutritional Information & Benefits
While these are definitely a treat, here’s a rough nutritional breakdown per bar (based on 16 servings, without mix-ins):
- Calories: 175
- Fat: 9g
- Carbohydrates: 23g
- Protein: 2g
- Sugar: 17g
- Fiber: 0.5g
These bars are made with simple, recognizable ingredients—no preservatives or artificial flavors. Brown butter adds a depth of flavor that allows you to use less sugar overall compared to many dessert recipes. The egg yolk provides a small amount of protein and healthy fats. If you’re looking for a slightly lighter option, you can reduce the sugar by 2 tablespoons without significantly affecting the texture.
For those with dietary restrictions, this recipe can easily be adapted to be gluten-free or dairy-free (see variations above). As always, check your specific ingredient labels if you have allergies. These bars contain wheat, dairy, and eggs.
Frequently Asked Questions
Can I use salted butter instead of unsalted?
Yes, you can. Just reduce the added salt in the recipe to ¼ teaspoon instead of ½ teaspoon. The salted butter will add enough salt to balance the sweetness.
Why did my blondies turn out dry?
Overbaking is the most common culprit. Remember to pull them out when the center still looks slightly underdone. Also, make sure you’re measuring your flour correctly by spooning it into the measuring cup and leveling it off. Scooping directly from the bag can pack in too much flour.
Can I double this recipe?
Absolutely. Double all the ingredients and bake in a 9×13-inch pan. The baking time will increase slightly to 28-32 minutes. Start checking at 25 minutes.
How do I know when the butter is properly browned?
Watch for three signs: the butter will turn a golden amber color, you’ll see small brown specks forming at the bottom of the pan, and it will smell nutty and toasty. As soon as you see and smell these, pull it off the heat. It happens fast, so don’t walk away.
Can I make these without brown butter?
You can, but they won’t have the same depth of flavor. If you’re short on time, simply melt the butter and proceed with the recipe. They’ll still be good blondies—just not the best blondies. If you’re looking for another easy dessert option, these pair wonderfully with a creamy make-ahead chocolate avocado pudding for a dessert spread.
Conclusion
These brown butter blondie bars are everything I wanted in a cookout dessert—easy to make, impossible to resist, and just special enough to feel like you went the extra mile without actually doing much extra work. The brown butter does all the heavy lifting here, turning simple pantry ingredients into something that tastes surprisingly sophisticated.
I love that these bars are forgiving enough for a beginner baker but impressive enough to serve to a crowd. They travel well, they store beautifully, and they genuinely get better after a day or two. Whether you’re heading to a Labor Day cookout, a summer potluck, or just want a batch of something chewy and buttery on your counter, these blondies will not let you down.
I’d love to hear how yours turn out. Did you add mix-ins? Try a variation? Leave a comment below and let me know what worked for you. And if you’re looking for more easy, crowd-pleasing recipes, don’t miss this tender slow cooker honey garlic chicken that’s perfect for feeding a crowd. Happy baking, friends!
Pin This Recipe!
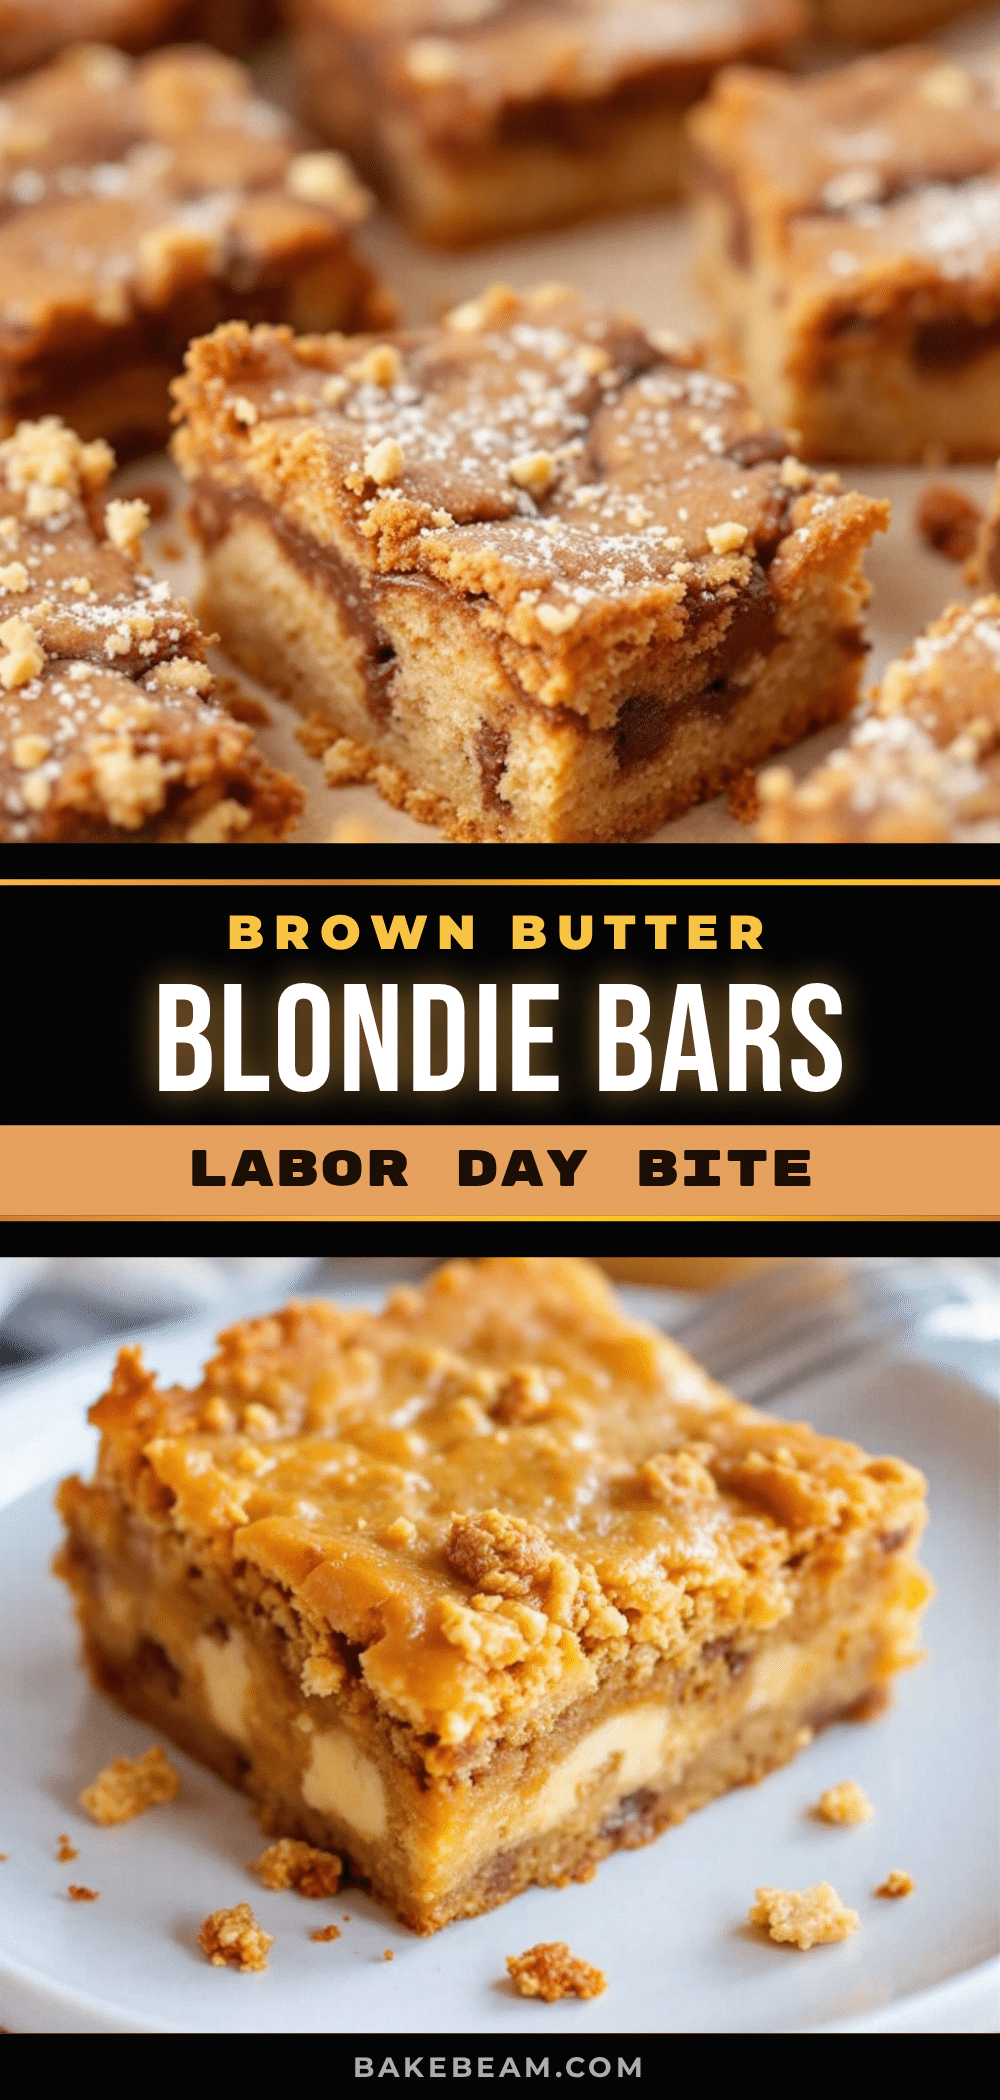
Best Brown Butter Blondie Bars for Labor Day Cookout
These brown butter blondie bars are chewy, buttery, and just sweet enough, with a nutty depth from browned butter. Perfect for cookouts, they come together in under 40 minutes with simple pantry ingredients.
- Prep Time: 15 minutes
- Cook Time: 25 minutes
- Total Time: 40 minutes
- Yield: 16 servings 1x
- Category: Dessert
- Cuisine: American
Ingredients
- ½ cup (1 stick, 113g) unsalted butter
- 1 cup (200g) light brown sugar, packed
- ¼ cup (50g) granulated sugar
- 1 large egg, at room temperature
- 1 egg yolk, at room temperature
- 2 teaspoons vanilla extract
- 1 cup (120g) all-purpose flour
- ½ teaspoon baking powder
- ½ teaspoon fine sea salt
- ½ cup (85g) white chocolate chips (optional)
- ½ cup (60g) chopped pecans (optional)
- ½ cup (85g) butterscotch chips (optional)
Instructions
- Preheat your oven to 350°F (175°C). Line an 8×8-inch baking pan with parchment paper, leaving an overhang on two opposite sides.
- Brown the butter: Place the unsalted butter in a light-colored saucepan over medium heat. Stir frequently until the butter melts, foams, and turns a golden amber color with brown specks, about 4-6 minutes. Remove from heat immediately and pour into a medium mixing bowl. Let cool for 5 minutes.
- Add the packed light brown sugar and granulated sugar to the warm brown butter. Whisk until well combined.
- Add the room temperature egg, egg yolk, and vanilla extract. Whisk vigorously for about 1 minute until smooth, glossy, and slightly thickened.
- In a small bowl, whisk together the all-purpose flour, baking powder, and salt. Add to the wet mixture and fold gently with a rubber spatula until just combined. Do not overmix.
- If using mix-ins, fold them in now, reserving about 2 tablespoons to sprinkle on top.
- Scrape the batter into the prepared pan and spread evenly. Sprinkle reserved mix-ins on top.
- Bake on the middle rack for 20-25 minutes, until edges are golden brown and center is slightly soft. A toothpick inserted in the center should come out with a few moist crumbs.
- Cool completely in the pan on a cooling rack, about 1-2 hours.
- Use the parchment handles to lift the blondies out, place on a cutting board, and slice into 16 squares.
Notes
Don’t rush the brown butter; watch for color change and nutty smell. Room temperature eggs prevent lumpy batter. Underbake slightly for chewy texture. Cool completely before slicing for clean cuts. Blondies taste even better the next day.
Nutrition
- Serving Size: 1 bar
- Calories: 175
- Sugar: 17
- Sodium: 120
- Fat: 9
- Saturated Fat: 5
- Carbohydrates: 23
- Fiber: 0.5
- Protein: 2
Keywords: brown butter blondies, blondie bars, Labor Day dessert, easy dessert, cookout dessert, chewy blondies