I figured thermos mac and cheese would be a sad, clumpy compromise—something you settle for when a real lunch isn’t possible. It took about one spoonful on a freezing January afternoon for that assumption to fall apart completely.
I was standing in my car, parked outside a job site, watching my breath fog the windshield. The heater had barely kicked in, and I was already regretting not packing something soupier. But I was hungry, so I twisted the lid off my thermos anyway, fully expecting the kind of pasta that sticks together in a gluey, unappetizing block. Instead, steam hit my face, and underneath it, a swirl of creamy, sharp cheddar sauce coated every single elbow. The pasta was al dente. The cheese was velvety. And it was still piping hot, almost forty-five minutes after I’d packed it.
That moment changed the way I think about packed lunches entirely. This cozy thermos mac and cheese for cold weather lunches isn’t about convenience alone—it’s about refusing to eat sad, cold food when you’re already freezing. It’s about opening your lunchbox and finding something that genuinely comforts you, even when you’re sitting in a drafty break room or a parked car.
Honestly, I never thought I’d get this excited about a thermos recipe. But here we are.
Why You’ll Love This Recipe
This isn’t just another mac and cheese recipe you’ll make once and forget. It’s specifically designed to hold up inside a thermos for hours without turning into a pasty, overcooked mess. That alone makes it worth your time.
- Stays Creamy for Hours : The sauce is engineered to resist separating or thickening as it sits, so every spoonful tastes as good as the first.
- Simple, Pantry-Friendly Ingredients : You probably already have everything you need—no fancy cheese blends or hard-to-find pasta shapes required.
- Perfect for Cold Weather Lunches : Whether you’re commuting, working outdoors, or just want something warm without microwaving, this recipe delivers.
- Crowd-Pleasing Comfort : Kids and adults both love it. I’ve packed this for myself and for my nephew’s school lunches, and the thermos comes back empty every single time.
- Unbelievably Satisfying : The texture is the real star here—creamy without being gloopy, cheesy without being greasy. It’s the kind of lunch that makes you look forward to your break.
What sets this recipe apart from every other thermos-friendly mac and cheese out there is a simple trick: undercooking the pasta slightly and using a combination of evaporated milk and sharp cheddar. The evaporated milk keeps the sauce stable, while the extra-sharp cheddar punches through with flavor that doesn’t fade as it sits. It’s not just another version—it’s the version that actually works.
This recipe is the kind that makes you close your eyes after the first bite, even if you’re eating it out of a thermos in your car. It’s comfort food reimagined for real life.
What Ingredients You Will Need
This recipe uses simple, wholesome ingredients that come together to deliver that soul-warming, creamy texture without any fuss. Most of these are pantry staples, which makes this perfect for busy mornings when you’re packing lunch in a hurry.
- 8 ounces (about 2 cups) elbow macaroni – or any small pasta shape like shells or cavatappi. I prefer De Cecco for its texture, but any good-quality brand works.
- 2 tablespoons unsalted butter – adds richness and helps the roux come together smoothly.
- 2 tablespoons all-purpose flour – the base for your roux. For a gluten-free version, use a 1:1 gluten-free flour blend.
- 1 cup whole milk – full-fat gives the creamiest result, but 2% works in a pinch.
- 1/2 cup evaporated milk – this is the secret ingredient. It prevents the sauce from breaking or thickening too much inside the thermos.
- 2 cups shredded sharp cheddar cheese – shred it yourself from a block for the best melt. Pre-shredded cheese has anti-caking agents that can make the sauce grainy.
- 1/2 teaspoon salt – plus more for the pasta water.
- 1/4 teaspoon black pepper – freshly ground if you have it.
- 1/4 teaspoon garlic powder – optional, but I never skip it. It adds a subtle savory depth.
- 1/4 teaspoon mustard powder – this is my secret trick. Mustard powder doesn’t make it taste like mustard; it just makes the cheese taste cheesier.
Ingredient Selection Tip: For the sharpest flavor, look for a block of extra-sharp cheddar from brands like Cabot or Tillamook. If you’re feeling adventurous, swap half the cheddar for Gruyère—it melts like a dream and adds a nutty complexity.
Substitution Guidance: Need it dairy-free? Use plant-based butter, unsweetened oat milk, and a good-quality vegan cheddar shred. The texture won’t be quite as luxurious, but it’s still delicious. For a lower-fat option, replace the whole milk with 2% and reduce the butter to 1 tablespoon.
Equipment Needed
You don’t need much to make this work, but a few tools make a real difference in the final result.
- Large pot – for boiling pasta. A 4-quart pot works perfectly.
- Medium saucepan – for making the cheese sauce. A heavy-bottomed one prevents scorching.
- Whisk – essential for a smooth, lump-free roux.
- Colander – for draining pasta.
- Cheese grater – please, please grate your own cheese. It melts so much better.
- Measuring cups and spoons – precision matters here.
- A good-quality thermos – this is non-negotiable. I use a Stanley thermos, and it keeps food hot for hours. Preheat it with boiling water for 5 minutes before filling for best results.
- Wooden spoon or silicone spatula – for stirring the sauce without scratching your pan.
Budget-Friendly Tip: You don’t need a fancy thermos for this to work. Even a basic $15 thermos from the grocery store will do the job if you preheat it properly. Just make sure it has a wide mouth for easy filling and eating.
Preparation Method
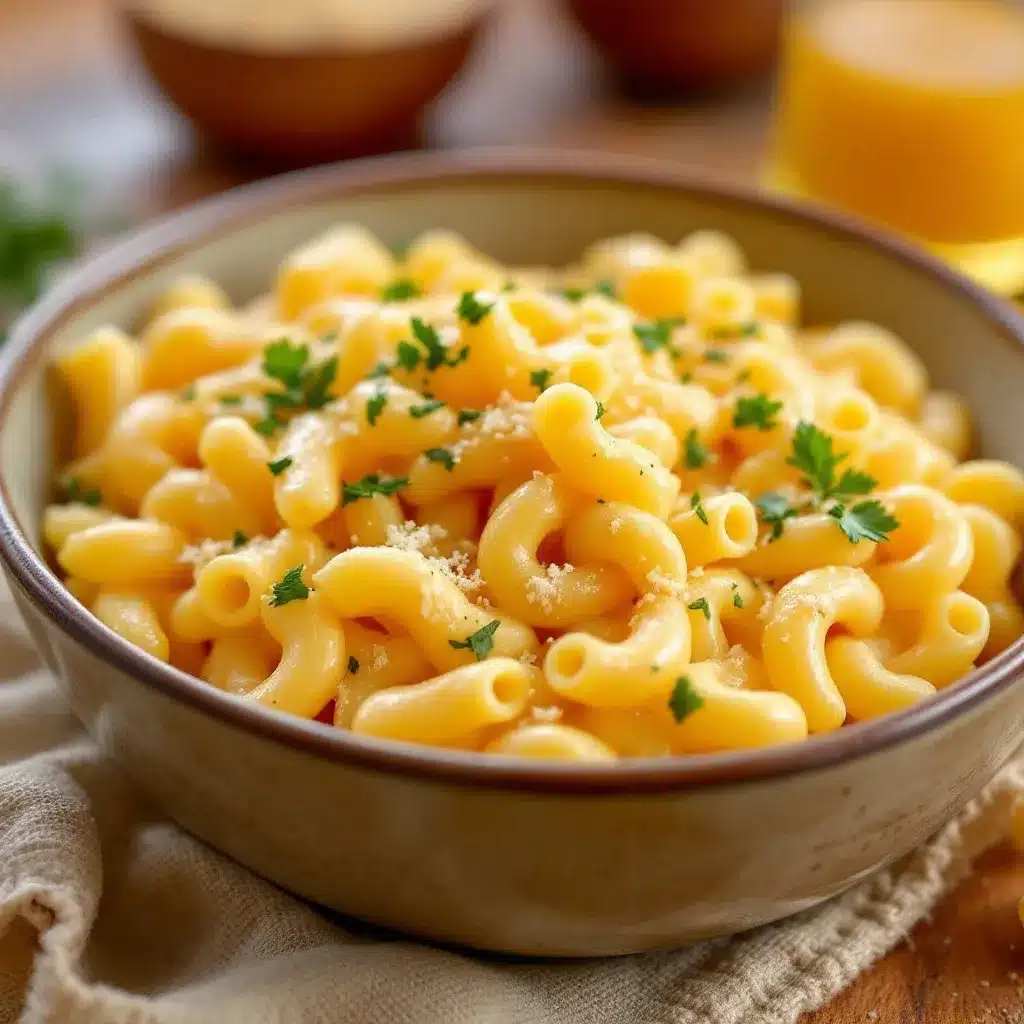
This comes together in about 25 minutes, and most of that is just waiting for water to boil. Here’s how to do it right.
- Boil the pasta. Fill your large pot with water, add a generous tablespoon of salt (it should taste like the sea), and bring it to a rolling boil. Add the elbow macaroni and cook for 2 minutes less than the package directions suggest. For most brands, that’s about 5 to 6 minutes. You want the pasta to be firm—almost undercooked—because it will continue cooking inside the thermos. Drain it in a colander and toss with a drizzle of olive oil to prevent sticking.
- Start the roux. While the pasta cooks, melt the butter in your medium saucepan over medium heat. Once it’s fully melted and starting to bubble, whisk in the flour. Keep whisking for about 1 minute until the mixture turns a pale golden color and smells slightly nutty. This step is crucial—raw flour taste is not something you want in your lunch.
- Add the milk slowly. Pour in the whole milk in a thin, steady stream while whisking constantly. This prevents lumps from forming. Keep whisking until the mixture thickens enough to coat the back of a spoon, about 2 to 3 minutes. It should look like a thick, glossy gravy.
- Stir in the evaporated milk. This is where the magic happens. Pour in the evaporated milk and whisk until fully incorporated. The sauce will thin out slightly—that’s exactly what you want. The evaporated milk keeps the sauce from separating or turning into a solid block inside the thermos.
- Melt the cheese. Reduce the heat to low. Add the shredded cheddar cheese in handfuls, stirring gently after each addition until it’s fully melted. Resist the urge to crank up the heat—high heat makes cheese sauce grainy. Once all the cheese is in, add the salt, pepper, garlic powder, and mustard powder. Stir until smooth and glossy.
- Combine and cool slightly. Add the undercooked pasta to the cheese sauce and stir until every piece is coated. Let it sit in the pot for about 2 minutes. This allows the sauce to thicken slightly and cling to the pasta. Don’t skip this step—if you pack it too hot and runny, the pasta will continue cooking in the thermos and turn mushy.
- Preheat your thermos. While the mac and cheese rests, fill your thermos with boiling water, screw the lid on, and let it sit for 5 minutes. This step is non-negotiable. A cold thermos will suck the heat right out of your lunch.
- Pack it up. Empty the hot water from the thermos. Spoon the mac and cheese in, packing it down gently to eliminate air pockets. Screw the lid on tightly. Your lunch will stay hot for at least 4 hours—longer if you use a high-quality thermos.
Cooking Tips & Techniques
I’ve made every mistake you can imagine with thermos mac and cheese, and I’m sharing the lessons so you don’t have to learn them the hard way.
Don’t overcook the pasta. This is the number one mistake. If you cook the pasta to al dente before packing, it will be mushy within an hour inside the thermos. Cook it 2 minutes less than the package says. Trust me on this. I once made the mistake of cooking it perfectly, and by lunchtime, I was eating what can only be described as cheesy porridge.
Use room-temperature dairy. Cold milk and cold cheese can cause your roux to seize up or your cheese to clump. Let your milk and cheese sit on the counter for 15 minutes before you start cooking. It makes a noticeable difference in how smoothly the sauce comes together.
Preheat your thermos every single time. I know it seems like an extra step, but it’s the difference between a hot lunch and a lukewarm disappointment. I forgot to do this once when I was rushing, and my mac and cheese was barely warm by noon. Never again.
Layer for extra heat retention. If you’re packing lunch late at night for the next day, let the mac and cheese cool to room temperature before refrigerating it. Then, in the morning, reheat it gently on the stovetop with a splash of milk before packing it into a preheated thermos. This two-step approach keeps the food hot longer than packing it straight from the fridge.
Don’t overfill your thermos. Leave about half an inch of space at the top. This creates a small air pocket that helps retain heat. A completely packed thermos actually cools down faster because there’s no insulation buffer at the top.
Variations & Adaptations
This recipe is endlessly adaptable, which is one of the reasons I keep coming back to it. Here are a few variations I’ve tried and loved.
- Broccoli Cheddar Thermos Mac : Steam 1 cup of small broccoli florets until just tender, then stir them into the mac and cheese before packing. The broccoli adds a pop of green and a subtle sweetness that balances the sharp cheddar. My nephew calls this “tree mac,” and he requests it weekly.
- Spicy Chipotle Version : Stir 1 to 2 teaspoons of chipotle paste (from a can of chipotles in adobo) into the cheese sauce along with the seasonings. The smoky heat cuts through the richness beautifully. I made this for a winter hiking trip, and it was the highlight of the day.
- Bacon and Chive Twist : Cook 4 slices of bacon until crispy, crumble them, and fold them into the mac and cheese along with 2 tablespoons of fresh chopped chives. The salty crunch of the bacon is incredible against the creamy sauce. Just note that the bacon will soften inside the thermos, so if you want it crispy, pack it separately and add it at lunchtime.
- Gluten-Free Adaptation : Use a 1:1 gluten-free flour blend in the roux and gluten-free pasta. Cook the pasta according to package directions but still undercook it by 2 minutes. Cup4Cup and Bob’s Red Mill both work well here.
- Vegan Version : Replace the butter with vegan butter, use unsweetened oat milk and vegan evaporated milk (or full-fat coconut milk), and use a high-quality vegan cheddar shred. Violife and Miyoko’s both melt well. The texture will be slightly different, but the comfort factor is still there.
Serving & Storage Suggestions
This recipe is designed for packed lunches, but it’s versatile enough for other situations too.
Serving Temperature: Serve straight from the thermos while it’s still steaming. The cheese sauce is at its best when it’s hot and fluid. If you’re eating at home, you can also serve it immediately in a bowl with a sprinkle of extra shredded cheddar on top.
What to Serve With It: A simple side of roasted broccoli or a crisp green salad balances the richness. I also love packing a small container of cucumber mint green tea cooler on the side for a refreshing contrast. For a heartier meal, pair it with tender slow cooker honey garlic chicken and vegetables on the side.
Storage Instructions: If you have leftovers, transfer them to an airtight container and refrigerate for up to 3 days. The mac and cheese will firm up as it cools, but that’s normal. To reheat, add a splash of milk and warm it gently on the stovetop or in the microwave in 30-second bursts, stirring between each.
Freezer Instructions: This recipe freezes surprisingly well. Portion it into freezer-safe containers, leaving a little room for expansion. Thaw overnight in the refrigerator, then reheat with a splash of milk. The texture won’t be quite as perfect as fresh, but it’s still miles better than anything from a box.
Flavor Development: Honestly, this mac and cheese tastes even better the next day. The flavors meld together as it sits, and the sharp cheddar becomes more pronounced. I often make a double batch on Sunday just so I have lunches ready for Monday and Tuesday.
Nutritional Information & Benefits
This isn’t health food, but it’s real food made from real ingredients—and that counts for something.
- Estimated Calories per Serving: Approximately 480 calories per serving (based on 4 servings). This includes the pasta, cheese sauce, and butter.
- Protein: About 18 grams per serving, thanks to the cheddar cheese and milk. That’s enough to keep you full through a long afternoon.
- Calcium: A significant source of calcium from the dairy. One serving provides roughly 30% of your daily needs.
- Dietary Considerations: This recipe is vegetarian. For gluten-free or vegan adaptations, see the variations section above.
- Potential Allergens: Contains dairy and gluten (wheat). If you’re serving someone with allergies, the substitutions provided above work well.
My Personal Wellness Perspective: I believe in the power of a warm, satisfying lunch to change the entire trajectory of your day. This mac and cheese isn’t about deprivation or “healthy swaps” that leave you unsatisfied. It’s about nourishing yourself with something that feels like a hug in a thermos. Sometimes, that’s exactly what you need.
Conclusion
This cozy thermos mac and cheese for cold weather lunches has become my go-to for everything from ski trips to office potlucks. It’s reliable, it’s delicious, and it genuinely makes me look forward to lunch on the coldest days of the year.
I encourage you to make this recipe your own. Throw in some broccoli, add a pinch of cayenne, or swap the cheddar for smoked gouda. The basic formula works, but the variations are where the fun begins. If you try it, I’d love to hear how it turned out—drop a comment below or tag me in your photos. And if you’re looking for more easy, make-ahead lunch ideas, check out all the recipes here for more inspiration.
Stay warm, eat well, and remember: a good lunch can fix almost anything.
Frequently Asked Questions
Can I use pre-shredded cheese for this recipe?
You can, but I don’t recommend it. Pre-shredded cheese is coated with anti-caking agents like cellulose, which prevent it from melting smoothly. Your sauce will be grainy instead of silky. Take the extra two minutes to shred your own cheese—it makes a real difference.
How long will the mac and cheese stay hot in a thermos?
If you preheat your thermos with boiling water and pack the mac and cheese while it’s piping hot, it should stay warm for 4 to 6 hours. High-quality thermoses like Stanley or Thermos brand can keep food hot for up to 8 hours. The key is preheating—don’t skip that step.
Can I make this recipe ahead of time?
Absolutely. You can make the mac and cheese up to 3 days in advance and store it in the refrigerator. When you’re ready to pack your lunch, reheat it gently on the stovetop with a splash of milk, then pack it into a preheated thermos. The flavor actually gets better after a day or two in the fridge.
What’s the best pasta shape for thermos mac and cheese?
Elbow macaroni is the classic choice, but any small pasta shape works well. I’ve used shells, cavatappi, and even ditalini with great results. The key is to choose a shape that’s small enough to eat easily from a thermos spoon but sturdy enough to hold its shape after hours in the sauce.
Can I add vegetables to this recipe without making it watery?
Yes, but you need to prep them correctly. Steam or roast your vegetables first to remove excess moisture, then stir them in just before packing. Broccoli, peas, and roasted red peppers all work beautifully. Avoid raw vegetables, as they’ll release water inside the thermos and make the sauce thin.
Pin This Recipe!
Cozy Thermos Mac and Cheese: Easy Cold Weather Lunch

This creamy, sharp cheddar mac and cheese is specially designed to stay hot and delicious inside a thermos for hours, making it the perfect comfort food for cold weather lunches on the go.
- Prep Time: 10 minutes
- Cook Time: 15 minutes
- Total Time: 25 minutes
- Yield: 4 servings 1x
- Category: Main Course
- Cuisine: American
Ingredients
- 8 ounces (about 2 cups) elbow macaroni
- 2 tablespoons unsalted butter
- 2 tablespoons all-purpose flour
- 1 cup whole milk
- 1/2 cup evaporated milk
- 2 cups shredded sharp cheddar cheese
- 1/2 teaspoon salt
- 1/4 teaspoon black pepper
- 1/4 teaspoon garlic powder (optional)
- 1/4 teaspoon mustard powder
Instructions
- Boil the pasta: Fill a large pot with water, add a generous tablespoon of salt, and bring to a rolling boil. Add the elbow macaroni and cook for 2 minutes less than the package directions suggest (about 5 to 6 minutes). Drain in a colander and toss with a drizzle of olive oil to prevent sticking.
- Start the roux: While the pasta cooks, melt the butter in a medium saucepan over medium heat. Whisk in the flour and cook for about 1 minute until the mixture turns pale golden and smells slightly nutty.
- Add the milk slowly: Pour in the whole milk in a thin, steady stream while whisking constantly. Continue whisking until the mixture thickens enough to coat the back of a spoon, about 2 to 3 minutes.
- Stir in the evaporated milk: Pour in the evaporated milk and whisk until fully incorporated. The sauce will thin out slightly.
- Melt the cheese: Reduce the heat to low. Add the shredded cheddar cheese in handfuls, stirring gently after each addition until fully melted. Add the salt, pepper, garlic powder, and mustard powder. Stir until smooth and glossy.
- Combine and cool slightly: Add the undercooked pasta to the cheese sauce and stir until every piece is coated. Let it sit in the pot for about 2 minutes to allow the sauce to thicken slightly.
- Preheat your thermos: Fill your thermos with boiling water, screw the lid on, and let it sit for 5 minutes.
- Pack it up: Empty the hot water from the thermos. Spoon the mac and cheese in, packing it down gently to eliminate air pockets. Screw the lid on tightly.
Notes
Cook pasta 2 minutes less than package directions to prevent mushiness. Use room-temperature dairy for a smoother sauce. Preheat thermos with boiling water for 5 minutes before filling. Leave about half an inch of space at the top of the thermos for heat retention. For best results, let the mac and cheese cool to room temperature before refrigerating, then reheat gently with a splash of milk before packing.
Nutrition
- Serving Size: 1 serving (about 1 c
- Calories: 480
- Sugar: 6
- Sodium: 680
- Fat: 24
- Saturated Fat: 14
- Carbohydrates: 44
- Fiber: 2
- Protein: 18
Keywords: thermos mac and cheese, cold weather lunch, packed lunch, creamy mac and cheese, thermos recipe, comfort food, make-ahead lunch