Third batch in two days and I finally stopped fighting the jello. The red layer was setting too fast, the yellow kept bleeding into the orange, and honestly, I was about ready to toss the whole thing. But that third try? The layers sat perfectly crisp, like little glass ribbons stacked in a cup. I stood there in the kitchen, spoon in hand, staring at them like they’d done something magical.
They hadn’t, of course. Jello is just jello. But there’s something about getting those candy corn colors to behave that feels like a small victory. Maybe it’s the patience it forces on you. Maybe it’s the way the light catches each layer when you hold the cup up. I don’t know. What I do know is that by the time I set the fourth batch in the fridge, I wasn’t making them for anyone else. I was making them because I wanted to see if I could get it right again.
These Easy Candy Corn Layered Jello Cups aren’t complicated. They’re just three colors of jello, stacked in order, chilled until firm. But the process teaches you something about timing and temperature that you don’t get from most desserts. And when you peel back the lid and see those clean lines—orange, yellow, white—it feels earned.
I’ve made these for Halloween parties, for fall potlucks, and for no reason at all except that I had a box of orange jello sitting in the pantry. They’re the kind of thing people pick up and say “wait, how did you do that?” And honestly, that never gets old.
Why You’ll Love This Recipe
Let me tell you why these jello cups have earned a permanent spot in my fall rotation. I’ve tested this recipe more times than I care to admit, and every tweak brought me closer to something that actually works without driving you crazy.
- Fun & Festive: These look like little cups of candy corn, which means they’re an instant hit at any fall gathering. Kids love them, adults get nostalgic, and everyone asks for the recipe.
- Simple Ingredients: Three boxes of jello and some water. That’s it. No fancy grocery trips, no specialty items, no hunting down obscure ingredients at three different stores.
- Make-Ahead Friendly: You can prep these the night before and they’ll be ready when you need them. Actually, they need to set for several hours anyway, so planning ahead is built into the process.
- Crowd-Pleaser: I’ve brought these to four different gatherings now and they’ve disappeared every single time. People are genuinely impressed by the layered effect, even though it’s just jello.
- Naturally Gluten-Free: Jello is naturally gluten-free, so this dessert works for guests with dietary restrictions without any special substitutions.
What makes these different from other jello recipes you’ve seen is the technique. Most tutorials skip over the critical step of cooling each layer to the right temperature before adding the next. I learned that the hard way—my first few batches looked like muddy messes instead of clean candy corn stripes. The method I’m sharing here gives you those crisp, defined layers every time, as long as you’re patient enough to let each layer set properly.
There’s something deeply satisfying about pulling these out of the fridge and seeing those perfect stripes. It’s comfort food in a cup, but with a visual payoff that makes you feel like you actually accomplished something. And on a busy fall day, that feeling matters.
What Ingredients You Will Need
This recipe uses just three simple ingredients, and you probably already have two of them in your pantry. Here’s what you’ll need and why each one matters:
- 1 box (3 oz) orange gelatin (like Jell-O brand) — This creates the bottom layer, which represents the wide orange section of candy corn. I’ve tried store-brand versions and they work fine, though the color tends to be slightly less vibrant. If you want that bright, punchy orange, stick with name brand.
- 1 box (3 oz) yellow or lemon gelatin — This forms the middle layer. Lemon flavor works beautifully here because it’s mild enough not to overpower the other layers. Some stores carry a straight “yellow” flavor that’s essentially lemon anyway. Avoid pineapple—it’s too tart and the color leans greenish.
- 1 box (3 oz) unflavored gelatin — This is the secret to the white top layer. Plain jello won’t give you that opaque white look. You need unflavored gelatin mixed with sweetened condensed milk or a splash of vanilla for flavor. I’ve tested this with just plain unflavored gelatin and water, and it tastes like nothing. The sweetened condensed milk version is the way to go.
- 3 cups boiling water (divided, 1 cup per layer) — You’ll dissolve each gelatin packet in one cup of boiling water. Make sure the water is actually boiling, not just hot from the tap. Hot tap water won’t fully dissolve the gelatin and you’ll end up with grainy spots.
- 1 cup cold water (divided, 1/3 cup per layer) — This cools the gelatin mixture down before you pour it into cups. Skipping this step means you’ll be waiting forever for each layer to set.
- 1/2 cup sweetened condensed milk — This goes into the white layer along with the unflavored gelatin. It adds sweetness and gives that opaque, creamy look that mimics the white tip of candy corn. You can substitute with evaporated milk plus a tablespoon of sugar, but the texture won’t be quite as rich.
- Optional: 1 teaspoon vanilla extract — Adds a hint of flavor to the white layer. Completely optional but I like the way it rounds out the sweetness.
That’s genuinely it. Three boxes of gelatin, water, and sweetened condensed milk. You probably have the water already. The gelatin boxes cost about a dollar each. This is not a recipe that requires a special trip to a gourmet store or a second mortgage.
One thing I’ve learned through trial and error: buy extra boxes of each flavor. You’ll inevitably mess up a layer or decide you want to make a second batch, and running to the store mid-recipe is annoying. I keep a backup box of each color in my pantry now, just in case.
Equipment Needed
You don’t need much for this recipe, which is part of why I love it. Here’s what you’ll want to have on hand:
- Clear plastic cups (9 oz size) — These are perfect for showing off the layers. I buy the ones with lids from the party supply section. You can use small glass cups or ramekins too, but the clear plastic lets everyone see the candy corn effect.
- Small mixing bowls (3) — One for each color layer. You don’t need anything fancy; medium cereal bowls work fine.
- Measuring cups — For measuring water and sweetened condensed milk accurately.
- Whisk or fork — For stirring the gelatin until it’s completely dissolved. A fork works in a pinch but a small whisk is faster.
- Liquid measuring cup with spout — This makes pouring the gelatin into cups much less messy. I use a 2-cup Pyrex measuring cup and it’s perfect.
- Refrigerator space — You’ll need room for the cups to sit undisturbed for several hours. Clear a shelf before you start.
If you don’t have clear plastic cups, you can use small mason jars or even shot glasses for mini versions. I’ve made these in little 4 oz cups for parties and they’re adorable. Just adjust the layer amounts accordingly.
One tool I didn’t think I needed but now swear by: a small offset spatula or butter knife for gently smoothing the top of each layer if it gets bubbly. You don’t have to do this, but it makes the final cups look a bit more polished.
Preparation Method
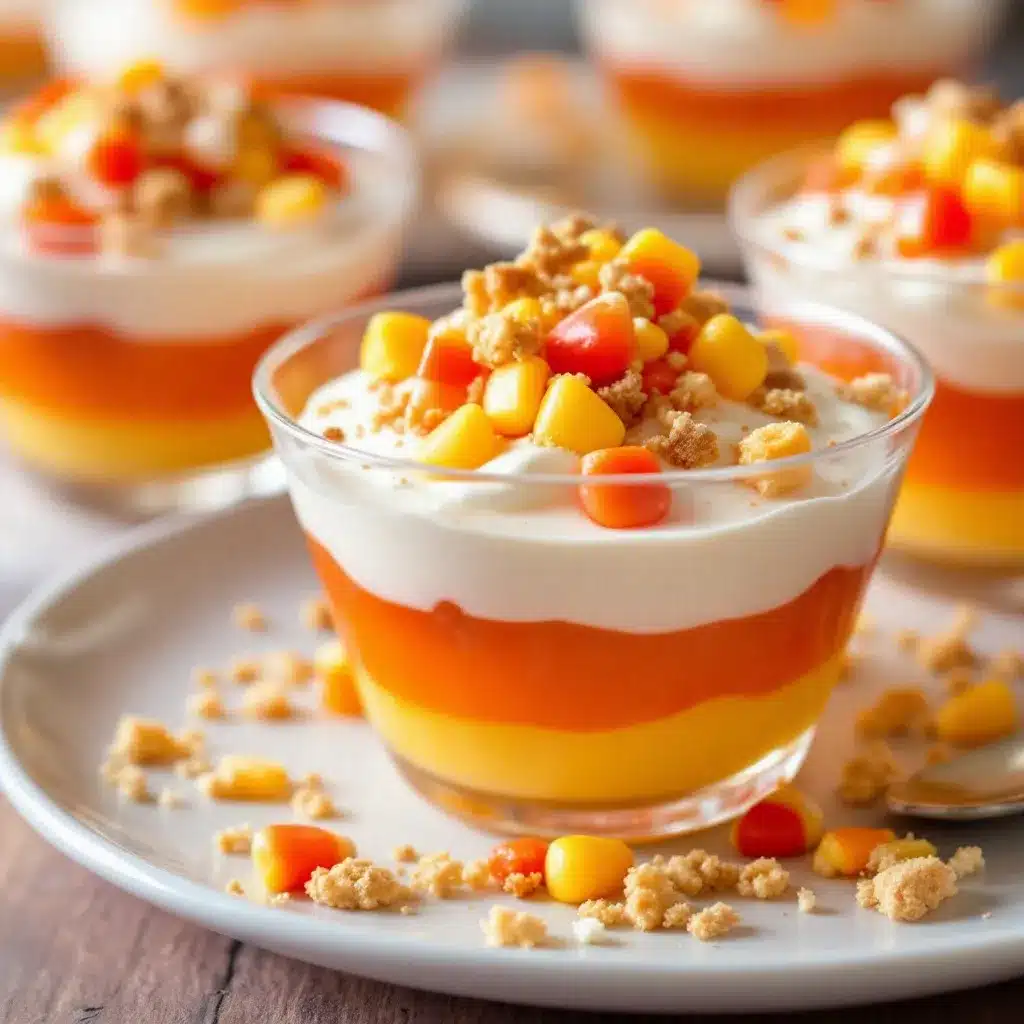
This method looks long, but I promise it’s straightforward. The key is patience between layers. Rushing this is the number one reason people end up with muddy, mixed-up colors instead of clean stripes.
Step 1: Prepare your workspace and cups
Set out your clear plastic cups on a baking sheet or tray. This makes them easier to move in and out of the fridge without spilling. You’ll get about 6-8 cups depending on size. Arrange them so they’re not touching each other—this helps air circulate and keeps the chilling even.
Step 2: Make the orange layer (bottom)
In a small bowl, empty the orange gelatin powder. Pour in 1 cup of boiling water and whisk until the powder is completely dissolved, about 2 minutes. You shouldn’t see any granules floating around. Add 1/3 cup cold water and stir. Let this sit at room temperature for about 5 minutes to cool slightly.
Pour the orange mixture evenly into your cups, filling each about one-third full. You want each layer to be roughly equal in height. Slide the tray into the refrigerator and let this set for about 45 minutes to 1 hour. The layer should be firm to the touch but not rock hard. If you poke it gently, your finger should leave a slight indent without sinking in.
Step 3: Make the yellow layer (middle)
While the orange layer is setting, you can prep the yellow gelatin. In a clean bowl, empty the yellow or lemon gelatin powder. Add 1 cup boiling water and whisk until dissolved. Add 1/3 cup cold water and stir. Set this aside at room temperature—don’t refrigerate it yet.
Here’s the critical part: the yellow mixture needs to cool to room temperature before you pour it over the orange layer. If it’s too warm, it will melt the orange layer and you’ll get a blended mess. If it’s too cold, it might start setting before you pour. Room temperature is the sweet spot. I usually let it sit for about 15-20 minutes.
Once the orange layer is firm and the yellow mixture is room temperature, carefully pour the yellow over the orange. Use the back of a spoon to gently distribute the liquid so it doesn’t disturb the bottom layer. Return the tray to the fridge and let this set for another 45 minutes to 1 hour.
Step 4: Make the white layer (top)
In a clean bowl, empty the unflavored gelatin powder. Add 1/2 cup cold water and let it sit for about 2 minutes—this is called “blooming” and it helps the gelatin dissolve evenly. Then pour in 1/2 cup boiling water and whisk until the gelatin is completely dissolved. Add the sweetened condensed milk and vanilla extract if using, and stir until smooth. Add another 1/3 cup cold water and stir.
Let this mixture cool to room temperature, about 15 minutes. It should feel lukewarm, not hot. Pour it carefully over the set yellow layer, using the spoon trick again. Return to the fridge and let the cups set for at least 4 hours, but overnight is better.
Step 5: Serve
Once fully set, these are ready to eat. Pop the lids on if you have them, or cover with plastic wrap. They’ll keep in the fridge for up to a week, though I doubt they’ll last that long.
Cooking Tips & Techniques
I’ve made this recipe probably a dozen times now, and I’ve made every mistake in the book. Here’s what I learned so you don’t have to repeat my errors.
Temperature is everything. The biggest mistake people make is pouring warm gelatin over a layer that hasn’t fully set. Wait the full hour. I know it’s tempting to rush, but that hour is non-negotiable. I once tried to speed things up by only waiting 30 minutes and ended up with a cup that looked like orange mud with yellow streaks. Not cute.
Room temperature means room temperature. When I say let the gelatin mixture cool before pouring, I mean let it sit until it feels like bath water. If it’s still warm to the touch, it will melt the layer below. I ruined an entire batch this way because I got impatient and poured warm yellow over barely-set orange. The layers merged into a single orange-ish mess.
Use a spoon to pour. Hold a spoon upside down over the cup and pour the gelatin over the back of the spoon. This gently disperses the liquid so it doesn’t land with force and break through the set layer below. It sounds fussy, but it works. I skipped this step once and the yellow liquid punched a hole right through the orange layer.
Don’t skip the bloom. For the unflavored gelatin, letting it sit in cold water for a few minutes before adding hot water ensures it dissolves completely. If you skip this, you’ll end up with little chewy bits in your white layer. Not the end of the world, but not ideal.
Make extra white layer. The white layer tends to be slightly less in volume than the colored layers because of the sweetened condensed milk. I usually make about 25% more white mixture to ensure I have enough to fill the cups. Leftover white layer can be poured into a small dish and eaten as plain jello later.
Plan your timing. Each layer needs about an hour to set. Three layers means three hours of active fridge time, plus cooling time between layers. I usually start these in the morning and let them set all day. If I start after dinner, they’re ready by lunch the next day.
Variations & Adaptations
Once you’ve mastered the basic candy corn layers, there’s a whole world of variations to explore. Here are a few I’ve tried and loved:
Berry Candy Corn Cups
Swap the orange and yellow layers with strawberry and lemon. The red and yellow combination still gives a candy corn vibe, but with a fruitier flavor profile. I made these for a summer party and they were a hit, even though candy corn is traditionally a fall thing.
Vegan Version
Use vegan gelatin alternatives like agar-agar or carrageenan-based jello. The texture is slightly different—firmer and less jiggly—but the layered effect works the same. Use coconut cream instead of sweetened condensed milk for the white layer. I tested this with agar-agar and found it sets faster, so reduce the fridge time to about 30 minutes per layer.
Mini Shot Cups
Make these in 2 oz shot cups for party appetizers or dessert shooters. The layers will be thinner, so reduce setting time to about 20 minutes per layer. These are perfect for Halloween parties where people want something small and sweet.
Sugar-Free Option
Use sugar-free gelatin mixes and sugar-free sweetened condensed milk (or a mixture of unflavored gelatin with a sugar substitute). The texture is slightly less firm, but the visual effect is the same. I’ve made these for diabetic family members and they were just as appreciated as the full-sugar version.
Layered Parfait Style
Instead of setting each layer in the same cup, make each color separately in a baking dish, cut them into cubes, and layer the cubes in a cup. This gives a different look—more like a jello parfait—and you don’t have to wait for layers to set. It’s faster but less impressive visually.
My personal favorite variation is adding a splash of coconut extract to the white layer. It gives a subtle tropical note that pairs beautifully with the fruit flavors. I discovered this by accident when I ran out of vanilla and grabbed coconut extract instead. Now I do it on purpose.
Serving & Storage Suggestions
These cups are best served cold, straight from the fridge. The texture is perfect when they’ve had at least 4 hours to set, but overnight is ideal. I like to serve them on a tray with the lids off so everyone can see the layers before they dig in.
Presentation ideas:
- Arrange the cups on a platter with fall leaves or mini pumpkins around them for a seasonal centerpiece.
- Top each cup with a dollop of whipped cream and a sprinkle of orange or yellow sprinkles.
- Serve alongside other fall desserts like pumpkin pie or apple crisp for a full spread.
Storage:
- Keep cups covered with lids or plastic wrap in the refrigerator.
- They’ll stay fresh for up to 7 days, though the texture is best within the first 3 days.
- Do not freeze. Freezing destroys the gelatin structure and turns the cups into a watery mess when thawed.
- If you’re transporting them, keep them cold with an ice pack in a cooler. They can sit at room temperature for about an hour without issue, but longer than that and they’ll start to soften.
Reheating (not recommended):
These are meant to be eaten cold. If you somehow end up with cups that didn’t set properly, you can reheat them gently in the microwave to dissolve the gelatin again and re-chill. But honestly, if they didn’t set the first time, something went wrong with the measurements or timing, and reheating rarely fixes it completely.
One thing I’ve noticed: the flavors actually meld together slightly after a day or two in the fridge. The orange and yellow layers start to share their flavors, creating a subtle fruit blend that’s different from when they were freshly made. Some people prefer this. I like them both ways.
Nutritional Information & Benefits
These jello cups are a treat, so I’m not going to pretend they’re health food. But here’s the honest breakdown:
Per serving (one 9 oz cup, assuming 6 servings per batch):
- Calories: approximately 180-200
- Carbohydrates: 35-40g
- Sugar: 30-35g
- Protein: 4-5g
- Fat: 2-3g (mostly from sweetened condensed milk)
The good news: jello is naturally low in fat and contains some protein from the gelatin. Gelatin is also a source of collagen, which supports joint health and skin elasticity. It’s not a superfood by any means, but it’s not empty calories either.
The sweetened condensed milk adds calcium and a small amount of vitamin A. If you use the sugar-free version, you can cut the sugar content significantly, though the texture will be slightly different.
These are not suitable for vegans in their standard form (gelatin is animal-derived), but the agar-agar version works well for plant-based diets. They’re naturally gluten-free, dairy-free (if you skip the sweetened condensed milk), and nut-free.
I’m not a nutritionist, and I don’t pretend to be one. But I will say that these cups are a fun, occasional treat that brings joy to fall gatherings. Everything in moderation, right?
Conclusion
These Easy Candy Corn Layered Jello Cups are one of those recipes that looks way more impressive than it actually is. Three simple ingredients, a little patience, and you’ve got a dessert that stops people in their tracks. I’ve made them for Halloween parties, Thanksgiving dinners, and random Tuesday afternoons when I needed something colorful in my life.
The first time you nail those perfect layers—orange, yellow, white, all crisp and defined—you’ll feel like a kitchen wizard. And honestly? You kind of are. It takes practice to get the timing right, but once you do, this recipe becomes second nature.
I’d love to hear how yours turn out. Did you try a variation? Did your layers come out perfect on the first try (unlike mine)? Drop a comment below and let me know. And if you’re looking for more fall dessert inspiration, you might enjoy our Easy Crispy Lemon Rosemary Salmon Sheet Pan Dinner for a savory option, or our Creamy Make-Ahead Vegan Chocolate Avocado Pudding for another easy dessert that looks fancy without the fuss.
Happy layering, friends. And remember: patience is the secret ingredient.
Frequently Asked Questions
Can I use different flavors for the layers?
Absolutely. The candy corn look comes from the colors, not the flavors. You can use any combination of orange, yellow, and white/clear gelatin flavors. Just make sure the colors are distinct enough to see the layers. Avoid using two similar colors like peach and yellow—they’ll blend together visually.
Why did my layers bleed into each other?
This happens when you pour the next layer too soon or when the new layer is too warm. Make sure each layer is fully set (about 1 hour in the fridge) and that your next gelatin mixture is cooled to room temperature before pouring. Using the spoon trick also helps prevent the liquid from disturbing the set layer.
Can I make these without sweetened condensed milk?
Yes, but the white layer won’t be as opaque or creamy. You can substitute with evaporated milk plus a tablespoon of sugar, or use plain unflavored gelatin mixed with water and a splash of vanilla. The texture will be more like clear jello than creamy white, but it still works visually.
How far in advance can I make these?
You can make them up to 5 days in advance. Store them covered in the refrigerator. The texture is best within the first 3 days, but they’ll still be good for up to a week. If you’re making them for a party, I recommend making them the day before so they’re fully set and ready to serve.
Can I use sugar-free gelatin?
Yes, sugar-free gelatin works fine. The texture is slightly less firm, but the layered effect is the same. For the white layer, use sugar-free sweetened condensed milk or a mixture of unflavored gelatin with a sugar substitute like stevia or monk fruit. The calories and sugar content will be significantly lower.
Pin This Recipe!
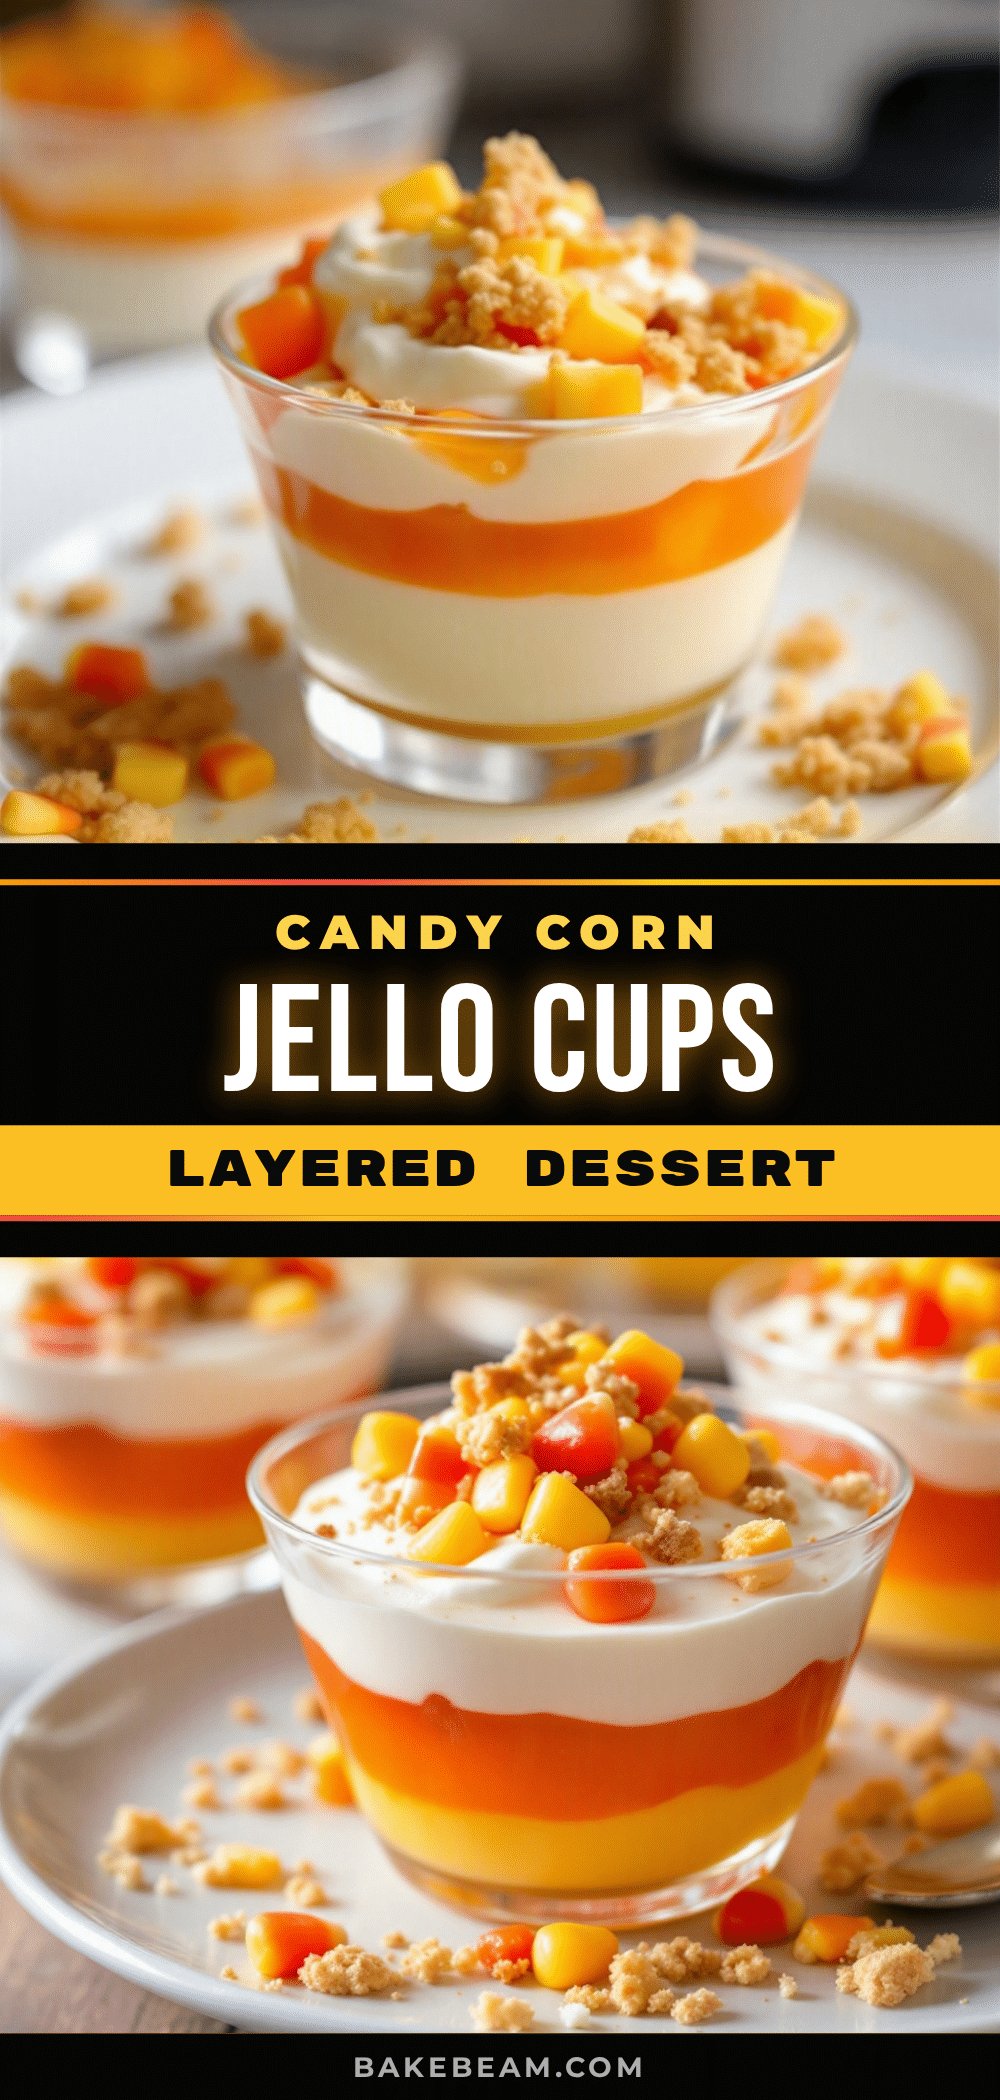
Easy Candy Corn Layered Jello Cups: Perfect Fall Dessert
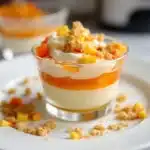
These Easy Candy Corn Layered Jello Cups are a fun and festive fall dessert that looks way more impressive than it actually is. With just three simple ingredients and a little patience, you can create beautiful, crisp layers of orange, yellow, and white that mimic the classic candy corn.
- Prep Time: 15 minutes
- Cook Time: 0 minutes
- Total Time: 5 hours 30 minutes (including setting time)
- Yield: 6 servings 1x
- Category: Dessert
- Cuisine: American
Ingredients
- 1 box (3 oz) orange gelatin
- 1 box (3 oz) yellow or lemon gelatin
- 1 box (3 oz) unflavored gelatin
- 3 cups boiling water (divided, 1 cup per layer)
- 1 cup cold water (divided, 1/3 cup per layer)
- 1/2 cup sweetened condensed milk
- 1 teaspoon vanilla extract (optional)
Instructions
- Prepare your workspace and cups: Set out clear plastic cups on a baking sheet or tray. Arrange them so they’re not touching each other.
- Make the orange layer (bottom): In a small bowl, empty the orange gelatin powder. Pour in 1 cup of boiling water and whisk until the powder is completely dissolved, about 2 minutes. Add 1/3 cup cold water and stir. Let sit at room temperature for about 5 minutes to cool slightly. Pour the orange mixture evenly into your cups, filling each about one-third full. Refrigerate for 45 minutes to 1 hour until firm.
- Make the yellow layer (middle): In a clean bowl, empty the yellow or lemon gelatin powder. Add 1 cup boiling water and whisk until dissolved. Add 1/3 cup cold water and stir. Let sit at room temperature for 15-20 minutes until cooled. Once the orange layer is firm, carefully pour the yellow over the orange using the back of a spoon to gently distribute. Refrigerate for another 45 minutes to 1 hour.
- Make the white layer (top): In a clean bowl, empty the unflavored gelatin powder. Add 1/2 cup cold water and let sit for 2 minutes to bloom. Then pour in 1/2 cup boiling water and whisk until dissolved. Add the sweetened condensed milk and vanilla extract if using, and stir until smooth. Add another 1/3 cup cold water and stir. Let cool to room temperature, about 15 minutes. Pour carefully over the set yellow layer using the spoon trick. Refrigerate for at least 4 hours, preferably overnight.
- Serve: Once fully set, these are ready to eat. Pop the lids on or cover with plastic wrap. They’ll keep in the fridge for up to a week.
Notes
Temperature is everything. Wait the full hour for each layer to set. Room temperature means room temperature—let gelatin mixtures cool to bath water temperature before pouring. Use a spoon to pour to avoid disturbing set layers. Don’t skip the bloom for unflavored gelatin. Make extra white layer as it tends to be slightly less in volume. Plan your timing—each layer needs about an hour to set.
Nutrition
- Serving Size: 1 cup (9 oz)
- Calories: 190
- Sugar: 33
- Sodium: 120
- Fat: 2.5
- Saturated Fat: 1.5
- Carbohydrates: 38
- Protein: 4.5
Keywords: candy corn jello cups, layered jello, fall dessert, Halloween dessert, easy jello recipe, gluten-free dessert