Third batch in two weeks, and I finally stopped overstuffing them. That was my problem, you see—I kept trying to cram in as much filling as humanly possible, like I was competing in some invisible breakfast burrito championship. The tortillas would split, the eggs would escape, and I’d be left standing over the counter at 7 AM, fork in one hand, broken burrito in the other, wondering why I couldn’t just get this right.
It started because I was tired of the morning scramble—literally. I’d wake up, stare into the fridge, and realize I had nothing quick that didn’t involve a skillet and fifteen minutes I didn’t have. So I did what any reasonable person would do: I made breakfast burritos. A lot of them. And then I made them again, tweaking the filling ratios, testing how long they’d keep, figuring out which reheating method didn’t turn the eggs into rubber.
These Easy Freezer Breakfast Burritos for Meal Prep are the result of that slightly unhinged deep dive. They’re not fancy. They’re not complicated. But they work—morning after morning, straight from the freezer to your plate in under two minutes. The trick, I learned, is treating the assembly like a science experiment (without the lab coat). Drain your veggies well. Don’t overfill. And for the love of all things crispy, wrap them tight.
Honestly, this recipe stuck because it solved a real problem. Not a hypothetical one, not a “wouldn’t it be nice” kind of thing—a genuine, every-single-morning struggle. And now, when I pull one of these from the freezer, unwrap the parchment, and hear that microwave hum, I feel a little smug. In the best way.
Why You’ll Love This Recipe
I’ve tested these burritos through three different jobs, two time zones, and one particularly chaotic holiday season. They’ve survived freezer burn experiments (mine), toddler approval tests (my nephew’s), and a few truly questionable reheating attempts. Here’s why they work:
- Quick & Easy: From freezer to table in 90 seconds in the microwave, or about 8 minutes in the oven if you want that crispy exterior. No morning prep, no dirty dishes.
- Simple Ingredients: Eggs, cheese, tortillas, and whatever veggies or protein you have on hand. No fancy grocery runs required—I’ve made these with leftover taco meat and sad-looking bell peppers before.
- Perfect for Meal Prep: Make a dozen on Sunday, and you’ve got breakfast (or lunch, or dinner) sorted for two weeks. They’re the ultimate busy-morning hack.
- Crowd-Pleaser: I’ve served these to picky eaters, health-conscious friends, and my dad who swears he “doesn’t do breakfast.” Everyone goes back for seconds.
- Unbelievably Customizable: The base recipe is just a starting point. Swap in black beans, add roasted sweet potatoes, go full veggie—it’s forgiving.
What makes these different from the sad, soggy freezer burritos you’ve had before? The technique. I drain the scrambled eggs slightly (yes, really) and let the veggie mixture cool completely before assembly. That one step—letting everything cool—keeps the tortillas from turning into a steamy mess in the freezer. It’s a small thing, but it makes all the difference between a burrito that reheats beautifully and one that reminds you of cafeteria food.
This isn’t just a recipe—it’s a morning survival strategy. The kind that makes you feel like you’ve got your act together, even when you absolutely do not.
What Ingredients You Will Need
This recipe uses simple, mostly pantry-friendly ingredients to deliver a satisfying breakfast that actually holds up to freezing and reheating. The key is choosing ingredients that won’t release too much moisture during storage.
- Large eggs (12): The base of our filling. Use fresh eggs for best texture—older eggs can turn watery when scrambled.
- Milk or cream (¼ cup / 60 ml): Adds richness to the eggs. I use whole milk, but any dairy or unsweetened plant-based milk works.
- Breakfast sausage or bacon (1 lb / 450 g): I prefer turkey breakfast sausage for a lighter option, but pork sausage or crispy bacon bits are fantastic. (Pro tip: drain the grease well—excess fat makes soggy burritos.)
- Bell peppers (2 medium, diced): Any color works. Red and yellow add sweetness; green gives a sharper flavor.
- Onion (1 medium, diced): Yellow or white onion. Cook until translucent to mellow the bite.
- Frozen shredded hash browns (2 cups / 300 g): The secret to texture. They add bulk and absorb excess moisture. Thaw and pat dry before using—trust me on this.
- Shredded cheddar or Monterey Jack cheese (2 cups / 200 g): Use freshly shredded for better melting. Pre-shredded bags have anti-caking agents that don’t melt as smoothly.
- Large flour tortillas (10-inch / 25 cm): Burrito-sized, not taco-sized. I recommend [Mission brand] for flexibility—they roll without cracking even when cold.
- Salt and black pepper: To taste. Don’t skimp—eggs need seasoning.
- Optional add-ins: Black beans (rinsed and drained), diced green chiles, chopped cilantro, or hot sauce.
For substitutions: Use vegan sausage and plant-based cheese for a dairy-free version. Swap hash browns with cooked quinoa or cauliflower rice for a lower-carb option—just make sure they’re well-drained. If you’re avoiding gluten, look for large gluten-free tortillas (they’re more delicate, so handle gently).
Equipment Needed
- Large skillet (12-inch / 30 cm): For cooking the eggs and veggie-sausage mixture. Nonstick makes cleanup easier.
- Mixing bowls: One large for the egg mixture, one medium for combining fillings.
- Cutting board and sharp knife: For dicing veggies and meat.
- Spatula: Wooden or silicone—avoid metal on nonstick pans.
- Baking sheet: For cooling the filling before assembly. Speeds up the process significantly.
- Parchment paper or foil: For wrapping each burrito individually. Parchment is my go-to—it doesn’t tear and lets you microwave directly.
- Freezer-safe zip-top bags or containers: For storing the wrapped burritos. I use gallon-sized bags and squeeze out as much air as possible.
No need for fancy equipment here. If you don’t have a baking sheet, a large plate works for cooling. I’ve even used wax paper in a pinch (it’s less sturdy but gets the job done).
Preparation Method
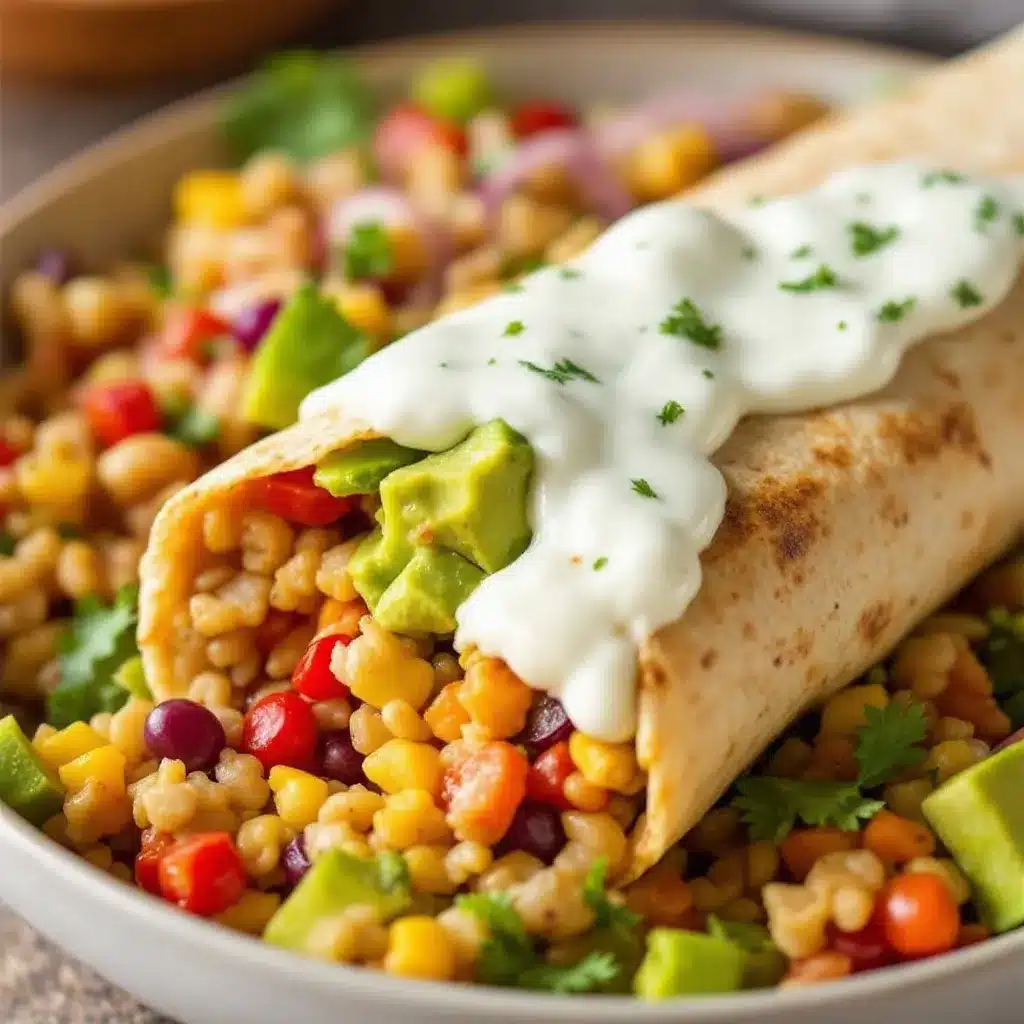
- Cook the sausage or bacon: In a large skillet over medium heat, cook your protein until browned and cooked through. Break it into small crumbles as it cooks. Transfer to a paper towel-lined plate to drain. (Don’t skip this—grease is the enemy of freezer burritos.)
- Sauté the veggies: In the same skillet (leave a tablespoon of rendered fat if using sausage, or add oil if using bacon), cook the diced onion and bell peppers over medium heat for 4-5 minutes until softened. Add the thawed hash browns and cook another 3-4 minutes, stirring occasionally. Season with salt and pepper.
- Scramble the eggs: In a large bowl, whisk the eggs with milk, ½ teaspoon salt, and ¼ teaspoon pepper. Pour into the skillet with the veggies (remove the veggie mixture first if your skillet is crowded). Cook over medium-low heat, stirring gently with a spatula, until just set but still soft—about 4-5 minutes. They’ll continue cooking slightly from residual heat.
- Combine and cool: Transfer the scrambled eggs and veggie mixture to a baking sheet or large bowl. Add the cooked sausage and shredded cheese. Stir gently to combine. Here’s the important part: let it cool completely. Spread it in a thin layer on the baking sheet and let it sit for 15-20 minutes. Warm filling will steam the tortillas and create ice crystals in the freezer.
- Assemble the burritos: Lay a tortilla on a clean surface. Spoon about ¾ cup of the cooled filling into the center, forming a log shape. Fold the sides inward, then roll tightly from the bottom, tucking the filling as you go. Aim for a snug, uniform roll—loose burritos fall apart when reheated.
- Wrap individually: Place each burrito seam-side down on a piece of parchment paper (about 12 inches square). Fold the parchment over the burrito, tuck the ends, and roll like you’re wrapping a present. Secure with a piece of tape if needed. The wrapping should be tight enough to hold its shape but not so tight that the tortilla compresses.
- Freeze: Place the wrapped burritos in a single layer on a baking sheet and freeze for 1-2 hours until solid. Transfer to a freezer-safe bag, removing as much air as possible. Label with the date—they’re best within 3 months.
Sensory cue: The filling should look like a cohesive, slightly moist (not wet) mixture. If you see liquid pooling, drain it off before assembling. The tortillas should feel pliable—if they crack, microwave them for 10 seconds to soften.
Cooking Tips & Techniques
I’ve made every mistake in the book with freezer burritos. Here’s what I learned the hard way:
Don’t overfill. I know it’s tempting, but ¾ cup is the sweet spot. More than that, and you’ll struggle to roll them tightly—plus the tortilla might split during reheating. Less is actually more here.
Cooling isn’t optional. That 15-20 minute cool-down is what separates good freezer burritos from great ones. Warm filling creates condensation inside the wrapper, which turns into ice crystals. Ice crystals = soggy burritos. I once skipped this step because I was in a rush, and I regretted it every morning for the next two weeks.
Double-wrap for longer storage. If you’re planning to keep these for more than a month, wrap each burrito in parchment paper, then again in aluminum foil. The extra layer prevents freezer burn. I learned this after finding a sad, frostbitten burrito in the back of my freezer three months later.
Label everything. I use a permanent marker to write the date and filling type on the parchment. “Sausage & cheddar, Feb 12” sounds obsessive, but when you have a freezer full of identical-looking burritos, you’ll thank me.
Reheating matters: Microwave: Remove parchment, wrap in a damp paper towel, and microwave for 60-90 seconds (flip halfway). Oven: Wrap in foil and bake at 350°F for 15-18 minutes. Air fryer: 350°F for 8-10 minutes, flipping once. The microwave is fastest, but the oven gives you a crispy exterior.
Variations & Adaptations
- Veggie Lover’s Burrito: Skip the meat and double the veggies. Add black beans, corn, and diced zucchini for extra bulk. Use smoked paprika or cumin for depth.
- Southwest Style: Add ½ cup drained black beans, ¼ cup diced green chiles, and a handful of chopped cilantro to the filling. Top with salsa or avocado when serving.
- Low-Carb / Keto: Replace hash browns with riced cauliflower (cook and drain well). Use large low-carb tortillas or lettuce wraps. Add extra cheese for fat.
- Spicy Chorizo Version: Swap breakfast sausage for Mexican chorizo (remove casing). Add a dash of hot sauce to the eggs and top with pickled jalapeños before rolling.
- Breakfast Bowl Alternative: Skip the tortilla entirely and layer the filling over greens or quinoa. Great for gluten-free eaters or lighter mornings.
I once made a batch with leftover roasted sweet potatoes and crumbled feta—it was incredible. Don’t be afraid to experiment; the base recipe is a canvas.
Serving & Storage Suggestions
These burritos are designed to be eaten straight from the freezer, but here’s how to make each serving feel intentional:
Serving: Unwrap and reheat using your preferred method. Serve with a side of salsa, sour cream (or Greek yogurt), and fresh cilantro. For a complete breakfast, add a piece of fruit or a small smoothie.
Storage: Keep frozen for up to 3 months in an airtight bag. To thaw overnight, transfer a burrito to the fridge (unwrap first) and reheat in the morning—it’ll be even faster.
Reheating tips: If microwaving, the damp paper towel is non-negotiable—it creates steam that keeps the eggs from turning rubbery. For oven reheating, let the burrito sit at room temperature for 5 minutes before baking for more even heating.
Flavor development: Honestly, these burritos taste better after a week in the freezer. The flavors meld together, and the textures settle into something cohesive. Day 1 burritos are good; day 10 burritos are great.
If you’re making these for a specific event (camping trip, busy work week, post-partum meals), double the batch. They freeze beautifully and are a lifesaver when you don’t have energy to cook.
Nutritional Information & Benefits
Per burrito (based on sausage, cheddar, and hash browns): Approximately 380-420 calories, 22g protein, 28g carbs, 20g fat. Values vary based on your specific ingredients and portion sizes.
Health benefits: Eggs provide high-quality protein and choline for brain health. Bell peppers are packed with vitamin C. If you use turkey sausage, you’re getting lean protein with less saturated fat. The hash browns add resistant starch (especially if cooled and reheated), which is great for gut health.
Dietary considerations: This recipe can be made gluten-free (use GF tortillas), dairy-free (use plant-based cheese and milk), or lower-carb (swap hash browns for cauliflower rice). For a vegetarian version, skip the meat and add beans or tofu scramble.
Potential allergens: Eggs, dairy, gluten (in tortillas). Adjust as needed for your dietary needs.
I’m not a nutritionist, but I’ve found these burritos to be a balanced, satisfying breakfast that doesn’t leave me crashing mid-morning. The protein and fiber keep you full, and the portion size is just right—not too heavy, not too light.
Conclusion
These Easy Freezer Breakfast Burritos for Meal Prep are the kind of recipe that quietly changes your mornings. Not in a dramatic, life-altering way—more like a gentle shift from chaos to calm. You wake up, you grab a burrito, you heat it, you eat it. No decisions, no mess, no stress.
I’ve customized this recipe a dozen different ways, and every version has been good. That’s the beauty of a solid base—you can make it your own without worrying if it’ll work. So go ahead: swap in your favorite protein, add extra veggies, or load it up with cheese. The freezer is forgiving.
If you make these (and I really hope you do), let me know how they turn out. Drop a comment below with your favorite filling combination, or tag me in your burrito assembly photos. I love seeing how people make recipes their own. And if you’re looking for more make-ahead meal ideas, check out these fresh quinoa and kale power bowls or this tender slow cooker honey garlic chicken for more weeknight wins.
Happy prepping, friends. Your future self (the one who hits snooze three times) will thank you.
Frequently Asked Questions
Can I use corn tortillas instead of flour?
You can, but they’re smaller and more prone to cracking. If using corn, warm them briefly in a dry skillet to make them pliable, and use less filling—about ½ cup per tortilla.
How long do these keep in the freezer?
They’re best within 3 months. After that, the texture may degrade slightly (the tortillas can get a bit dry), but they’re still safe to eat if properly wrapped.
Can I reheat these without a microwave?
Absolutely. Oven at 350°F for 15-18 minutes (wrap in foil first) or air fryer at 350°F for 8-10 minutes. Both methods give you a crispier exterior than the microwave.
My burritos came out soggy after reheating. What went wrong?
Two common culprits: the filling wasn’t cooled completely before assembly, or the veggies/meat weren’t drained well enough. Next time, spread the filling on a baking sheet and let it sit for a full 20 minutes before rolling.
Can I make these vegan?
Yes! Use a tofu scramble instead of eggs (crumble firm tofu and sauté with turmeric, nutritional yeast, and black salt), vegan sausage or black beans, and dairy-free cheese. The assembly and freezing instructions stay the same.
Pin This Recipe!
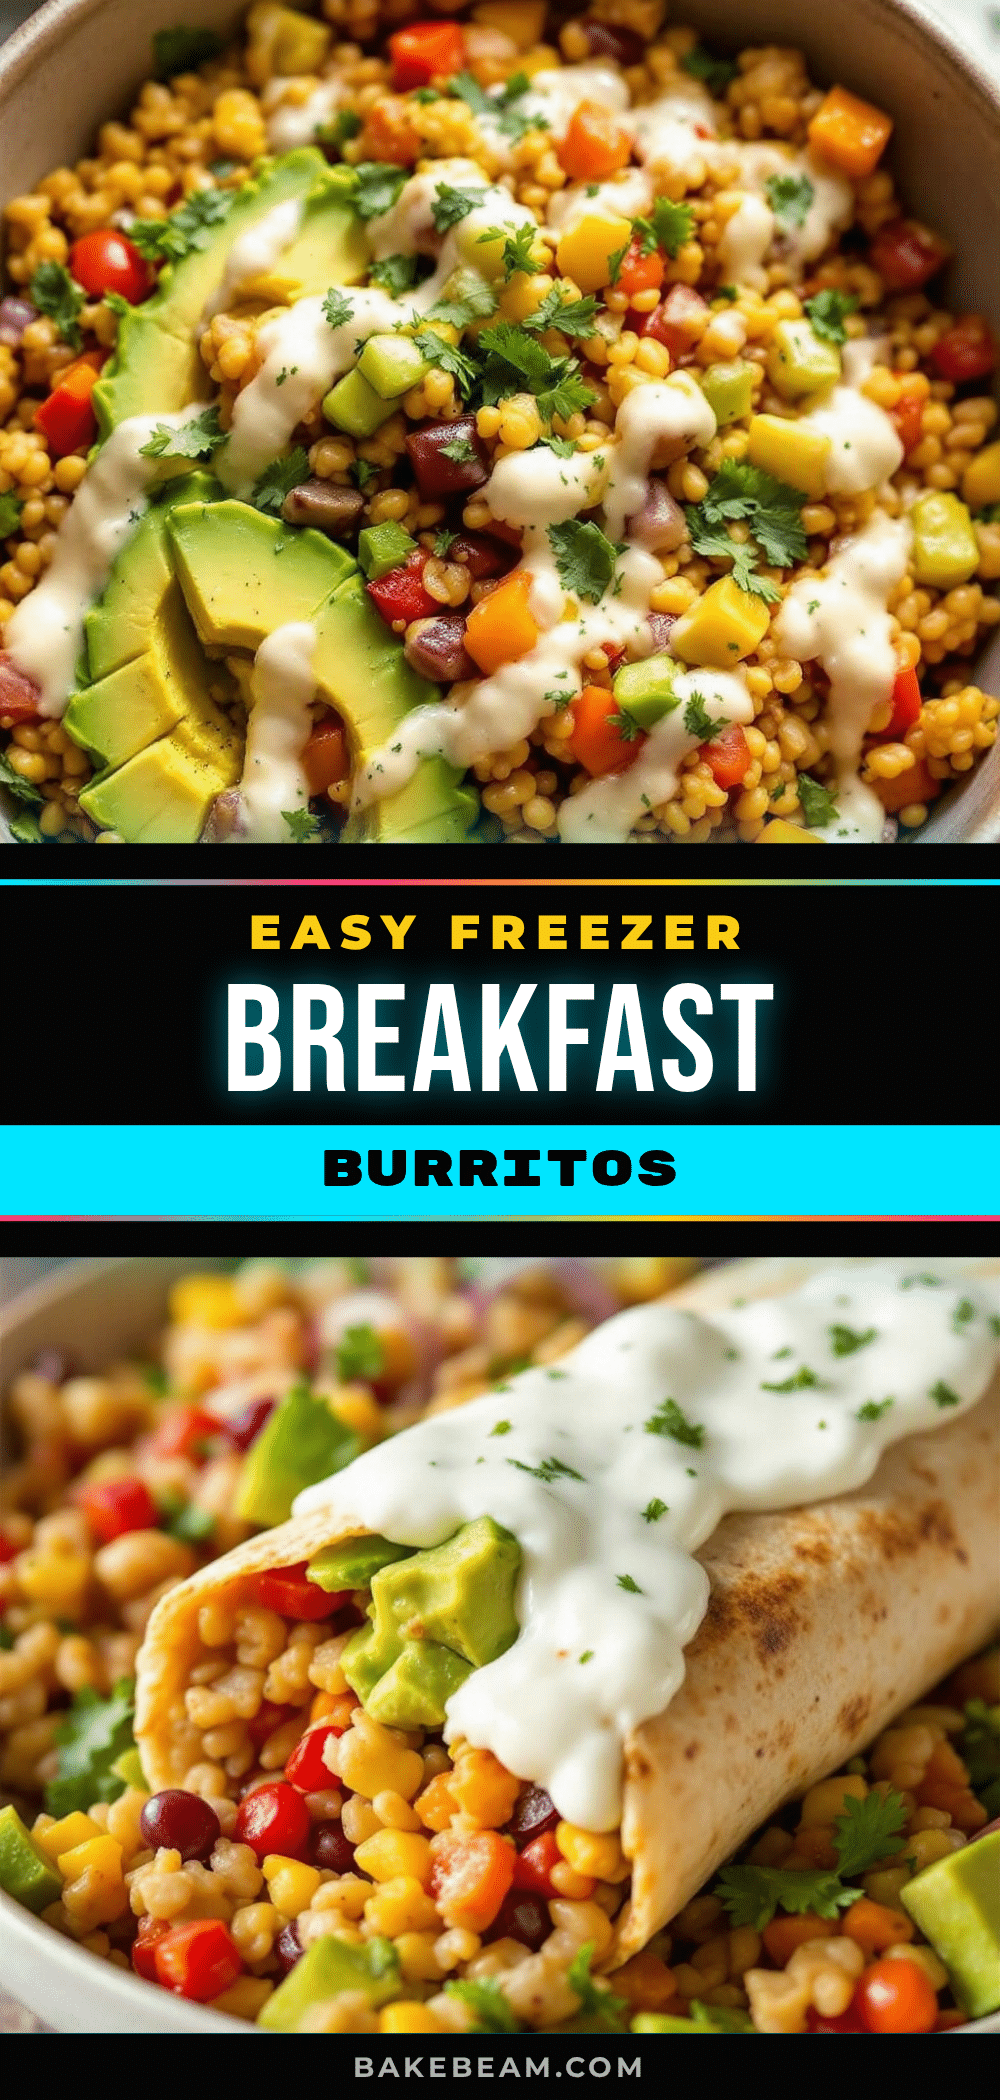
Easy Freezer Breakfast Burritos: Best Meal Prep
These Easy Freezer Breakfast Burritos for Meal Prep are the ultimate morning hack—straight from the freezer to your plate in under two minutes. Packed with eggs, cheese, sausage, and veggies, they’re customizable, freezer-friendly, and perfect for busy mornings.
- Prep Time: 20 minutes
- Cook Time: 20 minutes
- Total Time: 40 minutes (plus 15-20 minutes cooling and 1-2 hours freezing)
- Yield: 8-10 servings 1x
- Category: Breakfast
- Cuisine: American
Ingredients
- 12 large eggs
- 1/4 cup milk or cream (60 ml)
- 1 lb breakfast sausage or bacon (450 g)
- 2 medium bell peppers, diced
- 1 medium onion, diced
- 2 cups frozen shredded hash browns, thawed and patted dry (300 g)
- 2 cups shredded cheddar or Monterey Jack cheese (200 g)
- 8–10 large flour tortillas (10-inch / 25 cm)
- Salt and black pepper to taste
- Optional: black beans, diced green chiles, chopped cilantro, hot sauce
Instructions
- Cook the sausage or bacon: In a large skillet over medium heat, cook your protein until browned and cooked through. Break it into small crumbles as it cooks. Transfer to a paper towel-lined plate to drain.
- Sauté the veggies: In the same skillet (leave a tablespoon of rendered fat if using sausage, or add oil if using bacon), cook the diced onion and bell peppers over medium heat for 4-5 minutes until softened. Add the thawed hash browns and cook another 3-4 minutes, stirring occasionally. Season with salt and pepper.
- Scramble the eggs: In a large bowl, whisk the eggs with milk, 1/2 teaspoon salt, and 1/4 teaspoon pepper. Pour into the skillet with the veggies (remove the veggie mixture first if your skillet is crowded). Cook over medium-low heat, stirring gently with a spatula, until just set but still soft—about 4-5 minutes.
- Combine and cool: Transfer the scrambled eggs and veggie mixture to a baking sheet or large bowl. Add the cooked sausage and shredded cheese. Stir gently to combine. Let it cool completely—spread in a thin layer on the baking sheet and let it sit for 15-20 minutes.
- Assemble the burritos: Lay a tortilla on a clean surface. Spoon about 3/4 cup of the cooled filling into the center, forming a log shape. Fold the sides inward, then roll tightly from the bottom, tucking the filling as you go.
- Wrap individually: Place each burrito seam-side down on a piece of parchment paper (about 12 inches square). Fold the parchment over the burrito, tuck the ends, and roll like you’re wrapping a present. Secure with a piece of tape if needed.
- Freeze: Place the wrapped burritos in a single layer on a baking sheet and freeze for 1-2 hours until solid. Transfer to a freezer-safe bag, removing as much air as possible. Label with the date—they’re best within 3 months.
Notes
Cool the filling completely before assembly to prevent soggy tortillas. Don’t overfill—3/4 cup is the sweet spot. For longer storage, double-wrap in parchment and foil. Reheat in microwave (60-90 seconds with damp paper towel), oven (350°F for 15-18 minutes), or air fryer (350°F for 8-10 minutes).
Nutrition
- Serving Size: 1 burrito
- Calories: 400
- Sugar: 3
- Sodium: 650
- Fat: 20
- Saturated Fat: 8
- Carbohydrates: 28
- Fiber: 2
- Protein: 22
Keywords: freezer breakfast burritos, meal prep breakfast, make ahead breakfast, breakfast burritos, freezer friendly breakfast