My niece showed up at my door on a random Tuesday in October, not for a visit, but because she needed 48 spider-shaped cookies for her class party by the next morning. The only thing in my pantry was three different kinds of chocolate chips, a bag of marshmallows I’d forgotten about, and some pretzel sticks from a movie night two weeks ago. I looked at her panicked face, then at the clock, and realized there was no way we were making 48 shaped cookies before midnight. So I grabbed a baking sheet, melted the dark chocolate, and started drizzling white chocolate in circles. Twenty minutes later, we had this gorgeous spider web bark cooling on the counter, and she had her class treat sorted. Honestly, it looked way more impressive than any cookie ever could, and we both laughed at how the most stressful baking moment of the year turned into the easiest Halloween recipe I’ve ever made. That’s how this easy spider web chocolate bark for Halloween became my go-to for every spooky gathering since.
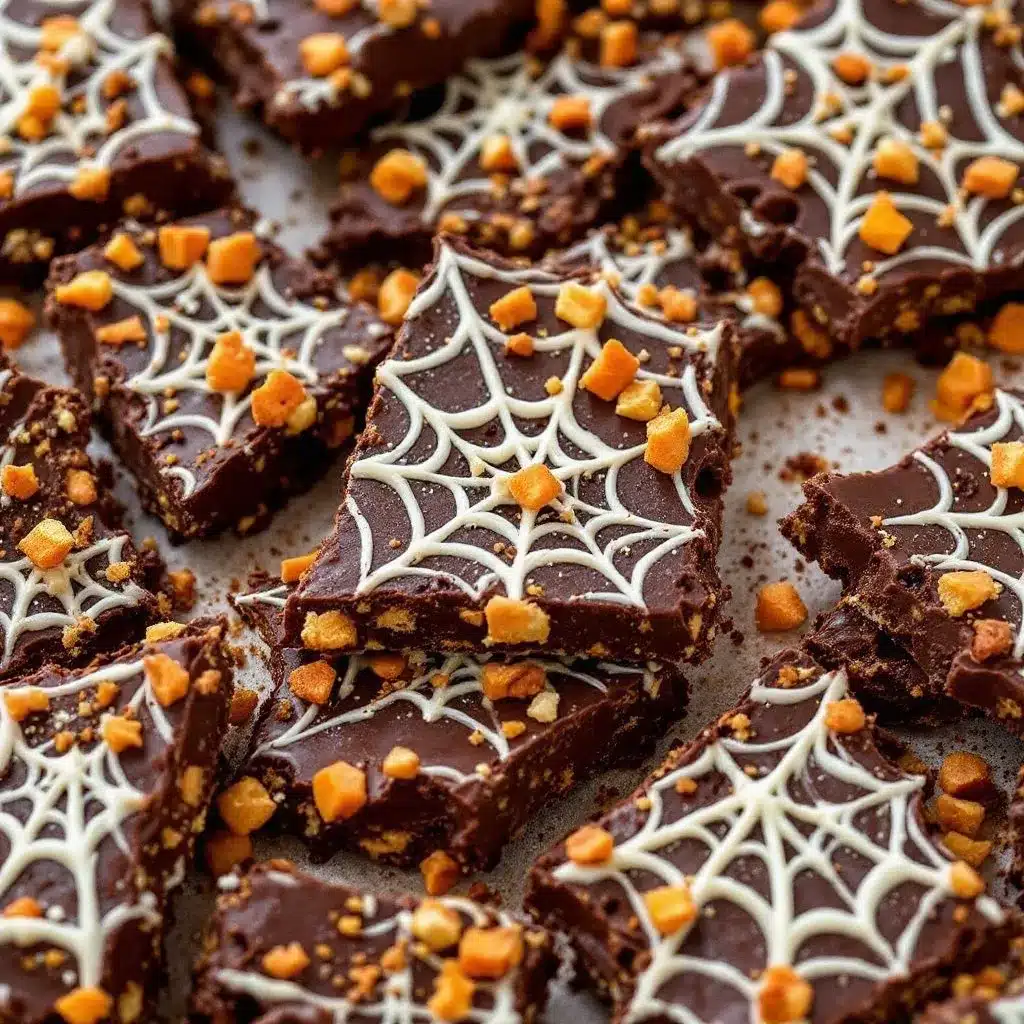
I’m not gonna lie—there’s something deeply satisfying about making something that looks like it took hours when it actually took minutes. This bark has that perfect Halloween vibe without the stress. The dark chocolate base, the delicate white chocolate web, and those little candy spiders sitting on top? It’s creepy cute in the best way. And the best part? You can make it with your kids in under 30 minutes, or whip it up solo while watching Hocus Pocus for the hundredth time. Either way, it works.
Look, I’ve made a lot of Halloween treats over the years. Some were complicated. Some were disasters. This one? It’s the one I keep coming back to because it’s foolproof, endlessly customizable, and always gets that “wait, you made this?” reaction. And honestly, that never gets old.
Why You’ll Love This Recipe
I’ve tested this bark more times than I care to admit—mostly because I kept eating the test batches. But through all that chocolate-fueled research, I figured out exactly what makes this version work. Here’s why this easy spider web chocolate bark for Halloween deserves a spot on your holiday baking list:
- Quick & Easy: From start to finish, this takes about 20 minutes of active time. Then just let it set in the fridge. Perfect for last-minute Halloween party prep or when the kids suddenly need a class treat tomorrow morning.
- Simple Ingredients: You likely have most of these in your pantry right now. Chocolate chips, a bit of oil, and some Halloween candy decorations. No special baking skills required.
- Perfect for Halloween Parties: This bark looks incredible on a dessert table, works for classroom parties, and makes a fantastic homemade gift for neighbors or teachers. It’s basically the MVP of Halloween treats.
- Crowd-Pleaser: Kids go nuts for the spider decorations, and adults appreciate that it’s not overly sweet. The dark chocolate balances the candy toppings perfectly.
- Unbelievably Delicious: The texture is where this shines—snappy dark chocolate, creamy white chocolate web, and crunchy little candy bits in every bite. It’s addictive in the best way.
What makes this different from other chocolate bark recipes? It’s the technique for the spider web. Instead of trying to pipe perfect lines (which always stress me out), you use a simple drizzle-and-drag method that creates the web pattern naturally. It’s forgiving, looks professional, and honestly, the imperfections make it look more like a real spider web anyway. I learned this trick after ruining three batches trying to be too precise. Sometimes the messy way is actually the better way.
This recipe isn’t just good—it’s the kind that makes you close your eyes after the first bite. It’s Halloween comfort food: spooky looking, but deeply satisfying. Perfect for impressing guests without breaking a sweat, or turning a simple Tuesday night into something memorable.
What Ingredients You Will Need
This recipe uses simple, pantry-friendly ingredients to create something that looks way more complicated than it actually is. Here’s what you’ll need to make this easy spider web chocolate bark for Halloween:
For the Chocolate Base
- 12 ounces dark chocolate chips or chopped dark chocolate (I prefer Ghirardelli 60% cacao for the best balance of sweetness and richness)
- 1 teaspoon coconut oil or vegetable oil (helps the chocolate melt smoothly and gives the bark a nice snap when it sets)
For the Spider Web Design
- 6 ounces white chocolate chips or chopped white chocolate (use a good quality brand like Guittard or Ghirardelli—cheap white chocolate can seize up when melted)
- 1/2 teaspoon coconut oil or vegetable oil (same reason—smooth melting is key here)
For Decoration
- Assorted Halloween candy spiders or candy eyes (I found a bag of plastic-free chocolate spiders at Target, but candy eyes work great too)
- Optional: orange and black sprinkles, chopped pretzels, or crushed Oreos (for extra crunch and color)
Ingredient Selection Tips: When choosing your chocolate, look for chips that are uniform in size—they melt more evenly. For the white chocolate, I’ve learned the hard way that white chocolate chips from the baking aisle often contain less cocoa butter and more stabilizers, which makes them harder to melt smoothly. If you can find a white chocolate bar and chop it yourself, that’s ideal. But honestly, good quality chips work fine if you add the oil and go slow.
Substitution Guidance: If dark chocolate isn’t your thing, milk chocolate works beautifully here too. For a dairy-free version, use dairy-free dark chocolate chips and dairy-free white chocolate (like Enjoy Life brand). The coconut oil helps everything melt smoothly regardless of the type. You can also swap the candy spiders for gummy worms, candy corn, or even small pretzel sticks arranged to look like spider legs—get creative with what you have on hand.
Equipment Needed
You don’t need fancy equipment for this recipe, which is part of why I love it. Here’s what you’ll need for this easy spider web chocolate bark for Halloween:
- Baking sheet or rimmed cookie sheet (standard half-sheet size works perfectly)
- Parchment paper or silicone baking mat (absolutely essential—the bark will stick to foil or wax paper)
- Medium microwave-safe bowls (two separate bowls for dark and white chocolate)
- Spatula or offset spatula (for spreading the chocolate evenly)
- Small piping bag or zip-top bag (for drizzling the white chocolate web)
- Toothpick or skewer (for dragging the web pattern—this is the secret tool)
- Refrigerator space (for setting the bark, about 20-30 minutes)
Budget-Friendly Options: If you don’t have a piping bag, a simple zip-top bag with the corner snipped off works just as well. No offset spatula? The back of a spoon does the job. And if you don’t have a silicone baking mat, parchment paper is perfectly fine—just make sure it’s good quality so it doesn’t curl up at the edges.
Personal Note: I’ve made this bark on everything from a cheap dollar-store baking sheet to a fancy half-sheet pan, and honestly, the results were identical. The key is the parchment paper, not the pan. Don’t skip that step, or you’ll be chiseling chocolate off your pan for days.
Preparation Method
Alright, let’s make this easy spider web chocolate bark for Halloween. I’ll walk you through every step, including the little tricks I’ve learned from making this about a dozen times.
- Prep your baking sheet. Line a rimmed baking sheet with parchment paper. Make sure the paper extends slightly over the edges—this gives you handles to lift the bark out later. Set aside.
- Melt the dark chocolate. Place 12 ounces of dark chocolate chips and 1 teaspoon of coconut oil in a medium microwave-safe bowl. Microwave in 30-second intervals, stirring well after each interval. It usually takes about 1.5 to 2 minutes total. Stop when most of the chips are melted and the mixture is smooth—don’t overheat or the chocolate will seize. (Trust me, I’ve ruined a batch this way and it’s heartbreaking.)
- Spread the base layer. Pour the melted dark chocolate onto the prepared baking sheet. Use your spatula to spread it into an even layer about 1/4-inch thick. Don’t stress about making it perfectly rectangular—organic, uneven edges look more rustic and natural. Aim for roughly a 9×13 inch rectangle.
- Melt the white chocolate. In a separate microwave-safe bowl, combine 6 ounces of white chocolate chips with 1/2 teaspoon of coconut oil. Microwave in 20-second intervals, stirring gently each time. White chocolate is more delicate than dark chocolate, so go slow. It should be smooth and pourable when done.
- Transfer to a piping bag. Spoon the melted white chocolate into a small piping bag or a zip-top bag. If using a zip-top bag, snip off a tiny corner—like, really tiny, about 1/8 inch wide. You want a thin stream for the web design.
- Create the spider web pattern. Here’s where the magic happens. Pipe concentric circles of white chocolate over the dark chocolate base. Start in the center and work your way outward, spacing the circles about 1 inch apart. You should have 4-5 circles total.
- Drag the web lines. Take a toothpick or skewer and gently drag it from the center of the circles outward toward the edge of the bark, like drawing spokes on a wheel. Space the spokes about 1 inch apart. Then, drag the toothpick from the outer edge back toward the center in between the spokes. This creates the classic spider web pattern. Wipe the toothpick clean between drags for the best results.
- Add decorations. While the chocolate is still wet, press your candy spiders or candy eyes into the bark. Place them randomly on the web, or cluster a few together for a “spider gathering” effect. If using sprinkles or pretzels, sprinkle those on now too.
- Let it set. Place the baking sheet in the refrigerator for 20-30 minutes, or until the chocolate is completely firm and set. The bark should lift easily off the parchment paper when ready.
- Break into pieces. Once set, lift the parchment paper off the baking sheet. Use your hands to break the bark into irregular pieces—don’t cut it with a knife, the rustic broken edges look better. Aim for pieces that are roughly 2-3 inches across.
Sensory Cues: When the dark chocolate is ready, it should look glossy and flow smoothly off the spatula. The white chocolate should be thick but pourable, like warm honey. When you drag the toothpick through the circles, you should see the white chocolate pull into thin, web-like lines. The finished bark should snap cleanly when broken, with no bending or softness.
Prep Note: If your kitchen is warm (above 75°F), the chocolate might take longer to set. Pop it in the fridge for an extra 10 minutes if needed. And if the white chocolate starts to thicken while you’re piping, just pop it back in the microwave for 5 seconds to loosen it up.
Cooking Tips & Techniques
After making this easy spider web chocolate bark for Halloween more times than I can count, I’ve collected a few tricks that make the process smoother and the results better. Here’s what I’ve learned the hard way:
Don’t overheat the chocolate. This is the number one mistake I see people make. Chocolate is temperamental—if you overheat it, it seizes up into a grainy, clumpy mess that’s unusable. Always use low power on the microwave and stir frequently. And never, ever add water to chocolate. Even a drop can cause it to seize. If your chocolate does start to look grainy, you can try adding a teaspoon of coconut oil and stirring vigorously, but honestly, it’s better to start over.
Work quickly with the web pattern. Once you pipe the white chocolate circles, you have about 30-45 seconds to drag the web lines before the chocolate starts to set. If you’re making a large batch, work in sections or keep the white chocolate warm by placing the piping bag in a bowl of warm water between uses. I learned this after my first batch set before I finished the web pattern, and I ended up with a very abstract, non-web-looking bark.
Use room-temperature ingredients. Cold chocolate chips straight from the fridge take longer to melt and can develop condensation, which ruins the texture. Let your chocolate chips sit at room temperature for about 15 minutes before melting. Same goes for the baking sheet—a cold sheet can cause the chocolate to set unevenly.
Multitasking strategy: While the dark chocolate is melting, prep your piping bag and decorations. That way, once the base layer is spread, you can move straight into the web pattern without any awkward pauses. I like to have everything laid out on the counter before I even start melting chocolate.
Consistency tip: If you want perfectly even bark thickness, use two wooden spoons or rulers placed on either side of the baking sheet as guides. Spread the chocolate between them, and you’ll get a uniform layer every time. I don’t always bother with this, but when I’m making bark for a party or gift, it makes a noticeable difference.
Variations & Adaptations
This easy spider web chocolate bark for Halloween is incredibly versatile. Here are some variations I’ve tried and loved:
White Chocolate Base with Dark Web: Flip the colors for a spooky reverse look. Use white chocolate as the base and dark chocolate for the web pattern. The dark web lines stand out beautifully against the white background, and it looks especially ghostly. I made this version for a friend’s Halloween party and it was the first thing to disappear.
Peanut Butter Spider Web Bark: Add 2 tablespoons of creamy peanut butter to the dark chocolate when melting. The peanut butter adds a savory depth that balances the sweetness perfectly. Top with chopped Reese’s cups instead of candy spiders for a peanut butter cup vibe. This one is dangerously addictive.
Vegan and Dairy-Free Version: Use dairy-free dark chocolate chips (most dark chocolate is naturally dairy-free, but check the label) and dairy-free white chocolate (Enjoy Life makes a great one). The coconut oil works perfectly with both. This version is just as delicious and sets exactly the same way.
Crunchy Pretzel Bark: Before pouring the dark chocolate, scatter a layer of broken pretzel sticks or mini pretzels on the parchment paper. Pour the chocolate over them and proceed with the web pattern. The salty crunch against the sweet chocolate is incredible. I made this for a Halloween movie night and it paired perfectly with popcorn.
Gluten-Free Adaptation: This recipe is naturally gluten-free as long as you use gluten-free decorations. Most chocolate chips are gluten-free, but always check the label. Candy eyes and spiders can sometimes contain wheat starch, so look for certified gluten-free options if that’s a concern.
Spicy Mexican Chocolate Bark: Add 1/4 teaspoon of cinnamon and a pinch of cayenne pepper to the dark chocolate when melting. The warmth of the spices plays beautifully with the sweet white chocolate web. This is my personal favorite variation—it’s unexpected and absolutely delicious.
Serving & Storage Suggestions
This easy spider web chocolate bark for Halloween is best served at room temperature, which allows the chocolate to soften slightly and the flavors to fully come through. Here’s how to serve and store it:
Serving Temperature: Take the bark out of the refrigerator about 10 minutes before serving. This takes the chill off without making the chocolate too soft. Arrange the pieces on a Halloween-themed platter or in a decorative tin for gifting. I like to scatter a few extra candy spiders around the platter for visual drama.
Complementary Pairings: This bark pairs beautifully with a hot cup of coffee or a glass of cold milk. For an adult Halloween party, serve it alongside a dark red wine or a spiced apple cider. It also works great as part of a Halloween dessert board with caramel apples, popcorn balls, and pumpkin cookies.
Storage Instructions: Store the bark in an airtight container at room temperature for up to 1 week. If your kitchen is warm (above 70°F), store it in the refrigerator to prevent the chocolate from softening. Layer the pieces between sheets of parchment paper to prevent sticking. For longer storage, you can freeze the bark for up to 3 months—just wrap it tightly in plastic wrap and then foil.
Reheating Notes: This bark doesn’t need reheating, but if you’ve stored it in the fridge, let it sit at room temperature for 10-15 minutes before serving. The chocolate should snap when broken, not bend. If it bends, it needs more time to set or the chocolate wasn’t tempered properly.
Flavor Development: Interestingly, this bark actually tastes better after a day or two. The flavors meld together and the chocolate develops a deeper, more complex taste. So if you can resist eating it all immediately, it’s worth making a day ahead. I’ve learned this the hard way after devouring an entire batch in one sitting and regretting it the next day.
If you’re looking for other easy treats to round out your Halloween spread, you might enjoy this creamy make-ahead vegan chocolate avocado pudding for a healthier option, or this easy crispy lemon rosemary salmon sheet pan dinner for a savory main dish before the sweets come out.
Nutritional Information & Benefits
While this easy spider web chocolate bark for Halloween is definitely a treat-first recipe, it does have some surprising nutritional benefits. Here’s the breakdown:
Estimated Nutritional Values (per 1-ounce serving, about 2 pieces):
- Calories: 140-160
- Fat: 9-11g
- Carbohydrates: 16-18g
- Sugar: 12-14g
- Protein: 2-3g
- Fiber: 1-2g
Health Benefits: Dark chocolate is rich in antioxidants called flavonoids, which can help reduce inflammation and improve heart health. The cocoa content in dark chocolate also contains iron, magnesium, and zinc. White chocolate doesn’t have the same antioxidant benefits, but it does provide calcium from the milk solids. The coconut oil adds healthy medium-chain triglycerides (MCTs) that can support brain function.
Dietary Considerations: This recipe is naturally gluten-free and can be made dairy-free and vegan with simple substitutions. It contains no eggs, nuts, or soy (depending on your chocolate brand). However, it is high in sugar and should be enjoyed in moderation as part of a balanced diet.
Potential Allergens: Dark chocolate and white chocolate both contain dairy (unless you use dairy-free versions). Some chocolate brands process their products on equipment that also processes nuts, so check labels if you have allergies. The candy decorations may also contain common allergens like wheat, soy, or nuts.
Personal Perspective: Look, I’m not going to pretend this is health food. It’s chocolate bark for Halloween—it’s supposed to be indulgent. But I do feel better about serving dark chocolate bark to my family because it has more nutritional value than, say, a bag of candy corn. And the portion control of breaking it into small pieces helps everyone enjoy a little without overdoing it. Balance, right?
Conclusion
This easy spider web chocolate bark for Halloween is the kind of recipe that makes you look like a baking genius with almost no effort. It’s spooky, delicious, and endlessly customizable—everything a Halloween treat should be. Whether you’re making it for a classroom party, a Halloween gathering, or just because you want something sweet and festive, this bark delivers every time.
I love that this recipe doesn’t take itself too seriously. It’s fun to make, fun to decorate, and even more fun to eat. The spider web pattern is forgiving enough for kids to help with, but impressive enough to wow adults. And honestly, the fact that it comes together in under 30 minutes means you can spend more time enjoying Halloween and less time stressing in the kitchen.
So grab your chocolate, call the kids over, and make a mess. That’s what Halloween is all about. And if you come up with a variation I haven’t tried—maybe with crushed candy canes for a Christmas version, or pastel sprinkles for Easter—I’d love to hear about it. Drop a comment below and share your creation. Happy Halloween, friends!
For more easy recipes that fit into your busy schedule, check out our full recipe collection for inspiration all year round.
Frequently Asked Questions
Can I use milk chocolate instead of dark chocolate?
Absolutely! Milk chocolate works beautifully in this recipe. It will be sweeter than dark chocolate, so you might want to reduce the amount of candy decorations to balance the sweetness. The melting process is the same—just use the same amount of milk chocolate chips and coconut oil.
How do I prevent the white chocolate from seizing?
The key is low and slow heat. Always microwave white chocolate in 20-second intervals and stir gently between each. Adding a teaspoon of coconut oil helps keep it smooth. If it starts to look grainy, stop heating immediately and stir vigorously—sometimes it will come back together. And never, ever add water to white chocolate, even a drop can cause it to seize.
Can I make this bark ahead of time?
Yes, this is one of the best make-ahead treats. You can make it up to a week in advance and store it in an airtight container at room temperature. It also freezes beautifully for up to 3 months. Just wrap it tightly in plastic wrap and then foil before freezing, and thaw at room temperature for about 15 minutes before serving.
What can I use instead of candy spiders for decoration?
So many options! Candy eyes are a popular choice and give the bark a fun, monster-like appearance. You can also use gummy worms, candy corn, mini marshmallows, or even small pretzel sticks arranged to look like spider legs. Get creative with whatever Halloween candy you have on hand.
Why did my chocolate bark turn white or streaky?
That’s called chocolate bloom, and it happens when the chocolate is stored at fluctuating temperatures or exposed to humidity. It’s completely safe to eat, just not as pretty. To prevent it, store the bark in a cool, dry place (not the fridge if you can help it) and make sure it’s fully set before wrapping. If you’re in a humid climate, seal the container tightly after the bark has cooled completely.
Pin This Recipe!
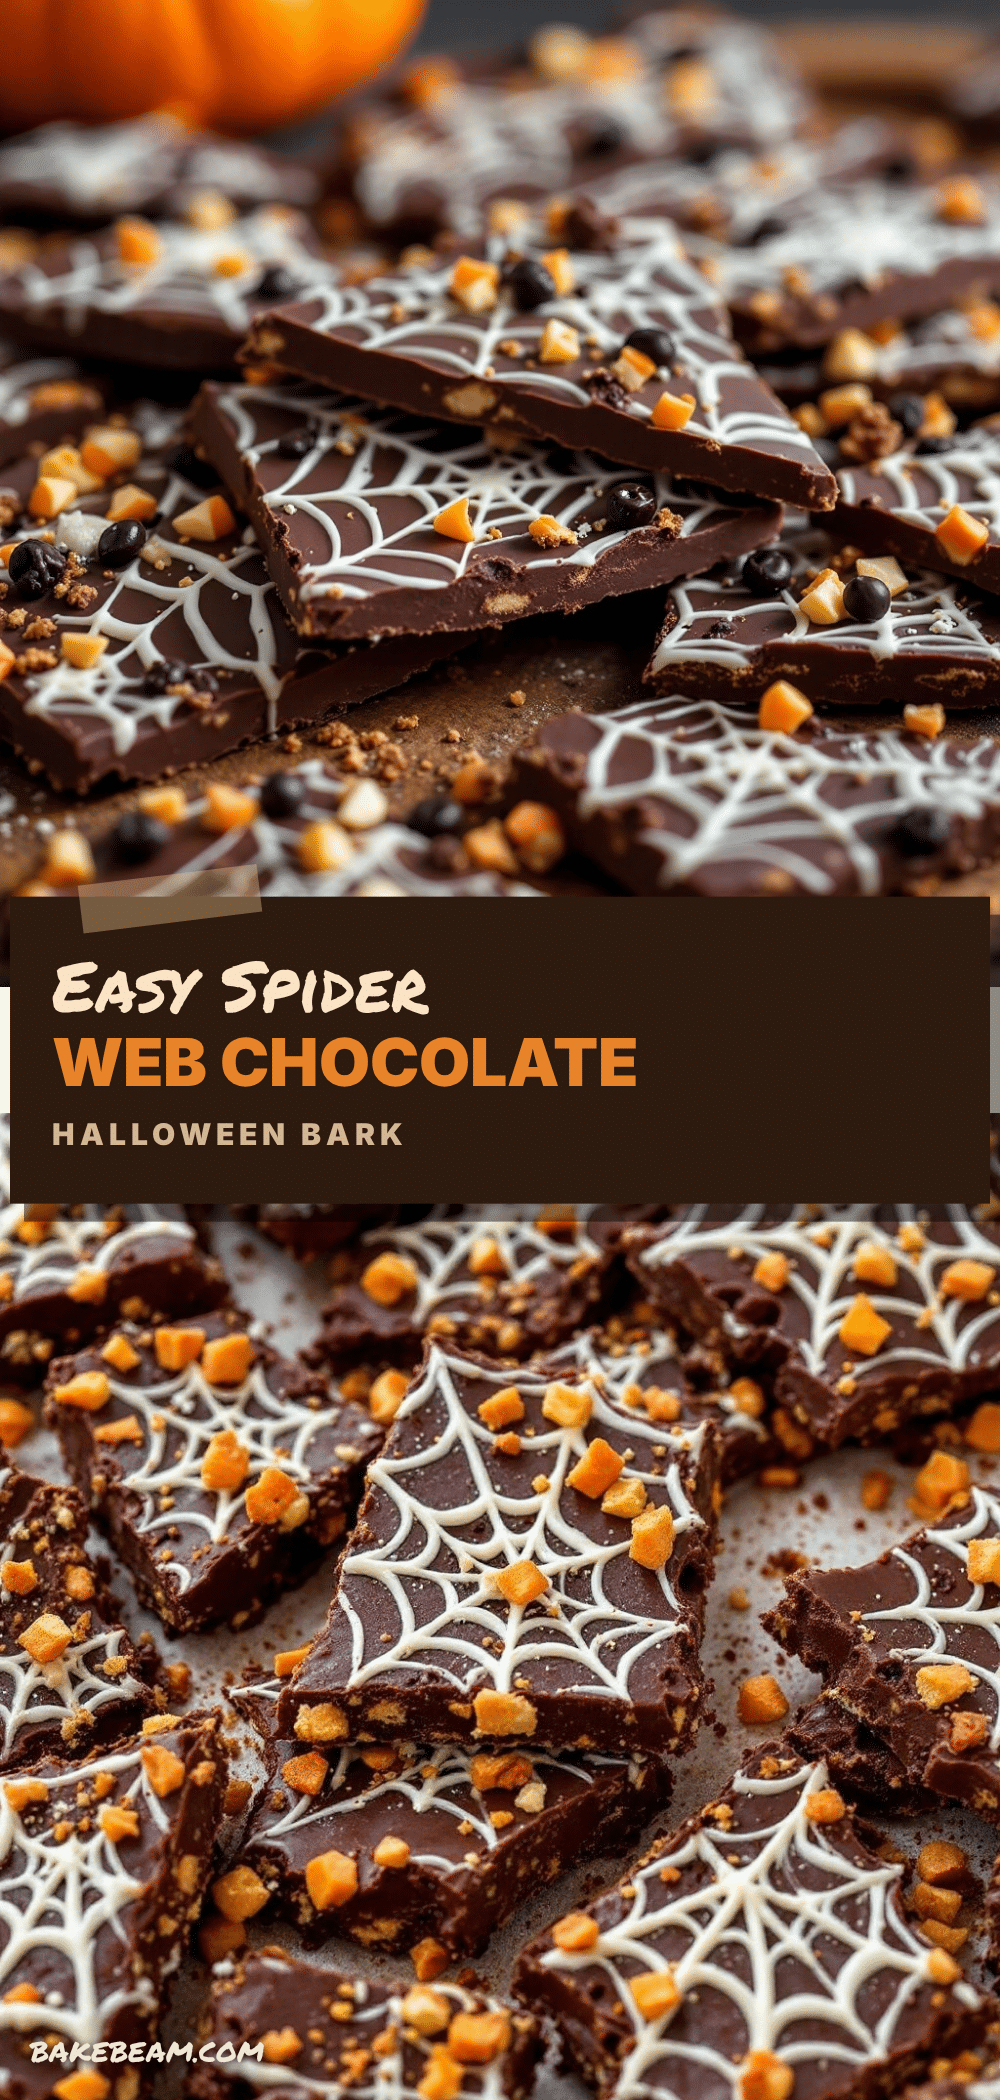
Easy Spider Web Chocolate Bark for Halloween

This easy spider web chocolate bark for Halloween is a quick, foolproof treat that looks impressively spooky with a delicate white chocolate web pattern and candy spiders. Made with simple ingredients in under 30 minutes, it’s perfect for last-minute parties, classroom treats, or homemade gifts.
- Prep Time: 20 minutes
- Cook Time: 0 minutes
- Total Time: 30 minutes
- Yield: 12 servings 1x
- Category: Dessert
- Cuisine: American
Ingredients
- 12 ounces dark chocolate chips or chopped dark chocolate (60% cacao recommended)
- 1 teaspoon coconut oil or vegetable oil
- 6 ounces white chocolate chips or chopped white chocolate
- 1/2 teaspoon coconut oil or vegetable oil
- Assorted Halloween candy spiders or candy eyes
- Optional: orange and black sprinkles, chopped pretzels, or crushed Oreos
Instructions
- Line a rimmed baking sheet with parchment paper, letting it extend slightly over the edges for easy lifting.
- Melt 12 ounces dark chocolate chips with 1 teaspoon coconut oil in a microwave-safe bowl in 30-second intervals, stirring after each, until smooth (about 1.5-2 minutes).
- Pour melted dark chocolate onto the prepared baking sheet and spread into an even 1/4-inch thick layer (roughly 9×13 inches).
- In a separate bowl, melt 6 ounces white chocolate chips with 1/2 teaspoon coconut oil in 20-second intervals, stirring gently, until smooth and pourable.
- Spoon melted white chocolate into a small piping bag or zip-top bag; snip a tiny corner (about 1/8 inch wide).
- Pipe concentric circles of white chocolate over the dark chocolate base, starting from the center and spacing circles about 1 inch apart (4-5 circles total).
- Using a toothpick or skewer, gently drag from the center outward to the edge (like spokes), spacing about 1 inch apart. Then drag from the outer edge back toward the center between the spokes to create the web pattern. Wipe the toothpick clean between drags.
- While chocolate is still wet, press candy spiders or candy eyes into the bark. Add optional sprinkles or pretzels if desired.
- Refrigerate for 20-30 minutes until completely firm and the bark lifts easily off the parchment.
- Lift parchment, then break the bark into irregular 2-3 inch pieces with your hands.
Notes
Work quickly with the web pattern—you have about 30-45 seconds before the white chocolate sets. If your kitchen is warm (above 75°F), the bark may need extra fridge time. For best results, let chocolate chips sit at room temperature for 15 minutes before melting. The bark tastes even better after a day or two as flavors meld.
Nutrition
- Serving Size: 1 ounce (about 2 pie
- Calories: 150
- Sugar: 13
- Sodium: 15
- Fat: 10
- Saturated Fat: 6
- Carbohydrates: 17
- Fiber: 1.5
- Protein: 2.5
Keywords: Halloween chocolate bark, spider web bark, easy Halloween treat, chocolate bark recipe, spooky dessert, no-bake Halloween candy