“Wait—you can put nachos on a charcuterie board?” My cousin Dave said this about two minutes after he walked into my living room last November, holding a six-pack of beer and looking genuinely confused. I just pointed at the spread I’d thrown together on a big wooden cutting board—rows of seasoned beef, warm queso, fresh pico, and a mountain of crispy chips—and told him to grab a plate. He didn’t say much after that, mostly because his mouth was full.
That moment stuck with me, honestly. Because here’s the thing about tailgating: it’s supposed to be easy, messy, and full of food people actually want to eat. Not dainty little skewers or cold sandwiches that fall apart. You want something that feels like a party, where everyone can grab what they like and build their own perfect bite. That’s exactly what this Ultimate Loaded Nacho Charcuterie Board for Tailgate delivers.
I’ve made a lot of game-day food over the years—some of it great, some of it forgettable. But this board? It’s the one people text me about the next day, asking when I’m making it again. It’s got all the crunch, all the cheese, and all the toppings you could want, but it’s also forgiving. You can prep most of it ahead, swap ingredients based on what you have, and scale it up or down depending on your crowd.
So if you’re tired of the same old chips-and-dip routine, or you just want something that looks impressive without hours of work, this is it. Trust me—Dave still talks about that board, and he’s not easy to impress.
Why You’ll Love This Recipe
I’ve tested this board at three separate tailgates now, plus a Super Bowl party and a random Tuesday night when I just wanted something fun. Every single time, it disappears. Here’s why this version works so well:
- Quick & Easy: You can have everything prepped and assembled in about 30 minutes. Most of the components can be made a day ahead, so you’re not scrambling when guests arrive.
- Simple Ingredients: Nothing fancy here—ground beef, cheese, beans, chips, and fresh produce. You probably already have most of this in your kitchen.
- Perfect for Tailgates: This board is built for sharing. Everyone grabs what they want, and there’s no need for plates or forks if you don’t want them. It’s portable, too, if you’re taking it to an actual parking lot.
- Crowd-Pleaser: I’ve watched picky eaters, vegetarians, and serious carnivores all go back for seconds. The build-your-own format means everyone wins.
- Unbelievably Delicious: The combination of warm, melty cheese, seasoned beef, crunchy chips, and fresh toppings is just next-level. It’s comfort food that actually satisfies.
What makes this board different from just putting out a bag of chips and some salsa is the thought behind it. I use a technique of layering the warm ingredients in small bowls set right on the board, so the chips stay crispy while the toppings stay hot. It sounds simple, but it changes everything. You get that perfect bite every time—crunchy, cheesy, and loaded with flavor.
This isn’t just another appetizer. It’s the kind of food that makes people close their eyes after the first bite. It’s tailgate food reimagined—more fun, less stress, and way more delicious.
What Ingredients You Will Need
This recipe uses straightforward, crowd-friendly ingredients to build big flavor without any fuss. Most of these are pantry staples or easy to find at any grocery store. I’ve grouped them by function to make shopping and prepping easier.
For the Seasoned Beef
- 1 pound ground beef (80/20 works best for flavor; drain excess fat)
- 1 tablespoon chili powder (I use McCormick for consistent heat)
- 1 teaspoon ground cumin
- 1 teaspoon smoked paprika
- ½ teaspoon garlic powder
- ½ teaspoon onion powder
- Salt and black pepper to taste
- ¼ cup water (helps the seasoning blend into the meat)
For the Warm Queso
- 8 ounces block-style processed cheese (like Velveeta, cubed—it melts smooth every time)
- ½ cup whole milk (or half-and-half for extra richness)
- 1 can (10 ounces) diced tomatoes with green chilies (like Rotel, undrained)
- ½ teaspoon cumin
For the Refried Beans
- 1 can (16 ounces) refried beans (I prefer traditional, not fat-free, for better texture)
- ¼ cup shredded Mexican blend cheese (optional, for topping)
For the Board Assembly
- 1 large bag (16-18 ounces) restaurant-style tortilla chips (look for sturdy chips that won’t break easily)
- 1 cup shredded iceberg lettuce (thinly sliced)
- 1 cup fresh pico de gallo (store-bought is fine, or make your own with diced tomatoes, onion, cilantro, lime, and salt)
- ½ cup sour cream
- ½ cup guacamole (fresh or store-bought)
- ¼ cup sliced black olives
- ¼ cup pickled jalapeños (adjust for heat preference)
- ¼ cup chopped fresh cilantro
- 1 lime, cut into wedges
Ingredient Tips: For the beef, I’ve found that 80/20 gives you the best flavor without being greasy—just drain off the excess fat after browning. If you want to lighten things up, ground turkey works, but add a tablespoon of olive oil to keep it from drying out. For the queso, don’t use pre-shredded cheese; it has anti-caking agents that prevent smooth melting. Stick with block cheese and cube it yourself. And for the chips, go with the thick, sturdy restaurant-style ones. Thin chips will break under the weight of all those toppings.
Equipment Needed
You don’t need anything fancy for this board, which is part of the beauty. Here’s what I use:
- Large cutting board or serving platter (at least 16×12 inches—wood or slate looks great)
- Large skillet for browning the beef
- Small saucepan for the queso
- Small microwave-safe bowl for the refried beans (or use the saucepan)
- Small serving bowls (3-4) for the queso, beans, sour cream, and guacamole
- Spatula or wooden spoon for stirring
- Chef’s knife and cutting board for prep
- Measuring spoons
I’ve made this board on a cheap plastic cutting board from Target and it worked just fine. If you don’t have a large board, use a baking sheet lined with parchment paper—nobody will care as long as the food tastes good. For the small serving bowls, ramekins or even small mason jars work perfectly. Just make sure they’re oven-safe if you plan to warm things up directly on the board.
Preparation Method
This comes together in about 30 minutes, and you can prep almost everything ahead. Here’s the step-by-step:
Step 1: Make the Seasoned Beef
Heat your large skillet over medium-high heat. Add the ground beef and cook, breaking it apart with a spatula, until browned—about 6-8 minutes. Drain off excess fat, leaving about a tablespoon in the pan for flavor. Reduce heat to medium, then add the chili powder, cumin, smoked paprika, garlic powder, onion powder, salt, and pepper. Stir until the meat is evenly coated, about 1 minute. Pour in the ¼ cup water and let it simmer until the liquid mostly evaporates, about 2-3 minutes. The meat should look dark and glossy, not dry. Taste and adjust seasoning if needed. Set aside and keep warm.
Step 2: Make the Warm Queso
In a small saucepan over medium-low heat, combine the cubed processed cheese and milk. Stir frequently until the cheese is completely melted and smooth—about 5 minutes. Add the undrained can of diced tomatoes with green chilies and the cumin. Stir until everything is incorporated and heated through. Keep the heat low to prevent scorching. If the queso gets too thick, add a splash more milk. Transfer to a small serving bowl.
Step 3: Warm the Refried Beans
Spoon the refried beans into a microwave-safe bowl and heat on high for 1-2 minutes, stirring halfway through, until hot. Alternatively, warm them in a small saucepan over medium heat, stirring occasionally. If you’re using the optional shredded cheese on top, sprinkle it on right after heating so it melts slightly. Transfer to a small serving bowl.
Step 4: Prep the Fresh Toppings
While the warm components are cooking, prep your fresh toppings. Shred the lettuce thinly—this keeps it from getting soggy too quickly. Spoon the pico de gallo, sour cream, and guacamole into separate small bowls. Slice the lime into wedges. Set everything aside.
Step 5: Assemble the Board
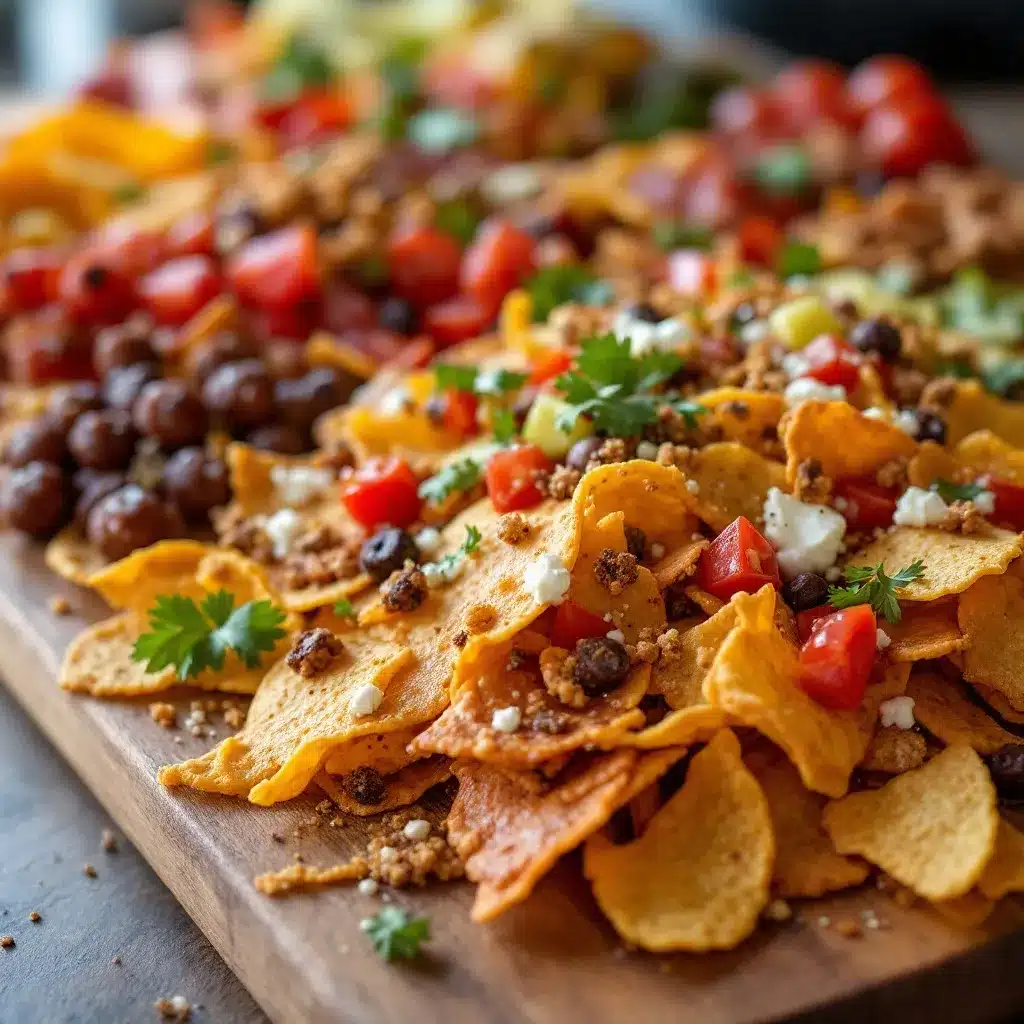
This is the fun part. Place your large cutting board or platter on the counter. Arrange the small bowls of queso, refried beans, sour cream, and guacamole around the board, leaving plenty of room for the chips and other toppings. Think of it like a map—you want people to be able to reach everything without reaching across someone.
Pour the tortilla chips in a generous pile in the center and around the bowls, filling in the gaps. Spoon the seasoned beef into a small pile directly on the board (or keep it in a bowl if you prefer). Sprinkle the shredded lettuce over one section of chips. Add the pico de gallo, black olives, and pickled jalapeños in small clusters around the board. Garnish with fresh cilantro and lime wedges.
Serve immediately while the queso and beef are still warm. The beauty of this board is that everyone can build their own nachos—grab a chip, add some beef, drizzle queso, and pile on the toppings. It’s interactive and fun.
Cooking Tips & Techniques
I’ve made this board enough times to learn a few things the hard way. Here are my best tips:
Keep the chips crispy. This is the number one rule. Don’t pour hot queso directly over the chips—it makes them soggy within minutes. Instead, serve the queso in a bowl so people can drizzle it over their own chips right before eating. Same goes for the beans and beef. Warm components in bowls, chips on the board.
Don’t overcrowd the board. It’s tempting to pile everything on, but if the board is too crowded, people will knock things over trying to grab chips. Leave a little breathing room between elements. You can always refill as things get eaten.
Prep ahead for stress-free hosting. The beef can be cooked and refrigerated up to two days in advance. The queso can be made a day ahead and reheated gently on the stovetop or in the microwave. The fresh toppings (pico, guacamole, sour cream) can be prepped the morning of. The only thing you should do right before serving is assemble the board and warm the queso and beans.
Watch the heat on the queso. Processed cheese can scorch easily if the heat is too high. Keep it low and stir constantly. If it starts to look grainy, you’ve overheated it—add a splash of milk and whisk vigorously to bring it back.
I once forgot to drain the beef fat and ended up with greasy chips. Not my finest moment. Now I always drain it well, and I keep a paper towel handy to blot any excess oil before adding the seasoning. Little things make a big difference.
Variations & Adaptations
One of the best things about this board is how flexible it is. Here are some ways to switch it up:
Vegetarian Version
Skip the ground beef and use seasoned black beans or a plant-based crumble instead. For the black beans, drain and rinse one can, then heat them in a skillet with the same chili powder, cumin, and smoked paprika. Add a splash of water to keep them from drying out. You can also add roasted sweet potatoes or corn for extra texture.
Spicy Upgrade
If you like heat, add a diced jalapeño to the beef while it cooks, or use hot Rotel in the queso. You can also sprinkle cayenne pepper or chipotle powder into the seasoning mix. For an extra kick, serve with sliced serrano peppers or a drizzle of hot sauce on the board.
Sheet Pan Nachos Style
If you want a more traditional nacho experience, spread the chips on a baking sheet, top with beef and shredded cheese, and bake at 375°F for 10 minutes until the cheese melts. Then transfer the whole sheet to a board and add the cold toppings. It’s a little less interactive but just as delicious.
I’ve also tried this with shredded chicken instead of beef—just use the same seasoning blend—and it was a hit. For a breakfast tailgate, swap the beef for chorizo and add scrambled eggs. The possibilities are endless.
Serving & Storage Suggestions
This board is best served immediately while the queso and beef are warm and the chips are crispy. Set it out on a counter or table where everyone can gather around. I like to put out small plates and napkins, but honestly, half the people at my tailgates just grab chips with their hands and dip directly into the bowls—and that’s totally fine.
For drinks, this board pairs beautifully with cold beer (a light lager or IPA works great), margaritas, or even a refreshing cucumber mint green tea cooler if you want something non-alcoholic. The cool, crisp flavors balance the richness of the queso and beef perfectly.
Storage: If you have leftovers (unlikely, but possible), store the components separately. The beef keeps in an airtight container in the fridge for up to 4 days. The queso will thicken when cold—reheat it gently with a splash of milk. The fresh toppings like pico and guacamole are best eaten within a day. Don’t try to store assembled chips; they’ll be stale by morning.
Reheating: For the beef, reheat in a skillet over medium heat with a tablespoon of water. For the queso, microwave in 30-second bursts, stirring between each, until smooth. The refried beans can be reheated in the microwave or on the stovetop. And if you have leftover chips, crisp them up in a 350°F oven for 5 minutes.
Nutritional Information & Benefits
This board is indulgent, and that’s part of its charm. But here’s a rough estimate per serving (assuming 8 servings): approximately 450-500 calories, 28g fat, 35g carbohydrates, 22g protein, 5g fiber, and 8g sugar. These numbers will vary based on how much of each topping you use.
The beef provides a good dose of protein and iron, while the beans add fiber and plant-based protein. The fresh toppings—lettuce, pico, cilantro—bring vitamins and hydration. If you use guacamole, you’re getting healthy monounsaturated fats from the avocado. And the queso? Well, it’s cheese. It’s delicious. Everything in moderation, right?
For dietary considerations, this recipe is naturally gluten-free (just double-check your seasoning blend and chips). To make it dairy-free, use a dairy-free cheese alternative for the queso and skip the sour cream. For a lower-carb version, serve with cucumber slices or bell pepper strips instead of chips.
Conclusion
This Ultimate Loaded Nacho Charcuterie Board has become my go-to for any gathering where I want people to have fun and eat well. It’s forgiving, flexible, and always a hit. Whether you’re hosting a tailgate, a game night, or just a casual dinner with friends, this board delivers the kind of food that makes people smile—and come back for more.
I love that it brings people together. There’s something about everyone standing around a board, building their own perfect bite, that just feels right. It’s not fussy or complicated. It’s just good food, shared with good people.
So give it a try. Customize it with your favorite toppings, make it as spicy or mild as you like, and don’t stress about perfection. The best part is the mess—and the memories. If you make this, I’d love to hear about it. Drop a comment below, tag me in your photos, or tell me how you made it your own. Happy tailgating!
Frequently Asked Questions
Can I make this board ahead of time?
Yes! Most components can be prepped a day or two in advance. Cook and season the beef, make the queso, and chop the fresh toppings. Store everything separately in the fridge. On the day of your event, just reheat the warm items and assemble the board. The only thing you should do right before serving is add the chips so they stay crispy.
What if I don’t have a large cutting board?
No problem. Use a baking sheet lined with parchment paper, a large platter, or even a clean pizza pan. You can also use multiple smaller boards or plates arranged together. The key is having enough surface area to spread everything out so people can reach it easily.
Can I use ground turkey or chicken instead of beef?
Absolutely. Ground turkey or chicken works well—just add a tablespoon of olive oil to the pan since lean poultry can dry out. Use the same seasoning blend, and you’ll have a lighter but still flavorful option. For a plant-based version, try seasoned black beans or a meat substitute.
How do I keep the queso warm during the party?
A small slow cooker or fondue pot set to low works perfectly. You can also pour the queso into a heat-safe bowl and place it on a warming tray. If you don’t have either, just reheat it in the microwave for 30 seconds every 30 minutes or so—it doesn’t take long. Just stir it well each time.
What are the best chips for this board?
Look for thick, sturdy restaurant-style tortilla chips. They can hold up to the weight of the beef, queso, and toppings without breaking. Avoid thin or delicate chips, which will crumble under the pressure. I’ve had great luck with brands like On the Border and Tostitos Cantina-style chips.
Pin This Recipe!
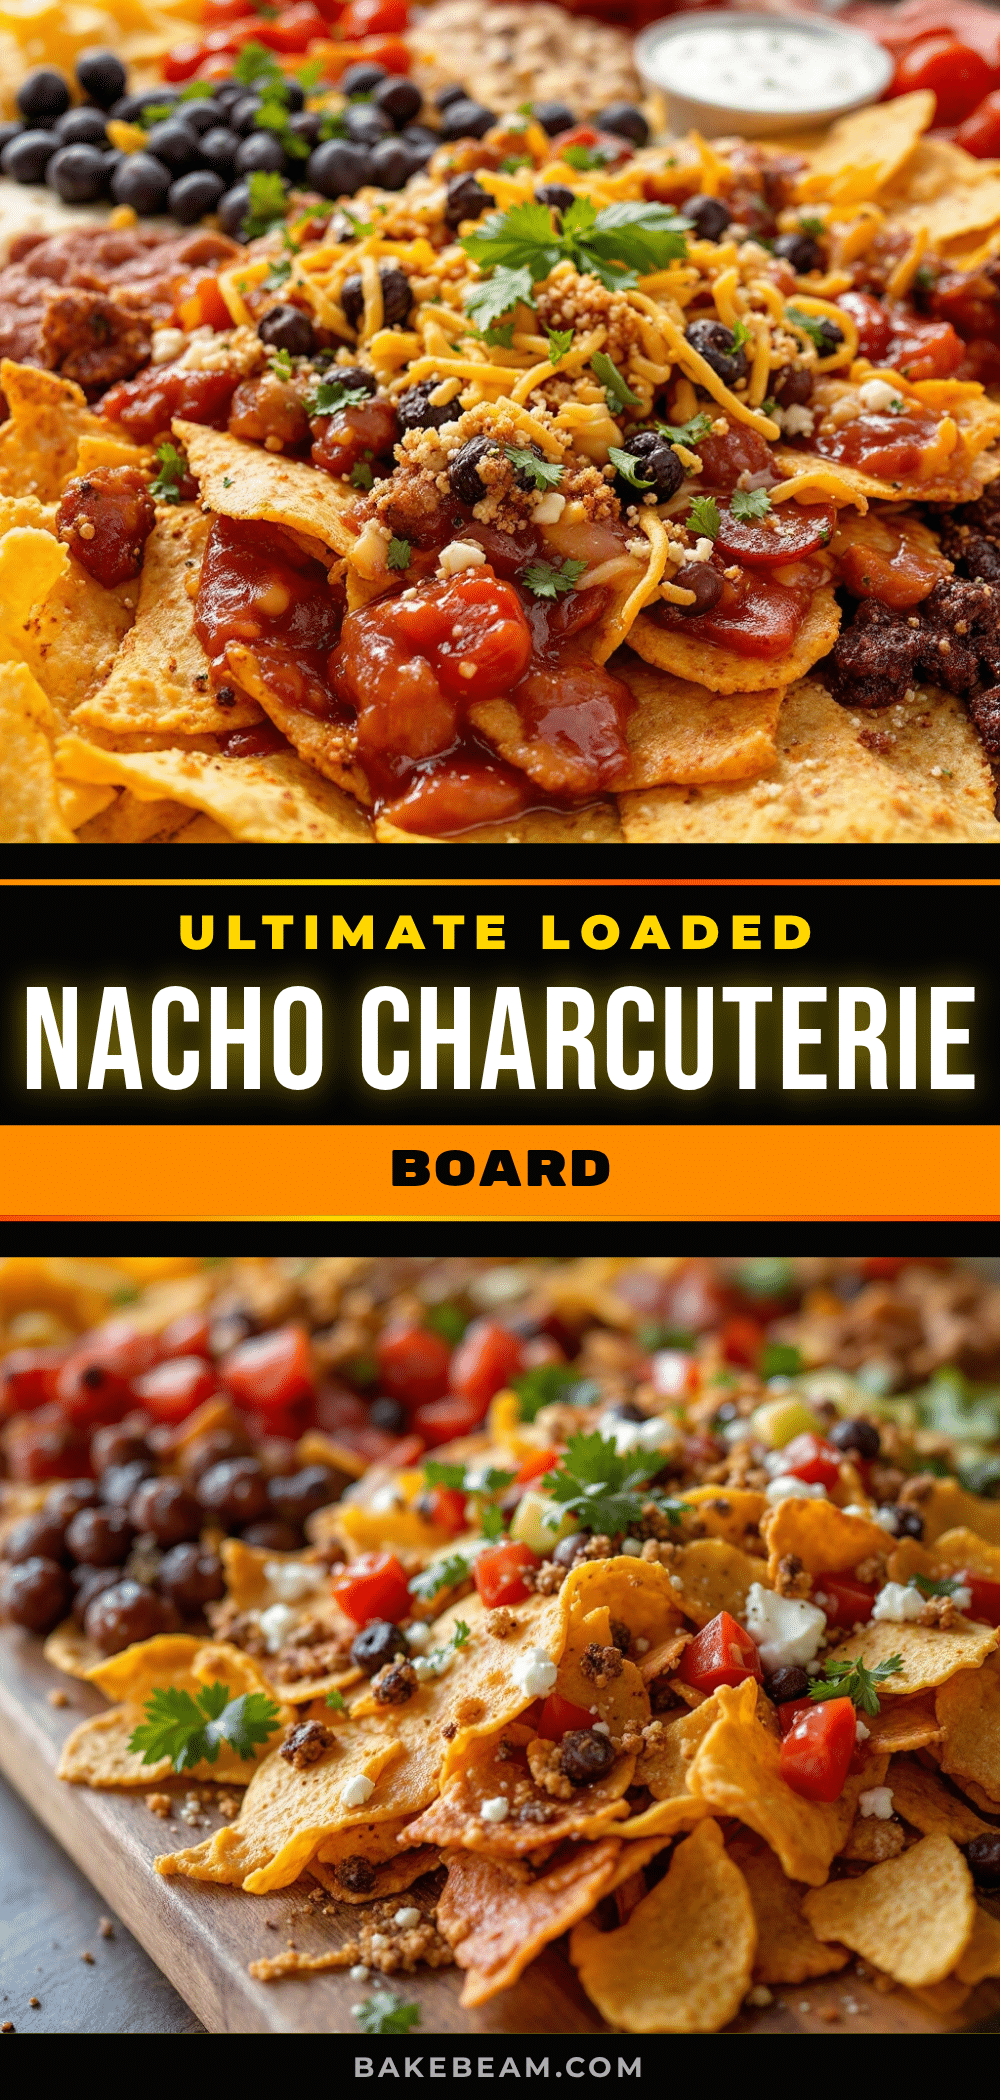
Ultimate Loaded Nacho Charcuterie Board for Easy Tailgate Party
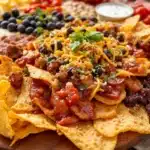
This Ultimate Loaded Nacho Charcuterie Board is the perfect tailgate party food—easy, messy, and full of flavor. With seasoned beef, warm queso, refried beans, and all your favorite toppings, everyone can build their own perfect bite.
- Prep Time: 15 minutes
- Cook Time: 15 minutes
- Total Time: 30 minutes
- Yield: 8 servings 1x
- Category: Appetizer
- Cuisine: Mexican-American
Ingredients
- 1 pound ground beef (80/20)
- 1 tablespoon chili powder
- 1 teaspoon ground cumin
- 1 teaspoon smoked paprika
- ½ teaspoon garlic powder
- ½ teaspoon onion powder
- Salt and black pepper to taste
- ¼ cup water
- 8 ounces block-style processed cheese (like Velveeta), cubed
- ½ cup whole milk
- 1 can (10 ounces) diced tomatoes with green chilies (like Rotel), undrained
- ½ teaspoon cumin
- 1 can (16 ounces) refried beans
- ¼ cup shredded Mexican blend cheese (optional)
- 1 large bag (16–18 ounces) restaurant-style tortilla chips
- 1 cup shredded iceberg lettuce
- 1 cup fresh pico de gallo
- ½ cup sour cream
- ½ cup guacamole
- ¼ cup sliced black olives
- ¼ cup pickled jalapeños
- ¼ cup chopped fresh cilantro
- 1 lime, cut into wedges
Instructions
- Make the Seasoned Beef: Heat a large skillet over medium-high heat. Add ground beef and cook, breaking it apart, until browned (6-8 minutes). Drain excess fat, leaving about 1 tablespoon. Reduce heat to medium, add chili powder, cumin, smoked paprika, garlic powder, onion powder, salt, and pepper. Stir for 1 minute. Add ¼ cup water and simmer until liquid mostly evaporates (2-3 minutes). Set aside and keep warm.
- Make the Warm Queso: In a small saucepan over medium-low heat, combine cubed processed cheese and milk. Stir frequently until melted and smooth (about 5 minutes). Add undrained diced tomatoes with green chilies and cumin. Stir until heated through. Transfer to a small serving bowl.
- Warm the Refried Beans: Spoon refried beans into a microwave-safe bowl. Heat on high for 1-2 minutes, stirring halfway. Alternatively, warm in a small saucepan over medium heat. If using optional shredded cheese, sprinkle on top after heating. Transfer to a small serving bowl.
- Prep the Fresh Toppings: Shred lettuce thinly. Spoon pico de gallo, sour cream, and guacamole into separate small bowls. Slice lime into wedges.
- Assemble the Board: Place a large cutting board or platter on the counter. Arrange small bowls of queso, refried beans, sour cream, and guacamole around the board. Pour tortilla chips in a generous pile in the center and around the bowls. Spoon seasoned beef into a small pile directly on the board or in a bowl. Sprinkle shredded lettuce over one section of chips. Add pico de gallo, black olives, and pickled jalapeños in small clusters. Garnish with fresh cilantro and lime wedges. Serve immediate…
Notes
Keep chips crispy by serving warm components in bowls rather than pouring directly over chips. Prep beef and queso up to 2 days ahead. For vegetarian version, use seasoned black beans or plant-based crumble. For spicy upgrade, add diced jalapeño to beef or use hot Rotel. Store leftovers separately; beef keeps up to 4 days in fridge.
Nutrition
- Serving Size: 1 serving (approxima
- Calories: 475
- Sugar: 8
- Sodium: 850
- Fat: 28
- Saturated Fat: 10
- Carbohydrates: 35
- Fiber: 5
- Protein: 22
Keywords: nachos, charcuterie board, tailgate, party food, game day, loaded nachos, easy appetizer