“Wait, is that the one with the beans or without?” my sister-in-law asked, peering over my shoulder at the cutting board. I was dicing tomatoes for what would become my most requested party dish, and she’d caught me mid-chop. “Because if it doesn’t have beans, it’s not a real layer dip, and I’m not interested.”
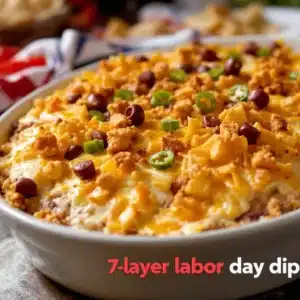
That conversation stuck with me, mostly because she was right. A 7-layer dip without refried beans is just… nacho toppings in a dish. It lacks that sturdy, savory foundation that makes every scoop worth fighting over. So I set out to build the Ultimate 7-Layer Labor Day Dip—the kind that disappears before the burgers even hit the grill and leaves people hovering around the bowl with chips in hand, hoping for one more bite.
This isn’t just another layered dip recipe. It’s the one I’ve tweaked over three summers, testing ratios and textures until each layer earned its place. The beans are seasoned just enough to stand up to the sour cream. The guacamole stays bright green thanks to a little lime juice trick. And the cheese? Let’s just say there’s no skimping on the good stuff. If you’re planning a Labor Day cookout and want something that feels special but comes together in under 30 minutes, this is it.
Why You’ll Love This Recipe
I’ve made a lot of dips in my day—some good, some forgettable, and a few that people actually asked for the recipe. This 7-layer Labor Day dip falls firmly in the last category, and here’s why it works:
- Ready in 20 minutes flat. No oven required, no complicated steps. Just layer, chill (if you want), and serve. Perfect for those chaotic moments when guests arrive earlier than expected.
- Made with simple, grocery-store ingredients. Nothing fancy here. Canned beans, store-bought guacamole (or homemade if you’re feeling ambitious), sour cream, cheese—all stuff you can grab in one quick trip.
- The ultimate crowd-pleaser for Labor Day. It’s hearty enough to stand alone as an appetizer but light enough that people won’t fill up before the main course. Bring it to a potluck, a backyard BBQ, or a tailgate, and watch it vanish.
- Each layer is intentionally seasoned. This isn’t one of those dips where everything tastes the same. The beans get a punch of cumin and chili powder. The sour cream layer has lime zest. Even the tomatoes are salted just enough to bring out their sweetness.
- It travels like a dream. Assemble it in a disposable aluminum pan or a glass dish with a lid, and you’re good to go. No reheating, no fuss.
I’ll be honest—I didn’t nail this on the first try. My early versions were soggy, bland, or just… fine. But after a few rounds of trial and error (and some very honest feedback from my family), I landed on a version that feels balanced, fresh, and satisfying. It’s the kind of dip that makes you close your eyes after the first bite, not because it’s fancy, but because it’s exactly what you wanted.
What Ingredients You Will Need
This recipe uses mostly pantry staples and a few fresh ingredients. The magic is in how they’re layered and seasoned, so don’t skip the small details. Here’s what you’ll need:
For the Bean Layer
- 1 can (16 oz) refried beans (I prefer Rosarita or Old El Paso for texture)
- 1/2 teaspoon ground cumin
- 1/2 teaspoon chili powder
- 1/4 teaspoon garlic powder
- 2 tablespoons water (to thin the beans slightly for easier spreading)
For the Guacamole Layer
- 3 ripe avocados
- 2 tablespoons fresh lime juice (about 1 lime)
- 1/4 cup finely diced red onion
- 1 small Roma tomato, seeded and diced
- 1/4 teaspoon salt
- 1/4 teaspoon black pepper
- Optional: 1 tablespoon chopped cilantro
For the Sour Cream Layer
- 1 cup sour cream (full-fat works best, but light is fine)
- 1/2 cup mayonnaise (trust me on this—it adds richness and stability)
- 1 packet (1 oz) taco seasoning (or make your own with 1 tablespoon chili powder, 1 teaspoon cumin, 1/2 teaspoon paprika, 1/2 teaspoon garlic powder, 1/2 teaspoon onion powder, 1/4 teaspoon cayenne)
- Zest of 1 lime
For the Remaining Layers
- 1 cup shredded Mexican blend cheese (or cheddar jack)
- 1 cup diced Roma tomatoes (about 2 medium tomatoes, seeds removed)
- 1/2 cup sliced black olives (drained)
- 1/2 cup sliced green onions (both white and green parts)
- Optional: 1/2 cup pickled jalapeños (for heat lovers)
For Serving
- Tortilla chips (I like Tostitos Scoops for maximum dip retrieval)
A quick note on substitutions: If you’re dairy-free, use vegan sour cream and shredded cheese alternatives. For a lighter version, swap the mayonnaise with Greek yogurt (though it won’t be as creamy). And if you’re not a fan of olives, leave them out or swap for diced bell peppers for crunch.
Equipment Needed
You don’t need much for this recipe, which is part of why I love it. Here’s what you’ll want on hand:
- A 9×13-inch glass or ceramic dish – Clear glass lets you see all the pretty layers, but any shallow dish works. I’ve used a pie plate in a pinch, and it was fine—just smaller portions.
- A medium skillet – For warming and seasoning the beans. Nonstick makes cleanup easier.
- A mixing bowl – For the guacamole and sour cream mixture. Two separate bowls, ideally.
- A spatula or offset spatula – For spreading layers evenly. A regular spoon works, but a spatula gives you cleaner lines.
- A sharp knife and cutting board – For dicing tomatoes, onions, and avocados.
- A citrus juicer or fork – For squeezing limes without getting seeds everywhere.
If you don’t have a 9×13 dish, a large pie plate or even a shallow serving bowl will work. Just keep in mind that the layers will be thicker, so you might need to adjust quantities slightly. I’ve also made this in a disposable aluminum pan for potlucks—works great and means no dish to wash later.
Preparation Method
Alright, let’s get into the actual process. This comes together faster than you’d think, especially if you prep your ingredients beforehand. Here’s the step-by-step:
- Season the beans. In a small skillet over medium heat, add the refried beans, cumin, chili powder, garlic powder, and water. Stir until warm and smooth, about 2-3 minutes. You’re not cooking them—just loosening them up so they spread easily. Remove from heat and let cool slightly.
- Make the guacamole. Cut the avocados in half, remove the pits, and scoop the flesh into a mixing bowl. Add the lime juice and salt, then mash with a fork until mostly smooth but still a little chunky. Fold in the diced red onion, tomato, and cilantro (if using). Taste and adjust salt—avocados vary, so trust your palate.
- Mix the sour cream layer. In a separate bowl, combine the sour cream, mayonnaise, taco seasoning, and lime zest. Whisk until smooth and fully combined. This step is crucial—don’t just dump sour cream straight from the tub. The seasoning needs to be evenly distributed, or you’ll get bland pockets.
- Prep the toppings. Dice the tomatoes, slice the olives, and chop the green onions. If using jalapeños, drain them well. Having everything ready makes assembly a breeze.
- Layer 1: Beans. Spread the seasoned refried beans in an even layer across the bottom of your dish. Use a spatula to get it smooth. This is your foundation, so take your time.
- Layer 2: Guacamole. Carefully spoon the guacamole over the beans and spread gently. Try not to mix the layers—work from the center outward. If the guacamole is thick, drop small spoonfuls first, then spread.
- Layer 3: Sour cream mixture. Dollop the seasoned sour cream over the guacamole and spread evenly. This layer acts as a barrier, keeping the guacamole from browning too quickly.
- Layer 4: Cheese. Sprinkle the shredded cheese evenly over the sour cream. Don’t dump it all in one spot—scatter it like you’re seasoning a steak.
- Layer 5: Tomatoes. Scatter the diced tomatoes over the cheese. Make sure they’re well-drained, or your dip will get watery after a few hours.
- Layer 6: Olives. Sprinkle the sliced olives evenly across the top. If you’re using jalapeños, add them now too.
- Layer 7: Green onions. Finish with a generous sprinkle of sliced green onions. They add color and a mild onion kick.
- Chill (optional but recommended). Cover the dish with plastic wrap and refrigerate for at least 30 minutes before serving. This helps the layers set and makes scooping cleaner. If you’re in a hurry, serve immediately—it’ll still be delicious.
A few things I’ve learned the hard way: If your guacamole is too thick, add another tablespoon of lime juice. If your beans are too dry, add a little more water. And for the love of all things dippable, drain your tomatoes. Soggy dip is a tragedy no one should experience.
Cooking Tips & Techniques
Over the years, I’ve made this dip enough times to know where things can go wrong. Here are the tips I wish someone had told me earlier:
Warm the beans before spreading. Cold refried beans straight from the can are thick and hard to spread. A quick warm-up makes them silky and easy to work with. Plus, the seasoning absorbs better when they’re warm.
Use a barrier layer. The sour cream mixture isn’t just for flavor—it creates a seal that keeps the guacamole from oxidizing and turning brown. Make sure it covers the guacamole completely, edge to edge.
Don’t overmix the guacamole. A few chunks are fine. Overmashing turns it into baby food, and nobody wants that texture in a layered dip.
Let it rest. I know it’s tempting to dig in right away, but giving the dip 30 minutes in the fridge allows the flavors to meld. The beans absorb the seasoning better, and the sour cream layer firms up slightly. It’s worth the wait.
Keep it cold. This dip is served cold, so if you’re taking it to a picnic or tailgate, pack it in a cooler with an ice pack. It’ll stay fresh for a few hours, but don’t leave it out in the sun.
One mistake I made early on was using pre-shredded cheese from a bag. It’s convenient, but it often has anti-caking agents that prevent it from melting or blending well. Shredding your own block cheese takes two extra minutes and makes a noticeable difference in texture.
Variations & Adaptations
This recipe is forgiving, and I’ve tried a few variations over the years. Here are some of my favorites:
Spicy Southwest Version. Add 1/2 cup of corn kernels (canned or grilled) to the bean layer, and mix 1/4 cup of pickled jalapeños into the sour cream. Top with a drizzle of hot sauce before serving. This version is a hit at tailgates—it pairs perfectly with these easy sticky honey garlic chicken wings for a full game-day spread.
Vegetarian Protein Boost. Add a layer of seasoned black beans (drained and warmed) between the refried beans and guacamole. It adds extra protein and fiber without changing the flavor profile much. I’ve also swapped the refried beans for black bean puree when I wanted something a little different.
Dairy-Free Adaptation. Use vegan sour cream and shredded vegan cheese. I’ve tried this with Kite Hill brand sour cream and Violife cheddar shreds, and it worked surprisingly well. Just note that vegan sour cream is thinner, so mix it with a tablespoon of cornstarch to help it thicken.
Summer Garden Version. When tomatoes and avocados are at their peak, I skip the store-bought guacamole and make it entirely from scratch with garden-fresh ingredients. I also add a layer of grilled corn kernels for sweetness and crunch. It’s a great way to use up summer produce, and it pairs beautifully with this ultimate grilled corn and black bean salad for a full summer-themed menu.
Breakfast-for-Dinner Twist. Okay, this one’s a little weird, but hear me out. Swap the refried beans for black bean hummus, add a layer of scrambled eggs (yes, really), and top with pico de gallo. It’s not traditional, but it’s surprisingly good for brinner.
Serving & Storage Suggestions
This dip is best served cold, right out of the fridge. I like to let it sit at room temperature for about 10 minutes before serving—it takes the chill off without making it warm. Serve with sturdy tortilla chips (Scoops are my go-to), but it’s also great with celery sticks, cucumber rounds, or even crackers if you’re feeling unconventional.
For presentation, I sometimes garnish with a few extra sliced olives and a sprinkle of paprika on top. It adds a pop of color and makes the dish look intentional, even if you threw it together in 20 minutes.
Storage: Cover the dish tightly with plastic wrap or a lid and refrigerate for up to 3 days. The guacamole may brown slightly on the surface, but it’s still safe to eat—just scrape off the top layer if it bothers you. I don’t recommend freezing this dip; the texture of the sour cream and avocado will suffer.
Reheating: This is a cold dip, so no reheating needed. If you’ve stored it and the layers have settled, give it a gentle stir before serving to redistribute the flavors.
One thing I’ve noticed: the dip actually tastes better the next day. The flavors meld together overnight, and the beans absorb more of the seasoning. So if you’re planning ahead, make it a day in advance and let it rest in the fridge. Your future self will thank you.
Nutritional Information & Benefits
While this dip isn’t exactly health food, it does have some redeeming qualities. Here’s a rough estimate per serving (based on 12 servings):
- Calories: ~280
- Protein: 7g
- Fat: 20g
- Carbohydrates: 18g
- Fiber: 6g
- Sugar: 3g
The avocados provide heart-healthy monounsaturated fats and fiber, while the beans add plant-based protein and iron. The tomatoes and green onions contribute vitamins A and C, and the lime juice offers a dose of antioxidants. If you use Greek yogurt in place of mayonnaise, you’ll boost the protein and reduce the fat slightly.
For those watching their sodium, opt for low-sodium refried beans and reduce the added salt in the guacamole. The taco seasoning packet can also be swapped for a homemade blend with less salt.
This dip is naturally gluten-free (check your taco seasoning label to be sure) and can be made dairy-free with simple substitutions. It’s not low-carb—thanks to the beans and chips—but it’s a balanced option for a party appetizer.
Conclusion
This Ultimate 7-Layer Labor Day Dip has become my go-to for every summer gathering, and I honestly can’t imagine a cookout without it. It’s the kind of recipe that feels effortless but looks like you put in real effort—the perfect balance for a holiday when you’d rather be outside with a drink in hand than stuck in the kitchen.
I love how adaptable it is. You can make it exactly as written, or you can tweak it to suit your crowd. Swap in black beans for refried. Add a layer of grilled corn. Go heavy on the jalapeños. It’s forgiving, and it always delivers.
If you make this dip for your Labor Day celebration, I’d love to hear about it. Drop a comment below and let me know how it turned out—did you add any twists? Did it disappear as fast as it does at my house? And if you’re looking for more crowd-pleasing appetizers, check out this best easy sheet pan nachos recipe for another party favorite.
Here’s to good food, good company, and a Labor Day that feels like summer’s last perfect moment. Happy cooking!
Frequently Asked Questions
Can I make this dip ahead of time?
Absolutely. In fact, it tastes better after resting in the fridge for a few hours or overnight. Just cover it tightly and refrigerate. Add the green onions and any fresh garnishes right before serving to keep them bright.
How do I keep the guacamole from turning brown?
The sour cream layer acts as a barrier, but pressing plastic wrap directly onto the surface of the dip before refrigerating also helps. The lime juice in the guacamole slows oxidation too. If the top browns slightly, just scrape it off before serving.
Can I use store-bought guacamole?
Yes, and it saves time. Look for a brand with minimal ingredients—avocado, onion, lime juice, salt. Avoid guacamole with added yogurt or fillers, as it can make the dip watery. I’ve used Wholly Guacamole in a pinch and it worked fine.
What if I don’t have taco seasoning?
Make your own with 1 tablespoon chili powder, 1 teaspoon cumin, 1/2 teaspoon paprika, 1/2 teaspoon garlic powder, 1/2 teaspoon onion powder, and 1/4 teaspoon cayenne (optional). It’s cheaper and lets you control the salt level.
Is this dip gluten-free?
Yes, as long as you use gluten-free taco seasoning and check your refried beans label. Most brands are gluten-free, but it’s always worth verifying. Serve with gluten-free tortilla chips to keep the whole dish safe for celiac guests.
Pin This Recipe!
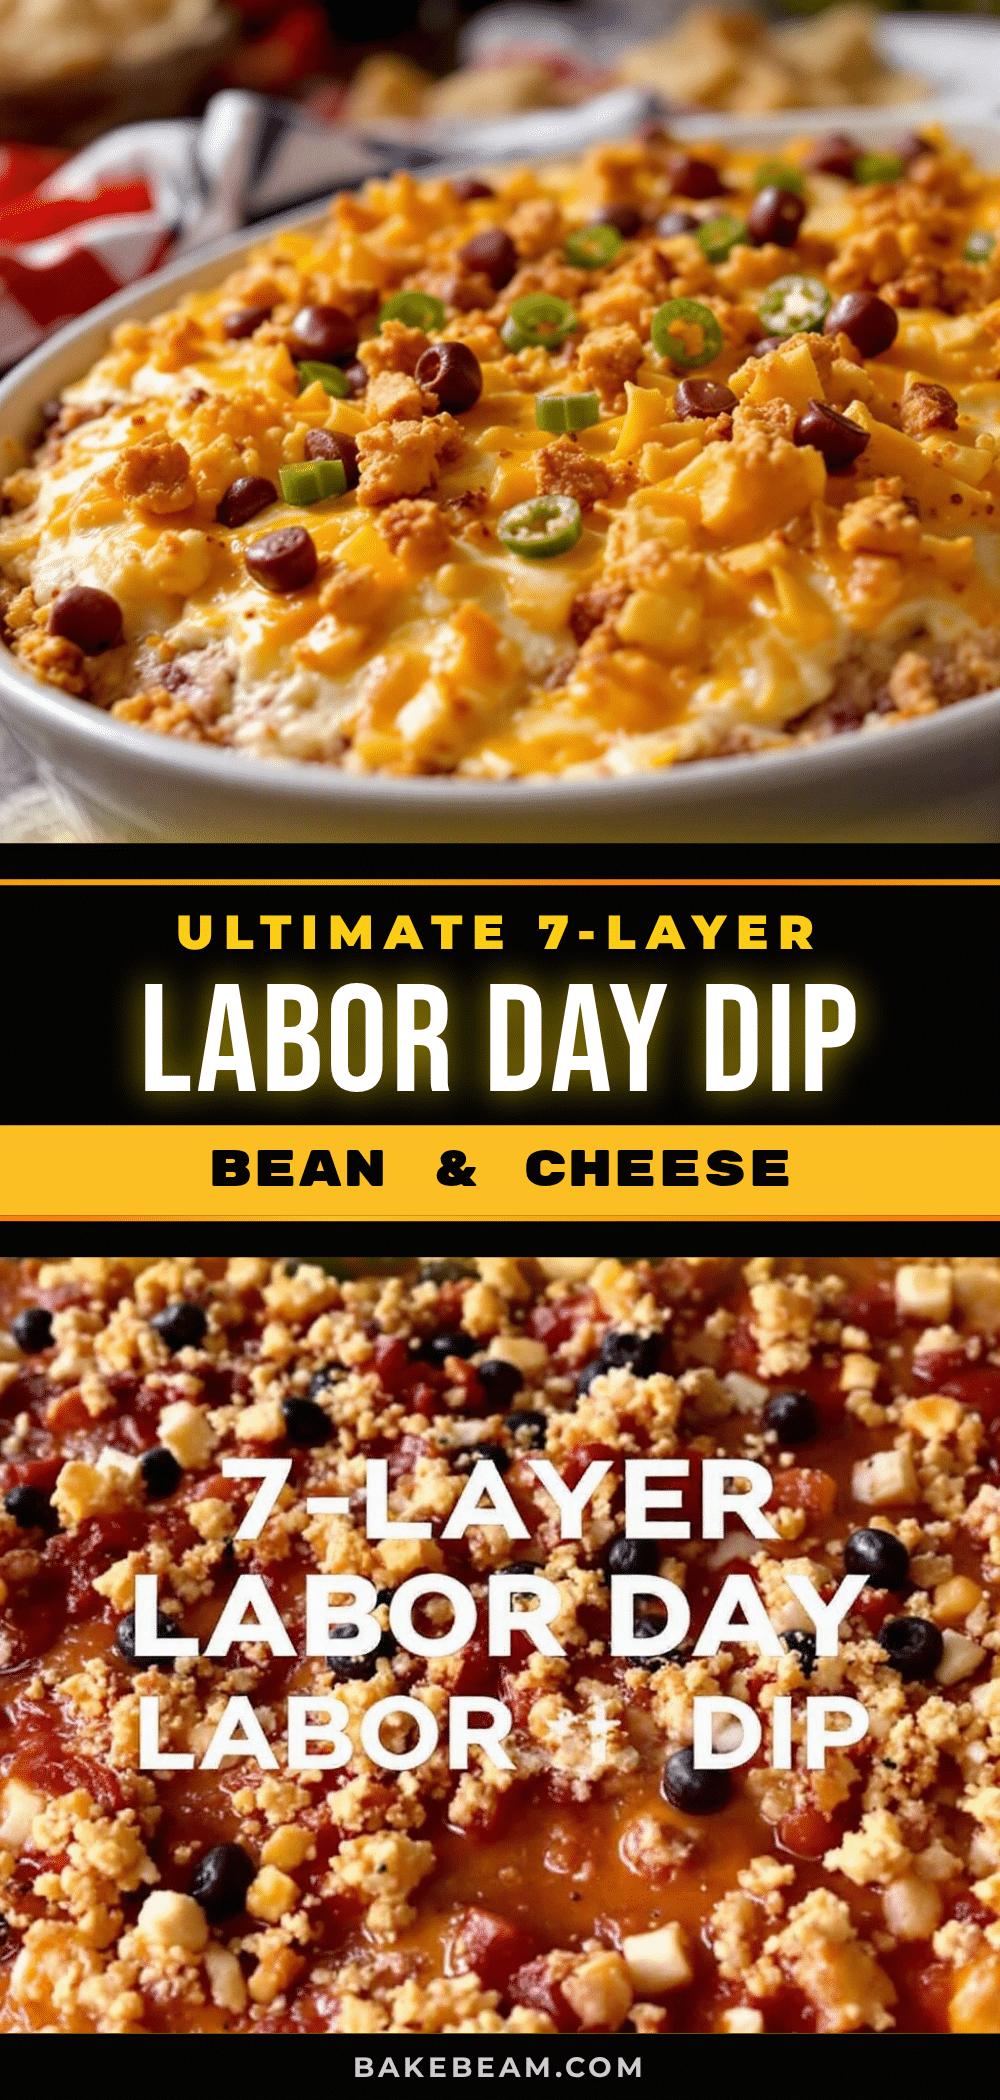
Best 7-Layer Labor Day Dip Recipe

This Ultimate 7-Layer Labor Day Dip is a crowd-pleasing appetizer with seasoned refried beans, fresh guacamole, tangy sour cream, cheese, tomatoes, olives, and green onions. Ready in 20 minutes, it’s perfect for cookouts, potlucks, and tailgates.
- Prep Time: 20 minutes
- Cook Time: 0 minutes
- Total Time: 20 minutes
- Yield: 12 servings 1x
- Category: Appetizer
- Cuisine: Mexican-American
Ingredients
- 1 can (16 oz) refried beans
- 1/2 teaspoon ground cumin
- 1/2 teaspoon chili powder
- 1/4 teaspoon garlic powder
- 2 tablespoons water
- 3 ripe avocados
- 2 tablespoons fresh lime juice
- 1/4 cup finely diced red onion
- 1 small Roma tomato, seeded and diced
- 1/4 teaspoon salt
- 1/4 teaspoon black pepper
- 1 tablespoon chopped cilantro (optional)
- 1 cup sour cream
- 1/2 cup mayonnaise
- 1 packet (1 oz) taco seasoning
- Zest of 1 lime
- 1 cup shredded Mexican blend cheese
- 1 cup diced Roma tomatoes (about 2 medium, seeds removed)
- 1/2 cup sliced black olives (drained)
- 1/2 cup sliced green onions
- 1/2 cup pickled jalapeños (optional)
- Tortilla chips for serving
Instructions
- Season the beans: In a small skillet over medium heat, add refried beans, cumin, chili powder, garlic powder, and water. Stir until warm and smooth, about 2-3 minutes. Remove from heat and let cool slightly.
- Make the guacamole: Cut avocados in half, remove pits, and scoop flesh into a mixing bowl. Add lime juice and salt, then mash with a fork until mostly smooth but still chunky. Fold in diced red onion, tomato, and cilantro (if using). Taste and adjust salt.
- Mix the sour cream layer: In a separate bowl, combine sour cream, mayonnaise, taco seasoning, and lime zest. Whisk until smooth and fully combined.
- Prep the toppings: Dice tomatoes, slice olives, and chop green onions. Drain jalapeños if using.
- Layer 1 – Beans: Spread seasoned refried beans in an even layer across the bottom of a 9×13-inch dish.
- Layer 2 – Guacamole: Carefully spoon guacamole over beans and spread gently, working from center outward.
- Layer 3 – Sour cream mixture: Dollop seasoned sour cream over guacamole and spread evenly.
- Layer 4 – Cheese: Sprinkle shredded cheese evenly over sour cream.
- Layer 5 – Tomatoes: Scatter diced tomatoes over cheese.
- Layer 6 – Olives: Sprinkle sliced olives evenly across the top. Add jalapeños if using.
- Layer 7 – Green onions: Finish with a generous sprinkle of sliced green onions.
- Chill (optional but recommended): Cover dish with plastic wrap and refrigerate for at least 30 minutes before serving. Serve with tortilla chips.
Notes
For best results, let the dip rest in the fridge for at least 30 minutes before serving. Drain tomatoes well to avoid a watery dip. Use full-fat sour cream for best texture. If making ahead, add green onions just before serving.
Nutrition
- Serving Size: 1 serving (based on
- Calories: 280
- Sugar: 3
- Sodium: 520
- Fat: 20
- Saturated Fat: 7
- Carbohydrates: 18
- Fiber: 6
- Protein: 7
Keywords: 7-layer dip, labor day dip, layered dip, party dip, mexican dip, appetizer, easy dip, no-bake dip