I ruined pears for almost a year before I got this right. Not the fruit itself, but the idea of cooking them. My first attempt at a poached pear came out so tough and flavorless that I actually threw the whole thing in the compost and ordered takeout. The second time, I boiled them into mush, and the ginger was so sharp it burned my throat going down. I nearly gave up on the whole concept of warm fruit desserts altogether.
But here is the thing about fall — it demands something cozy. Something that fills your kitchen with steam and spice and makes the whole house smell like you have been baking all day, even when you have barely lifted a finger. That is what finally pulled me back to the stove.
I wanted a dessert that felt special but didn’t require rolling dough or whipping cream. Something that looked impressive on a plate but let me sit down with a cup of tea while it came together. The cinnamon poached pear and ginger crisp ended up being that recipe for me, and honestly, it has become my go-to for everything from quiet Tuesday nights to holiday dinners when I need one less thing to stress about.
The pears get tender and fragrant from a gentle bath in cinnamon-spiked liquid, and the crisp topping — buttery oats with warm ginger and a hint of brown sugar — gives you that crunch you crave without any complicated techniques. It is the kind of dessert that makes people close their eyes after the first bite, and nobody has to know how easy it was to make.
Why You’ll Love This Recipe
This is not your average fruit crisp. I have tested this recipe more times than I care to count, tweaking the poaching time, adjusting the ginger ratio, and burning exactly one batch of topping before I figured out the right oven temperature. What I landed on is a dessert that delivers every single time.
- Perfectly Tender Pears : The poaching method guarantees soft, juicy pears that hold their shape without turning to mush. No more sad, dry baked fruit.
- Warm Spices That Actually Work : Cinnamon and ginger are a classic pair, but getting the balance right matters. This recipe uses enough ginger to feel warming without overpowering the delicate pear flavor.
- Simple Ingredients : You probably already have most of these in your pantry. No trips to specialty stores or expensive extracts.
- Looks Fancy, Zero Stress : Served in individual ramekins or a single baking dish, this crisp looks like you spent hours on it. The reality is about 20 minutes of active prep time.
- Make-Ahead Friendly : The pears can be poached a day in advance, and the crisp topping keeps in the fridge for days. Assemble and bake when you are ready.
- Crowd-Pleaser : I have served this to kids, grandparents, and friends who claim they “don’t like cooked fruit.” Every single person went back for seconds.
What makes this recipe different from other pear desserts is the texture. Most crisps end up soggy because the fruit releases too much liquid during baking. Poaching the pears first seals in flavor and lets you control exactly how much moisture stays in the final dish. The topping stays crunchy, the pears stay tender, and every spoonful has that perfect contrast between soft fruit and crispy oat crumble.
This is the dessert I make when I want to feel like I have my life together, even on days when I definitely do not. It is comfort food that works for real life.
What Ingredients You Will Need
This recipe uses simple, wholesome ingredients to create something that tastes far more complex than it actually is. Most of these are pantry staples, especially if you keep basic baking supplies on hand.
For the Poached Pears
- 4 firm but ripe Bosc pears (Bosc holds its shape best during poaching, but Anjou or Bartlett work too if you handle them gently)
- 4 cups water (enough to cover the pears completely)
- 1 cup granulated sugar (adds sweetness and helps the pears hold their texture)
- 2 cinnamon sticks (I prefer Ceylon cinnamon for its milder, floral notes, but Cassia works fine too)
- 1 tablespoon fresh ginger, thinly sliced (use a vegetable peeler for thin, even slices that infuse without being overpowering)
- 1 teaspoon vanilla extract (pure vanilla, not imitation, makes a noticeable difference here)
- Pinch of salt (balances the sweetness and brings out the fruit flavor)
For the Ginger Crisp Topping
- 1 cup old-fashioned rolled oats (do not use quick oats — they turn to paste. Old-fashioned gives you that proper crunch)
- 1/2 cup all-purpose flour (you can swap in oat flour or almond flour for a gluten-free version)
- 1/2 cup packed brown sugar (light or dark both work; dark gives a deeper molasses flavor)
- 1 teaspoon ground ginger (this is where the warm kick comes from)
- 1/2 teaspoon ground cinnamon
- 1/4 teaspoon salt
- 1/2 cup cold unsalted butter, cut into small cubes (keep it cold — this is the secret to a crumbly topping)
- 1/4 cup chopped crystallized ginger (optional, but I highly recommend it for little bursts of spicy sweetness)
I usually buy Bosc pears from the farmers market when they are in season, but grocery store pears work just fine. Look for pears that yield slightly when you press near the stem — too hard and they will not soften during poaching, too soft and they will fall apart. If your pears are underripe, let them sit on the counter for a day or two before using them.
For the crystallized ginger, I like the brand from The Ginger People, but any brand works. If you cannot find it, you can skip it and add an extra teaspoon of ground ginger to the topping instead.
Equipment Needed
You do not need fancy equipment for this recipe, which is part of why I love it so much. Here is what you will actually use:
- Medium saucepan (large enough to hold the pears in a single layer with room for the poaching liquid)
- Vegetable peeler (a good Y-peeler makes quick work of pear skin)
- Sharp paring knife (for coring the pears from the bottom — a melon baller also works great for this)
- 8×8 inch baking dish or 4 individual ramekins (I use a ceramic dish from Le Creuset, but any oven-safe dish works)
- Mixing bowls (one medium, one small)
- Pastry cutter or two forks (for cutting butter into the flour mixture — your hands work too if they run cold)
- Slotted spoon (for removing pears from the poaching liquid without burning yourself)
- Measuring cups and spoons
If you do not have a pastry cutter, do not worry. I actually prefer using my fingers for this topping because I can feel when the butter is the right size. Just work quickly so the butter stays cold. If your hands run warm, stick to forks or a pastry cutter.
A note on the baking dish: glass or ceramic works best because they distribute heat evenly. Metal pans can cause the topping to brown too quickly on the bottom before the pears are heated through.
Preparation Method
Step 1: Poach the Pears
Start by peeling the pears. I leave the stems on because they look prettier when serving, but you can remove them if you prefer. Cut a thin slice off the bottom of each pear so they stand upright without wobbling. Use a melon baller or small spoon to scoop out the core from the bottom, being careful not to break through the stem end.
In your medium saucepan, combine the 4 cups water, 1 cup sugar, 2 cinnamon sticks, sliced fresh ginger, vanilla extract, and a pinch of salt. Bring this to a gentle simmer over medium heat, stirring until the sugar dissolves completely. This takes about 3-4 minutes.
Gently lower the pears into the simmering liquid. They should be mostly submerged — if they are not, add a little more water. Reduce the heat to low, cover the pot, and let them simmer for 20-25 minutes. The pears are done when a knife slides easily into the thickest part with almost no resistance.
Use a slotted spoon to carefully transfer the pears to a plate. Let them cool while you make the topping. You can save the poaching liquid to make a simple syrup for cocktails or pancakes — just strain it and store it in the fridge for up to a week.
Step 2: Make the Crisp Topping
Preheat your oven to 375°F (190°C).
In a medium mixing bowl, combine the rolled oats, all-purpose flour, brown sugar, ground ginger, ground cinnamon, and salt. Whisk everything together until the spices are evenly distributed.
Add the cold butter cubes to the bowl. Use a pastry cutter, two forks, or your fingertips to work the butter into the dry ingredients. You are looking for a crumbly mixture with pea-sized pieces of butter throughout. Some larger chunks are fine — they will melt and create those crispy, craggy bits everyone fights over.
If you are using crystallized ginger, stir it in now. The little sticky pieces add incredible texture and bursts of spicy sweetness.
Pop the topping in the refrigerator while you prepare the pears. Cold topping bakes up crunchier.
Step 3: Assemble and Bake
Place the poached pears in your baking dish or divide them among individual ramekins. If using a single dish, arrange them so they are not touching each other. If the pears have released any juice on the plate, drizzle that over them.
Spoon the crisp topping over each pear, pressing it gently into place. Do not pack it down — you want some air gaps for the topping to crisp up. Use all of the topping; it looks like a lot, but it will settle as it bakes.
Bake for 25-30 minutes, or until the topping is golden brown and the pears are bubbling around the edges. If the topping is browning too quickly, tent the dish loosely with foil for the last 10 minutes.
Let the crisp rest for 5 minutes before serving. This lets the juices settle and prevents anyone from burning their mouth on molten pear juice — trust me on this one.
Cooking Tips & Techniques
The first time I made this, I skipped the step where you let the pears cool before adding the topping. The hot pears melted the butter before the dish even went in the oven, and I ended up with a greasy, soggy mess. Let them cool. It matters.
Here is another thing I learned the hard way: do not rush the poaching. If you boil the pears instead of simmering them, the outside will overcook before the inside softens. Keep the liquid at a gentle bubble — barely moving — and you will get perfectly tender pears every time.
For the topping, cold butter is non-negotiable. I keep my butter in the freezer for about 10 minutes before I start cutting it into the flour mixture. If the butter warms up, the topping turns into a dense paste instead of a crumbly crisp. If that happens, just refrigerate the whole bowl for 15 minutes before baking.
I also recommend tasting a piece of your pear before you assemble everything. Pears vary in sweetness depending on the variety and ripeness. If your pear tastes bland, sprinkle a little extra brown sugar over it before adding the topping. If it is already very sweet, you can reduce the sugar in the topping slightly.
One more thing: do not skip the salt in the topping. It sounds weird for a dessert, but salt balances the sweetness and makes the ginger pop. I once forgot it and the whole thing tasted flat. A pinch makes a real difference.
Variations & Adaptations
This recipe is flexible, and I have tried quite a few variations over the years. Here are the ones that actually worked:
Gluten-Free Version
Swap the all-purpose flour in the topping for oat flour or a gluten-free all-purpose blend. I have tested this with Bob’s Red Mill 1-to-1 Baking Flour and it worked perfectly. Just make sure your oats are certified gluten-free if that matters to you.
Dairy-Free Version
Use cold coconut oil or vegan butter in place of regular butter. I prefer coconut oil because it adds a subtle flavor that pairs well with the ginger. Cut it into the dry ingredients the same way you would butter, and chill the topping before baking.
Spiced-Up Version
Add a star anise and a strip of orange peel to the poaching liquid for a more complex flavor profile. I tried this for a holiday dinner and it was a huge hit. The orange and ginger combination is really lovely.
Apple-Pear Hybrid
If you cannot find good pears, swap in firm apples like Honeycrisp or Granny Smith. They take a little longer to poach (about 30-35 minutes), but the flavor works beautifully with the ginger crisp topping.
Individual Ramekins
For a dinner party, I like to make individual crisps in 6-ounce ramekins. Reduce the baking time to 18-20 minutes. They look adorable and everyone gets their own crunchy topping.
I have also tried adding chopped pecans to the topping, and that was a win. About 1/4 cup of chopped pecans stirred in with the crystallized ginger adds another layer of texture and a nutty flavor that complements the pears.
Serving & Storage Suggestions
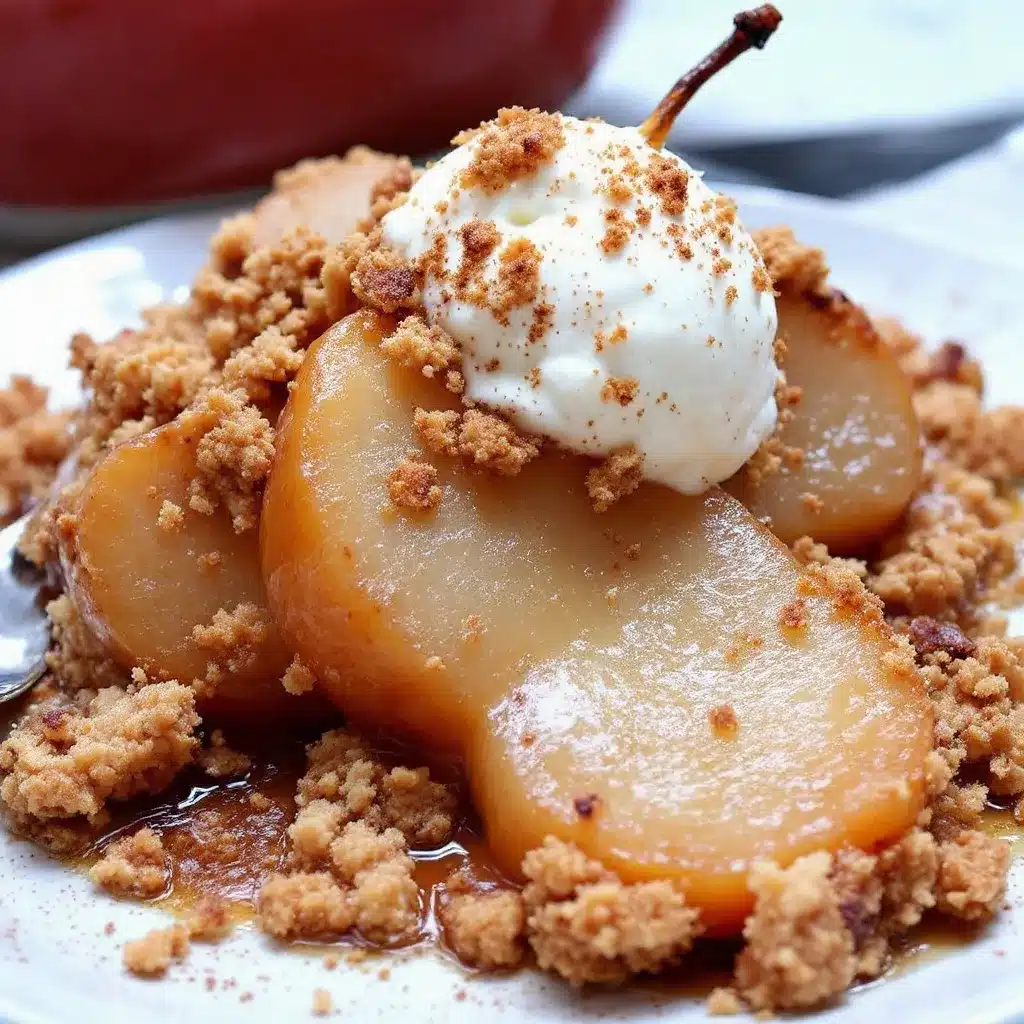
Serve this crisp warm, straight from the oven. The contrast between the hot, tender pears and the cold topping is part of the magic. I like to add a scoop of vanilla ice cream or a dollop of whipped cream on top. The cream melts into the warm crisp and creates this incredible sauce situation.
For a dairy-free option, coconut whipped cream works beautifully. The coconut flavor actually pairs nicely with the ginger and cinnamon.
This dessert also works well with a drizzle of caramel sauce or a sprinkle of flaky sea salt right before serving. The salt thing sounds weird, I know, but try it once and you will understand.
Leftovers keep in the refrigerator for up to 3 days in an airtight container. The topping will soften over time, but it is still delicious. To reheat, pop individual servings in the microwave for about 30 seconds, or reheat the whole dish in a 350°F oven for 10 minutes.
I do not recommend freezing this crisp. The pears get mushy when thawed, and the topping loses its crunch entirely. If you want to prep ahead, poach the pears and make the topping separately, then assemble and bake when you are ready.
The poached pears themselves will keep in the fridge for up to 5 days in their poaching liquid. This is actually my preferred method — I poach a batch on Sunday and have dessert ready to go all week.
Nutritional Information & Benefits
Here is the estimated nutrition for one serving (1 pear with about 1/4 of the topping, without ice cream or whipped cream):
| Nutrient | Amount |
|---|---|
| Calories | 385 |
| Total Fat | 16g |
| Saturated Fat | 9g |
| Carbohydrates | 62g |
| Fiber | 7g |
| Sugar | 42g |
| Protein | 4g |
| Sodium | 180mg |
Pears are a good source of dietary fiber and vitamin C. One medium pear provides about 6 grams of fiber, which supports digestive health and helps you feel full longer. Ginger is known for its anti-inflammatory properties and can help with digestion — which is nice after a heavy meal.
This dessert is not exactly health food, but it uses real ingredients and no artificial additives. If you want to lighten it up, you can reduce the sugar in the poaching liquid to 3/4 cup and use coconut oil instead of butter in the topping. The texture will be slightly different, but it still tastes great.
For those watching their sugar intake, this recipe is not low-sugar, but the sweetness comes from natural sources (pears) and minimally processed ingredients (brown sugar). I consider it a reasonable indulgence for special occasions.
Conclusion
This cinnamon poached pear and ginger crisp has become my signature fall dessert, and I think it deserves a spot in your rotation too. It is the kind of recipe that looks impressive on the table but lets you actually enjoy the evening instead of stressing in the kitchen.
The pears come out perfectly tender every time, the topping stays crunchy, and the combination of warm cinnamon and spicy ginger fills your whole house with that cozy autumn smell. Plus, it is flexible enough to adapt to whatever you have on hand or whatever dietary needs come up.
I love this recipe because it reminds me that simple things can be extraordinary. You do not need complicated techniques or fancy equipment to make something that feels special. Just good ingredients, a little patience, and the willingness to try again when the first attempt does not work out.
If you make this crisp, I would love to hear how it turns out. Drop a comment below and let me know if you tried any variations, or tag me in your photos if you share them online. And if you are looking for more cozy fall recipes, you might also enjoy this tender slow cooker honey garlic chicken and vegetables for a savory option, or these easy Mediterranean chickpea and feta stuffed mini peppers for a lighter bite.
Go ahead and give it a try. Your kitchen is about to smell amazing.
Frequently Asked Questions
Can I use canned pears instead of fresh?
I would not recommend it. Canned pears are already cooked and much softer, so they will fall apart during baking. Fresh pears hold their shape and absorb the poaching flavors much better. If you are in a pinch, drain canned pears well and skip the poaching step, but the texture will be noticeably different.
What if I do not have crystallized ginger?
No problem at all. You can skip it entirely, or add an extra 1/2 teaspoon of ground ginger to the topping to compensate. The crystallized ginger adds little bursts of sweetness and spice, but the recipe works perfectly fine without it.
How do I know when the pears are done poaching?
The easiest test is to insert a sharp knife into the thickest part of the pear. It should slide in with almost no resistance, like room-temperature butter. If there is any firmness or resistance, let them simmer for another 5 minutes and test again.
Can I make this recipe vegan?
Yes. Use coconut oil or vegan butter in the topping instead of regular butter. For serving, use coconut whipped cream or a dairy-free ice cream. The poached pears themselves are naturally vegan, so you just need to adjust the topping.
Why did my topping turn out soggy?
This usually happens for one of two reasons: the pears were too hot when you added the topping (which melts the butter before baking), or the topping was not chilled before going into the oven. Make sure your pears are cool to the touch and your topping is cold before assembling. Also, make sure your oven is fully preheated so the topping starts cooking immediately.
Pin This Recipe!
Cozy Cinnamon Poached Pear and Ginger Crisp – Easy Fall Dessert

Tender cinnamon-poached pears topped with a buttery oat and ginger crisp. This easy fall dessert looks impressive but requires minimal effort, making it perfect for weeknights or holiday dinners.
- Prep Time: 20 minutes
- Cook Time: 30 minutes
- Total Time: 50 minutes
- Yield: 4 servings 1x
- Category: Dessert
- Cuisine: American
Ingredients
- 4 firm but ripe Bosc pears
- 4 cups water
- 1 cup granulated sugar
- 2 cinnamon sticks
- 1 tablespoon fresh ginger, thinly sliced
- 1 teaspoon vanilla extract
- Pinch of salt
- 1 cup old-fashioned rolled oats
- 1/2 cup all-purpose flour
- 1/2 cup packed brown sugar
- 1 teaspoon ground ginger
- 1/2 teaspoon ground cinnamon
- 1/4 teaspoon salt
- 1/2 cup cold unsalted butter, cut into small cubes
- 1/4 cup chopped crystallized ginger (optional)
Instructions
- Peel the pears, leaving stems on. Cut a thin slice off the bottom so they stand upright. Use a melon baller or small spoon to scoop out the core from the bottom without breaking through the stem end.
- In a medium saucepan, combine 4 cups water, 1 cup sugar, 2 cinnamon sticks, sliced fresh ginger, vanilla extract, and a pinch of salt. Bring to a gentle simmer over medium heat, stirring until sugar dissolves (about 3-4 minutes).
- Gently lower the pears into the simmering liquid. Reduce heat to low, cover, and simmer for 20-25 minutes until a knife slides easily into the thickest part. Transfer pears to a plate to cool.
- Preheat oven to 375°F (190°C).
- In a medium bowl, combine rolled oats, all-purpose flour, brown sugar, ground ginger, ground cinnamon, and salt. Whisk to distribute spices.
- Add cold butter cubes. Use a pastry cutter, two forks, or your fingertips to work butter into dry ingredients until mixture is crumbly with pea-sized butter pieces. Stir in crystallized ginger if using. Refrigerate topping while preparing pears.
- Place poached pears in an 8×8 inch baking dish or divide among 4 individual ramekins. Drizzle any released juice over pears.
- Spoon crisp topping over each pear, pressing gently. Do not pack down.
- Bake for 25-30 minutes until topping is golden brown and pears are bubbling. If browning too quickly, tent with foil for last 10 minutes.
- Let rest for 5 minutes before serving.
Notes
Let pears cool before adding topping to prevent butter from melting. Keep butter cold for a crumbly topping. Do not rush poaching; keep liquid at a gentle simmer. Taste pears before assembling and adjust sweetness if needed. Do not skip salt in topping.
Nutrition
- Serving Size: 1 pear with about 1/
- Calories: 385
- Sugar: 42
- Sodium: 180
- Fat: 16
- Saturated Fat: 9
- Carbohydrates: 62
- Fiber: 7
- Protein: 4
Keywords: poached pears, ginger crisp, fall dessert, cinnamon pears, easy dessert, fruit crisp, pear crisp