I figured making Halloween snacks for a party full of kids would be this whole production—carved jack-o’-lanterns, elaborate cupcakes, something that took three hours and a trip to three different stores. It took about ten minutes of staring at a package of hot dogs in my fridge for that whole assumption to fall apart completely.
I had this bag of hot dogs, a can of crescent rolls, and a tiny jar of mustard. My kid was bouncing off the walls in a store-bought ghost costume, and I needed something—anything—that looked like I tried. So I grabbed a knife, cut some hot dogs in half, and started wrapping strips of dough around them like tiny little bandages. No plan. No Pinterest board. Just me, a cutting board, and the vague hope that my kid wouldn’t ask for candy for dinner.
They came out of the oven looking ridiculous—lopsided, some with dough hanging off, others with mustard eyes that looked more confused than spooky. But my kid grabbed one, took a bite, and said, “Mom, these are the best mummies ever.” And honestly? That was it. That’s the whole reason I still make them every single year.
These Easy Mummy Hot Dog Bites aren’t fancy. They’re not gourmet. But they’re the kind of snack that makes a Halloween party feel like a Halloween party—without making you want to hide in the bathroom with a glass of wine. They’re quick, they’re fun, and they actually taste good. That’s the thing nobody tells you about holiday snacks. They don’t have to be impressive. They just have to be the ones people remember grabbing first.
Why You’ll Love This Recipe
Look, I’ve made a lot of Halloween snacks over the years. Some were great. Some were… let’s just say the kids were polite about them. These Mummy Hot Dog Bites are the ones I come back to every single time. Here’s why they work:
- So Quick & Easy: We’re talking 20 minutes from fridge to plate. That’s less time than it takes to argue with a kid about wearing a costume.
- Simple Ingredients: Hot dogs, crescent roll dough, and mustard. That’s it. You probably have all of this in your kitchen right now.
- Perfect for Halloween Parties: They look spooky, they’re fun to eat, and they disappear faster than anything else on the table.
- Crowd-Pleaser: I’ve yet to meet a kid—or an adult, honestly—who doesn’t grab at least two of these. They’re just fun.
- Unbelievably Delicious: Salty hot dog wrapped in buttery, flaky dough. It’s comfort food in the most ridiculous, perfect way.
What makes these different from every other mummy dog recipe out there? It’s the little things. I don’t overcomplicate the wrapping—two or three strips of dough per mummy is plenty. I use regular yellow mustard for the eyes because it’s what kids actually like. And I bake them just until the dough is golden but not too dark, so they stay soft and pillowy instead of crunchy. It’s not rocket science. It’s just knowing what actually works when you’re feeding a room full of excited, sugared-up little monsters.
This is the kind of snack that makes you feel like a Halloween hero without actually having to be one. You just roll some dough, bake it, and watch everyone smile. That’s the kind of win I can get behind.
What Ingredients You Will Need
This recipe uses the simplest ingredients to create something that looks way more impressive than it actually is. Here’s what you’ll need:
- 1 package (8 count) hot dogs – I use regular beef hot dogs, but any kind works. Turkey, chicken, or even plant-based hot dogs are fine too. Just make sure they’re not the jumbo kind—they’re too big for mummy bites.
- 1 can (8 ounces) refrigerated crescent roll dough – This is the shortcut that makes the whole thing possible. I prefer Pillsbury original, but any brand works. You could also use puff pastry sheets if you want something extra flaky.
- Yellow mustard – For the eyes. You can use regular yellow mustard or Dijon if you want a slightly sharper taste. Ketchup works too, but mustard looks more like actual eyes.
- Optional: cooking spray or melted butter – For brushing on top before baking. It helps the dough get golden and a little crispy.
That’s it. Four ingredients. You probably already have three of them in your kitchen right now. The only thing you might need to grab is the crescent roll dough, and honestly, that’s in every grocery store’s refrigerated section.
A few quick notes from my own experience: Don’t use the reduced-fat crescent rolls if you can help it. They don’t brown as nicely and they tend to tear more easily when you’re wrapping. Full-fat, original dough is the way to go. Also, if you’re using plant-based hot dogs, look for ones that are firm enough to hold their shape when cut in half. Some vegan hot dogs are a bit too soft and fall apart during wrapping.
For the mustard, I’ve tried a few different kinds over the years. Yellow mustard is the classic choice because it’s mild and kids actually like it. But if you’re making these for an adult party, a little Dijon or spicy brown mustard adds a nice kick. Just don’t go overboard—a tiny dot is all you need for each eye.
Equipment Needed
You don’t need much for this recipe. That’s part of the beauty of it. Here’s what you’ll need:
- Baking sheet – A standard half-sheet pan works perfectly. Line it with parchment paper or a silicone baking mat for easy cleanup.
- Sharp knife or pizza cutter – For cutting the hot dogs in half and slicing the crescent roll dough into strips. A pizza cutter makes the dough strips much easier to handle.
- Small bowl – For the mustard dots. You can also just squeeze the mustard straight onto a plate and dip a toothpick in it.
- Toothpick or small skewer – For applying the mustard eyes. A toothpick is perfect for tiny dots.
- Pastry brush (optional) – For brushing butter or oil on top of the dough before baking. Not strictly necessary, but it helps with browning.
If you don’t have a pizza cutter, don’t worry. A sharp knife works just fine. Just make sure it’s sharp enough to cut through the dough cleanly without tearing it. I’ve used a butter knife in a pinch, and let me tell you—it’s not fun. The dough just squishes instead of cutting.
Preparation Method

Alright, let’s get to the fun part. Here’s how to make these Easy Mummy Hot Dog Bites step by step:
- Preheat your oven to 375°F (190°C). Line a baking sheet with parchment paper or a silicone baking mat. This makes cleanup so much easier—trust me on this one.
- Cut the hot dogs in half. Take each hot dog and cut it crosswise into two equal pieces. You should end up with 16 pieces total. If you’re using shorter hot dogs, you can leave them whole—just adjust the baking time slightly.
- Open the crescent roll dough. Unroll it carefully. You’ll see it’s already perforated into triangles. Don’t separate the triangles. Instead, use a sharp knife or pizza cutter to cut each triangle lengthwise into 3 thin strips. You should get about 24 strips total (8 triangles × 3 strips each).
- Wrap the mummies. Take one strip of dough and wrap it around a hot dog piece, starting at one end and working your way to the other. Leave a small gap at the top for the eyes. Don’t wrap too tightly—the dough will expand as it bakes. Repeat with all the hot dog pieces.
- Place on the baking sheet. Arrange the wrapped mummies on the prepared baking sheet, leaving about 1 inch of space between each one. They’ll puff up a bit as they bake, so give them some room.
- Brush with butter or oil (optional). If you want a golden, shiny finish, brush the tops lightly with melted butter or cooking spray. This step is optional but recommended.
- Bake for 10-12 minutes. Bake until the dough is golden brown and cooked through. The hot dogs should be heated through and the dough should be flaky and puffed. Keep an eye on them—ovens vary, and you don’t want burnt mummies.
- Add the eyes. Let the mummies cool for 2-3 minutes on the baking sheet. Then, using a toothpick or small skewer, dip it in mustard and dot two tiny eyes on each mummy. Don’t make the dots too big—a little goes a long way.
- Serve immediately. These are best eaten warm, right out of the oven. The dough is soft and buttery, and the hot dog is perfectly salty. They’re irresistible.
A few things I’ve learned the hard way: Don’t overwork the dough. If it gets too warm, it becomes sticky and hard to handle. Work quickly, and if the dough starts feeling soft, pop it in the fridge for 5 minutes. Also, don’t wrap the dough too thickly. Two or three strips per mummy is plenty. If you use too much dough, the hot dog gets lost in all that bread.
Cooking Tips & Techniques
I’ve made these Mummy Hot Dog Bites more times than I can count, and I’ve definitely made my share of mistakes. Here are a few things I’ve learned along the way:
Don’t overbake them. The dough should be golden brown, not dark brown. If you bake them too long, the dough gets hard and the hot dogs dry out. Pull them out when the dough is just set and lightly golden. They’ll continue cooking slightly from the residual heat.
Work with cold dough. Crescent roll dough gets sticky really fast if it warms up. If you’re making a big batch, keep the unused dough in the fridge while you’re wrapping the first batch. Cold dough is much easier to cut and wrap without tearing.
Use a gentle touch when wrapping. I used to wrap the dough really tight, thinking it would look neater. But tight dough just splits when it bakes. Leave a little slack, and the mummies will puff up beautifully without any gaps.
Make the eyes after baking. I tried putting the mustard eyes on before baking once. They just melted into the dough and looked like weird yellow smudges. Trust me—wait until they come out of the oven. The mustard stays bright and defined, and it looks way cuter.
Double the batch if you’re feeding a crowd. These disappear fast. I usually make at least 32 mummy bites for a party of 10 kids. They go fast, especially if adults start sneaking them too (and they will).
One time, I forgot to cut the hot dogs in half and wrapped them whole. They looked like giant, lumpy sausages with tiny eyes. My kid called them “angry hot dogs.” Not my finest moment. So yeah—cut them in half. It makes a difference.
Variations & Adaptations
These Mummy Hot Dog Bites are super versatile. Here are a few ways to change them up:
- Cheesy Mummies: Before wrapping, cut a small slit in the hot dog and stuff it with a thin strip of cheddar or mozzarella cheese. The cheese melts out slightly as it bakes, and it’s absolutely delicious.
- Spicy Mummies: Use spicy Italian sausage or chorizo-style hot dogs instead of regular beef hot dogs. Add a tiny dot of sriracha or hot sauce to the mustard eyes for an extra kick.
- Veggie Mummies: Use plant-based hot dogs or even carrot sticks (blanched first) for a vegetarian version. The carrot version is surprisingly good—sweet and earthy against the buttery dough.
- Breakfast Mummies: Swap the hot dogs for breakfast sausage links. Bake the same way, and serve with a side of maple syrup for dipping. These are amazing for Halloween morning.
- Pizza Mummies: Brush the dough with a little pizza sauce before wrapping. Sprinkle with a tiny bit of mozzarella before baking. Serve with extra sauce for dipping.
I tried the cheesy version last year, and honestly, it might be my new favorite. The melted cheese oozes out just a little, and it looks like the mummy is leaking something mysterious. Very Halloween-appropriate.
Serving & Storage Suggestions
These Mummy Hot Dog Bites are best served warm, right out of the oven. The dough is soft and flaky, and the hot dog is perfectly heated through. I like to arrange them on a platter with a bowl of ketchup or mustard for dipping. Sometimes I add a few black olives or pretzel sticks on the side for extra spooky vibes.
If you’re serving them at a party, you can keep them warm in a low oven (200°F) for up to 30 minutes. Just cover them loosely with foil so the dough doesn’t dry out. They won’t be quite as amazing as fresh out of the oven, but they’ll still be delicious.
For storage, let any leftovers cool completely, then place them in an airtight container. They’ll keep in the refrigerator for up to 3 days. To reheat, pop them in a 350°F oven for 5-7 minutes, or until warmed through. The microwave works too, but the dough gets a little soft and chewy.
I don’t recommend freezing these. The dough gets soggy when thawed, and the hot dogs lose their texture. They’re so quick to make that it’s better to just whip up a fresh batch when you need them.
One thing I love about this recipe is that the flavors actually get a little better after a day in the fridge. The dough absorbs some of the hot dog’s salty goodness, and the mustard sets into tiny little flavor bombs. Cold mummy bites are actually pretty great for lunch the next day.
Nutritional Information & Benefits
Let’s be real—these Mummy Hot Dog Bites aren’t health food. But they’re a fun treat, and that’s okay. Here’s a rough estimate per mummy bite:
| Nutrient | Amount per bite |
|---|---|
| Calories | 110 |
| Total Fat | 7g |
| Saturated Fat | 2.5g |
| Cholesterol | 15mg |
| Sodium | 310mg |
| Total Carbohydrates | 8g |
| Protein | 4g |
If you’re looking for a slightly healthier version, try using turkey hot dogs and reduced-fat crescent rolls. You’ll save about 30 calories and a few grams of fat per bite. You can also swap the yellow mustard for a sugar-free version if you’re watching your sugar intake.
One thing I appreciate about this recipe is that it’s naturally low in added sugar. The crescent dough has a tiny bit, but it’s not a dessert snack. It’s more of a savory, satisfying bite that happens to look like a mummy. That makes it a nice option for parties where you want something fun but not overloaded with sugar.
Potential allergens: This recipe contains wheat (gluten) and dairy (in the crescent dough). It may also contain soy depending on the brand of hot dogs you use. If you’re cooking for someone with allergies, look for gluten-free crescent dough and allergen-friendly hot dogs.
Conclusion
These Easy Mummy Hot Dog Bites are the kind of recipe that makes you feel like a Halloween hero without breaking a sweat. They’re quick, they’re fun, and they actually taste good—which is more than I can say for some of the other spooky snacks I’ve tried over the years.
The best part? You can customize them however you want. Add cheese, swap the hot dogs for sausage, or go full veggie with carrot sticks. The base recipe is so simple that it’s basically a blank canvas for your Halloween creativity.
I make these every single year, and they never get old. My kid is 10 now, and he still asks for “mummy dogs” the second October hits. That’s the kind of tradition that sticks. Not because it’s fancy or complicated, but because it’s simple and it works.
So go ahead—grab a package of hot dogs, a can of crescent rolls, and a bottle of mustard. Whip up a batch of these little guys for your next Halloween party. And when everyone grabs one and smiles, you’ll know exactly why I keep coming back to this recipe year after year.
If you try them, let me know how they turn out! Drop a comment below, share a photo, or tag me on social media. I love seeing your spooky creations. Happy Halloween, friends!
Frequently Asked Questions
Can I make these mummy hot dog bites ahead of time?
You can assemble them up to 24 hours ahead of time. Just wrap the dough around the hot dogs, place them on a baking sheet, cover with plastic wrap, and refrigerate. Bake them right before serving for the best texture.
Can I use homemade dough instead of crescent rolls?
Absolutely. Any flaky dough works—puff pastry, pie crust, or even homemade pizza dough. Just roll it out thin and cut it into strips. The baking time might vary slightly, so keep an eye on them.
What can I use instead of mustard for the eyes?
Ketchup works well, but it’s a little runnier. You can also use small dots of cream cheese, sour cream, or even black sesame seeds for a different look. Just make sure whatever you use is safe for kids to eat.
How do I keep the dough from tearing while wrapping?
Work with cold dough and don’t wrap too tightly. If the dough starts to tear, just press it back together gently. A little imperfection makes the mummies look more authentic anyway.
Can I bake these in an air fryer?
Yes! Air fry at 350°F for 6-8 minutes, or until the dough is golden and puffed. You might need to work in batches depending on the size of your air fryer basket. They come out extra crispy this way.
For more easy party snack ideas, check out our full recipe collection. And if you’re looking for something a little healthier to balance out all the Halloween treats, this Mediterranean chickpea and feta stuffed mini peppers recipe is a great option.
Pin This Recipe!
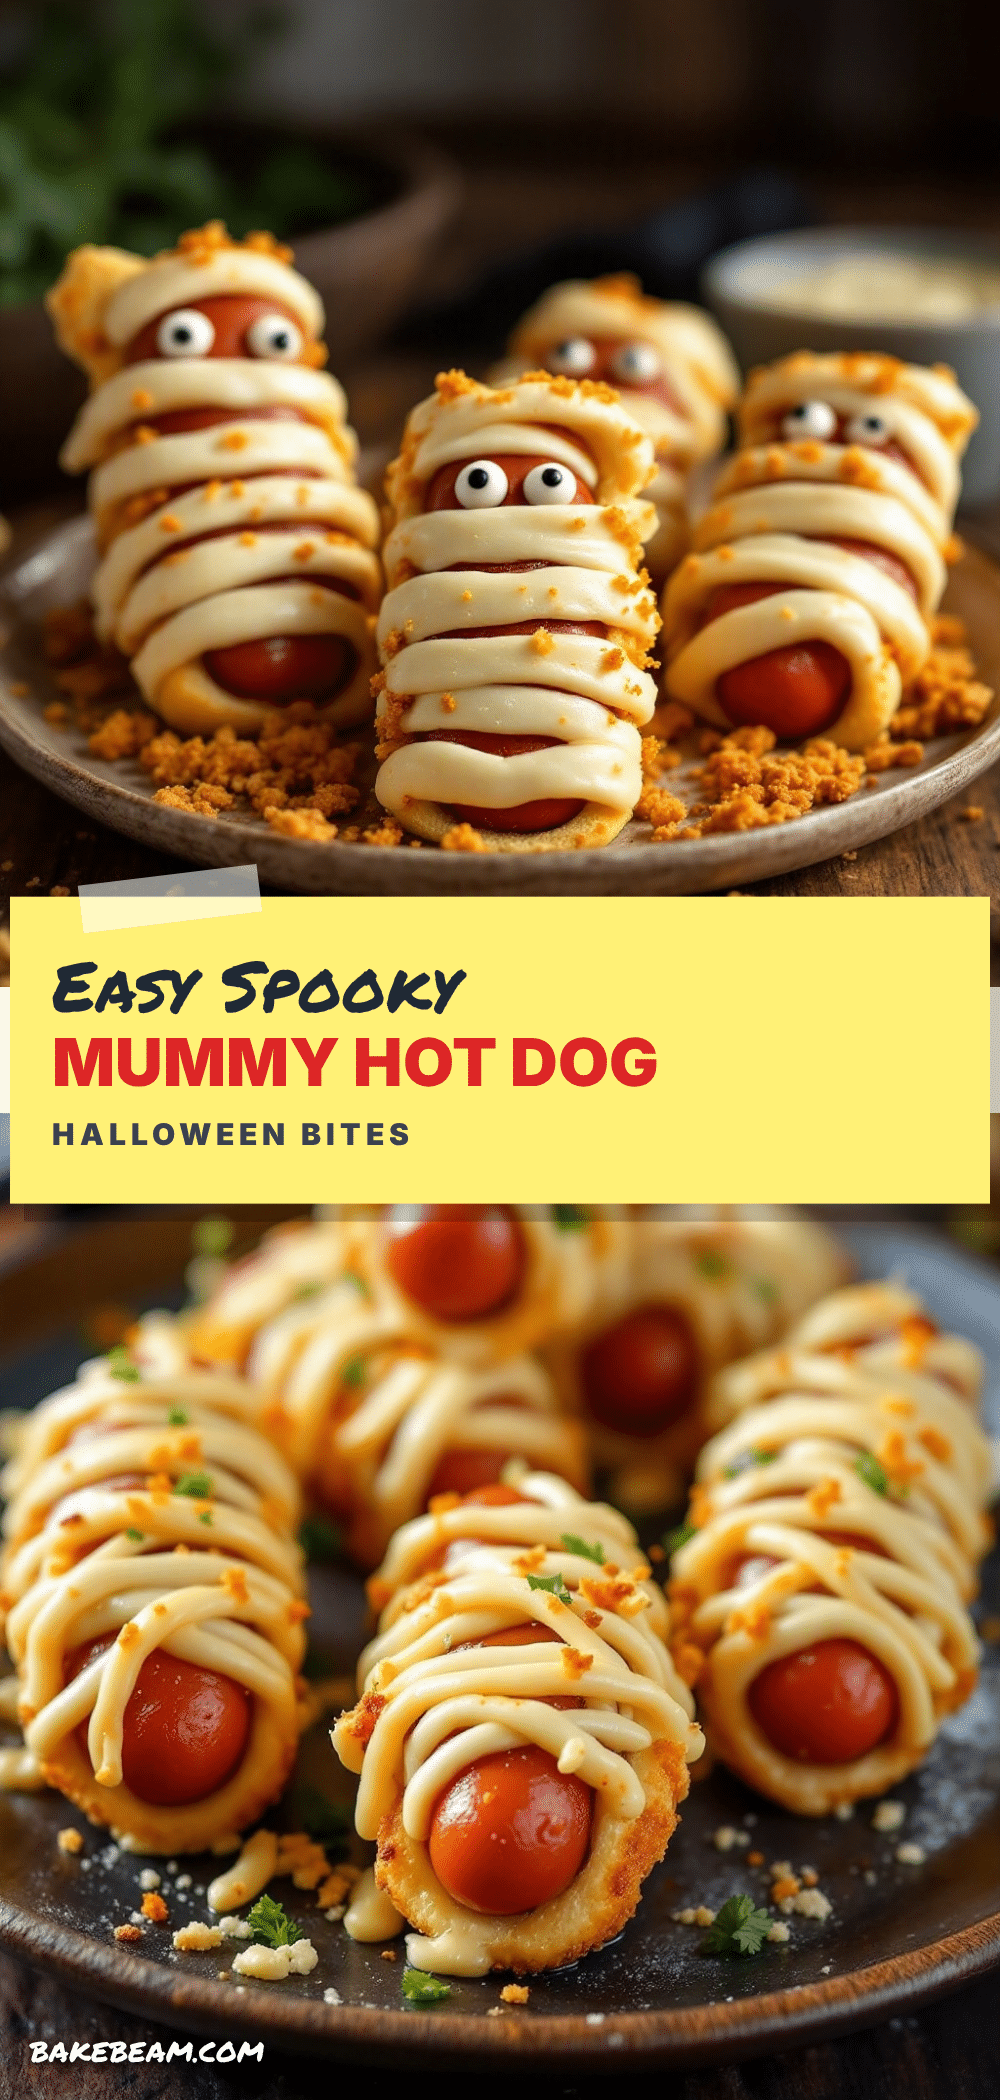
Easy Mummy Hot Dog Bites: Perfect Spooky Halloween Snack

These Easy Mummy Hot Dog Bites are a quick, fun, and delicious Halloween snack made with hot dogs, crescent roll dough, and mustard. Perfect for parties, they come together in just 20 minutes and are always a crowd-pleaser.
- Prep Time: 10 minutes
- Cook Time: 12 minutes
- Total Time: 22 minutes
- Yield: 16 mummy bites 1x
- Category: Appetizer
- Cuisine: American
Ingredients
- 1 package (8 count) hot dogs
- 1 can (8 ounces) refrigerated crescent roll dough
- Yellow mustard (for eyes)
- Optional: cooking spray or melted butter (for brushing)
Instructions
- Preheat your oven to 375°F (190°C). Line a baking sheet with parchment paper or a silicone baking mat.
- Cut each hot dog crosswise into two equal pieces to get 16 pieces total.
- Open the crescent roll dough and unroll it carefully. Without separating the triangles, use a sharp knife or pizza cutter to cut each triangle lengthwise into 3 thin strips (about 24 strips total).
- Take one strip of dough and wrap it around a hot dog piece, starting at one end and working to the other, leaving a small gap at the top for eyes. Do not wrap too tightly. Repeat with all hot dog pieces.
- Place the wrapped mummies on the prepared baking sheet, leaving about 1 inch of space between each.
- Optional: Brush the tops lightly with melted butter or cooking spray for a golden finish.
- Bake for 10-12 minutes, until the dough is golden brown and cooked through.
- Let the mummies cool for 2-3 minutes on the baking sheet. Using a toothpick or small skewer, dip it in mustard and dot two tiny eyes on each mummy.
- Serve immediately.
Notes
Work with cold dough to prevent tearing. Don’t overbake; dough should be golden, not dark. Add mustard eyes after baking to keep them defined. For a crowd, double the batch.
Nutrition
- Serving Size: 1 mummy bite
- Calories: 110
- Sugar: 1
- Sodium: 310
- Fat: 7
- Saturated Fat: 2.5
- Carbohydrates: 8
- Protein: 4
Keywords: Halloween snack, mummy hot dog bites, easy Halloween recipe, kid-friendly snack, spooky snack