The clock was ticking down the last two minutes of the third quarter, and I was losing my mind. Not because of the game—actually, I couldn’t even tell you who was playing that day. No, I was panicking because I had promised to bring the main snack for a tailgate, and my fridge was looking pretty sad. A bag of tortilla chips, some leftover shredded cheese, a half-empty jar of salsa, and a can of black beans I’d been ignoring for weeks. That was it. And I had thirty minutes before kickoff.
That’s the thing about game day, you know? You get so caught up in the excitement, the trash talk, the jerseys, that you completely forget about the food. But honestly, the food is half the reason we show up. And there I was, staring at my sad little pile of ingredients, wondering if I could just pick up a pizza on the way. But then I had this thought—what if I just threw everything on a sheet pan and baked it? No fancy layering, no complicated steps. Just chips, toppings, and heat.
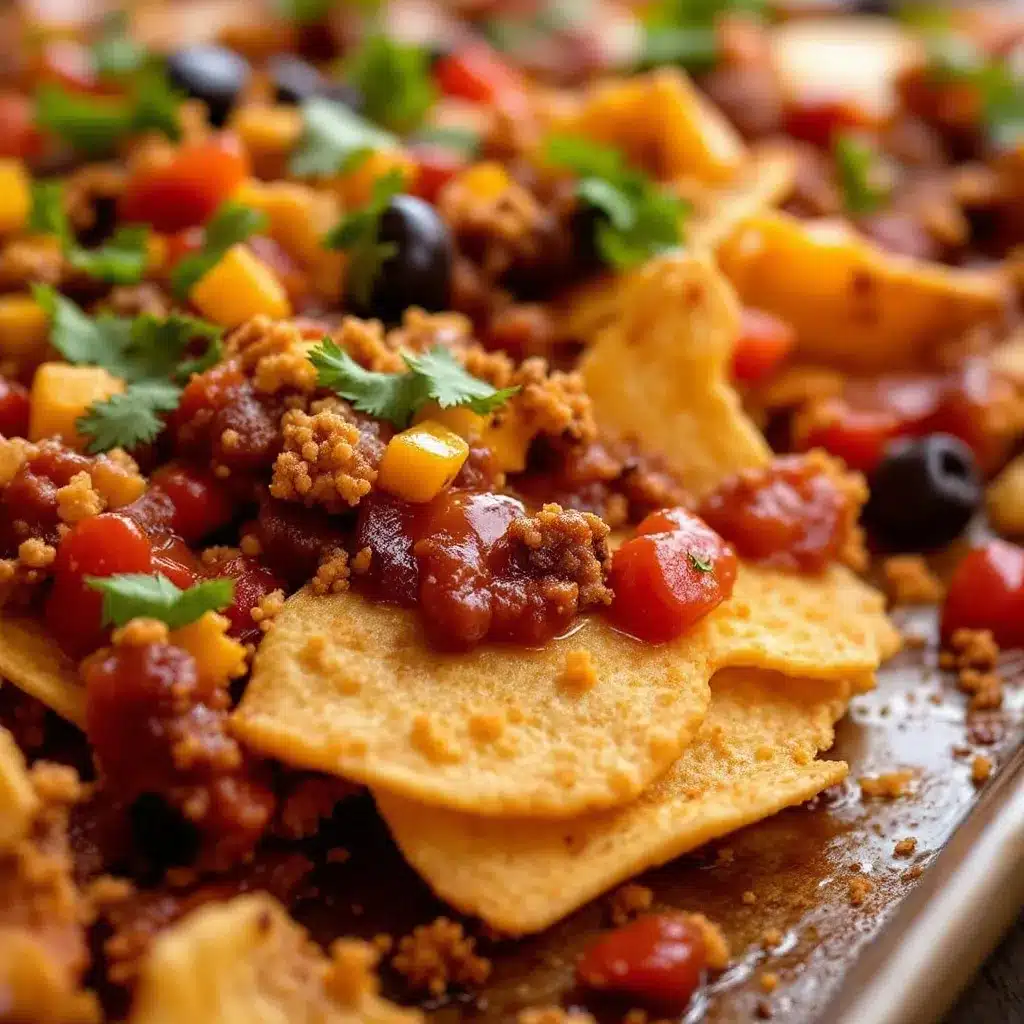
And that, right there, is how my obsession with easy sheet pan nachos was born. It was messy, it was chaotic, and it was absolutely perfect. The cheese melted into every single crevice, the beans got all warm and creamy, and the chips stayed surprisingly crunchy around the edges. I brought that pan to the tailgate, and it was gone in ten minutes. People were asking me for the recipe, and I just laughed and pointed at my trash can. But after making it a hundred times since then, tweaking the ratios, testing the timing, I can honestly say—this is the one. This is the sheet pan nacho recipe that will save your game day, every single time.
Why You’ll Love This Recipe
Let me tell you why these aren’t just ordinary nachos. I’ve tested this recipe so many times that my husband actually begged me to make something else for a change. But every time I think I’ve perfected it, I find another little tweak that makes it even better. And now, after countless batches, I can confidently say this is the best version. Here’s why you’re going to love it:
- Quick & Easy : From start to table in under 25 minutes. Seriously. You can make these during a commercial break and not miss a single play.
- Simple Ingredients : No weird stuff. No special trips to the store. You probably have 90% of these ingredients in your pantry right now.
- Perfect for Tailgating : This is the ultimate crowd-pleaser. It travels well, it’s easy to serve, and everyone can just grab a handful.
- Crowd-Pleaser : I’ve served these at Super Bowl parties, birthday parties, and casual get-togethers. They disappear every single time.
- Unbelievably Delicious : The key is the layering technique. You don’t just dump everything on top. You layer the chips, then the cheese, then the toppings, then more cheese. This way, every single chip gets some love.
What makes this recipe different from the rest is the balance. I’ve seen so many sheet pan nachos that end up soggy or uneven. But I’ve figured out the exact ratio of chips to toppings, the perfect oven temperature, and the right order of operations. It’s not just another nacho recipe—it’s the nacho recipe. The one you’ll come back to again and again. And honestly, it’s the kind of dish that makes you close your eyes after the first bite. Pure comfort, pure joy, pure game day magic.
What Ingredients You Will Need
This recipe uses simple, straightforward ingredients that come together to create something truly special. No fuss, no stress—just good food. Here’s what you’ll need:
For the Nachos
- 1 large bag (13-16 oz) restaurant-style tortilla chips — I prefer the thicker, sturdier chips that can hold up to the toppings. The thin ones tend to break under the weight. My go-to is the Tostitos Cantina style, but any thick chip works.
- 3 cups shredded Mexican blend cheese — You can also use a mix of cheddar and Monterey Jack. The key is shredding it yourself if you have time. Pre-shredded cheese has anti-caking agents that don’t melt as smoothly.
- 1 can (15 oz) black beans, drained and rinsed — Rinsing is important here. You want to get rid of that starchy liquid that can make things soggy.
- 1 can (15 oz) refried beans — This is my secret weapon. A few dollops of refried beans add a creamy, savory layer that just takes everything up a notch.
- 1 cup cooked, shredded chicken — You can use rotisserie chicken, leftover grilled chicken, or even canned chicken in a pinch. I usually grab a rotisserie chicken from the store the day before.
- 1 cup corn kernels — Frozen corn that’s been thawed works great. Canned corn is fine too, just drain it well. In the summer, fresh corn off the cob is incredible.
- 1 large jalapeño, thinly sliced — Remove the seeds if you want less heat. Leave them in if you’re brave.
- 1/2 cup sliced black olives — Optional, but I love the briny pop they add.
- 1/2 cup diced red onion — Adds a nice bite and color.
- 1 large tomato, diced — Or use cherry tomatoes, halved.
- 1/4 cup chopped fresh cilantro — For that fresh finish.
For Serving
- 1/2 cup sour cream
- 1/2 cup salsa — Your favorite jarred kind, or homemade if you’re fancy.
- 1/2 cup guacamole — Store-bought or homemade.
- 1 lime, cut into wedges
Ingredient Selection Tips: When choosing your chips, look for a bag that doesn’t have too many broken pieces at the bottom. And for the cheese, if you can find a block of white cheddar and shred it yourself, the melt is just unbeatable. I’ve tried all kinds of cheese combos, and the Mexican blend is the most forgiving. For the chicken, I really recommend using rotisserie chicken from the store. It’s already seasoned and tender, and it saves you so much time.
Substitution Guidance: If you’re vegetarian, just skip the chicken and double up on the beans. You can also add some sauteed bell peppers and onions for extra flavor. For a gluten-free option, just make sure your tortilla chips are certified gluten-free (most are, but always check). And if you’re dairy-free, use a good vegan shredded cheese—I’ve had decent luck with the Follow Your Heart brand.
Equipment Needed
You don’t need a lot of fancy equipment for this recipe, which is part of the beauty of it. Here’s what you’ll need:
- A large rimmed baking sheet (half-sheet pan) — This is the star of the show. A standard 13×18 inch sheet pan works perfectly. I’ve used both non-stick and regular aluminum pans, and both work fine. Just make sure it has a rim so nothing drips off.
- Parchment paper or aluminum foil — For easy cleanup. Trust me, you don’t want to be scrubbing melted cheese off your pan.
- A sharp knife and cutting board — For prepping your veggies.
- A can opener — Obviously.
- A colander — For rinsing the beans.
- A small bowl — For mixing the refried beans with a little water to make them spreadable.
- A spatula — For spreading and serving.
Personal Experience: I’ve made these nachos on a cheap dollar-store baking sheet, and they turned out just fine. The key is lining it well. I’ve also used a disposable aluminum pan when I was bringing them to a tailgate and didn’t want to worry about getting my pan back. Worked like a charm. Just be careful with the disposable pans—they’re a bit flimsy, so put them on a sturdy surface before loading them up.
Budget-Friendly Tip: If you don’t have a half-sheet pan, you can use a 9×13 inch baking dish. The nachos will be a bit thicker, but they’ll still be delicious. You might need to adjust the cooking time by a couple of minutes.
Preparation Method
Alright, let’s get to it. This is the part where the magic happens. Follow these steps, and you’ll have the best sheet pan nachos of your life.
- Preheat your oven to 400°F (200°C). This is important. You want a hot oven that will melt the cheese quickly without burning the chips. While the oven is heating up, line your sheet pan with parchment paper or aluminum foil. I prefer parchment because nothing sticks to it.
- Prepare your ingredients. Drain and rinse the black beans. In a small bowl, mix the refried beans with about 2 tablespoons of water to loosen them up a bit. Shred your cheese if you bought a block. Slice the jalapeño, dice the red onion and tomato, and chop the cilantro. Have everything ready to go—this is a fast process once you start assembling.
- Spread the chips in an even layer. Pour the tortilla chips onto the prepared sheet pan and spread them out in a single, even layer. Try not to overlap them too much, but a little overlapping is fine. You want every chip to have access to the heat and the toppings.
- Add the first layer of cheese. Sprinkle about half of the shredded cheese evenly over the chips. This is the foundation layer. It melts down and creates a cheesy base that holds everything together.
- Dollop the refried beans. Using a spoon, drop small dollops of the thinned refried beans all over the chips. Don’t try to spread them—just leave them as little pockets of creamy goodness.
- Add the black beans and chicken. Scatter the black beans evenly over the chips. Then do the same with the shredded chicken. You want to distribute everything evenly so every handful has a bit of everything.
- Add the corn and jalapeño. Sprinkle the corn and sliced jalapeño over the top. If you’re using olives, add them now too.
- Add the second layer of cheese. Sprinkle the remaining shredded cheese over everything. This is the top layer that will get all bubbly and golden. Don’t be shy with the cheese—this is what makes it amazing.
- Bake for 10-12 minutes. Place the sheet pan in the preheated oven and bake until the cheese is completely melted and bubbly, and the edges of the chips are just starting to turn golden brown. Keep an eye on it—ovens vary, and you don’t want the chips to burn. At the 10-minute mark, check it. If the cheese is melted and the chips look good, it’s done.
- Add fresh toppings. Remove the sheet pan from the oven and immediately sprinkle the diced tomato, red onion, and fresh cilantro over the top. The heat from the nachos will slightly warm the tomatoes, which is perfect.
- Serve immediately. Transfer the sheet pan to a serving area and add dollops of sour cream, salsa, and guacamole. Squeeze a few lime wedges over everything. Serve hot, directly from the pan.
Troubleshooting Tip: If your nachos are coming out soggy, you’re probably using too many wet toppings. Drain your beans really well, and don’t go overboard with the salsa or sour cream during baking. Save those for after. Also, make sure your oven is fully preheated before you put the nachos in. A hot oven is crucial for getting that perfect melt without turning the chips to mush.
Sensory Cue: You’ll know the nachos are ready when the cheese is fully melted and starting to brown in spots, and you can hear a slight sizzle when you pull the pan out of the oven. The kitchen will smell like a combination of toasty chips, melted cheese, and warm spices. It’s a beautiful thing.
Cooking Tips & Techniques
I’ve made a lot of mistakes with nachos over the years. I’ve made them soggy, I’ve made them burnt, and I’ve made them so uneven that half the chips were naked. But I’ve learned from every single failure, and now I’m sharing all my secrets with you.
Don’t Overload the Chips. This is the number one mistake people make. You want to see the chips through the toppings. If you pile everything on too thick, the bottom chips will get soggy and the top chips will be bare. Think of it as a single layer of chips with toppings scattered evenly. A little overlap is fine, but don’t stack them.
Use Room Temperature Ingredients. If your chicken and beans are cold from the fridge, they’ll cool down the whole pan and your cheese won’t melt properly. Let them sit on the counter for 15-20 minutes before you start assembling. This makes a huge difference.
Grate Your Own Cheese. I know it’s tempting to buy the pre-shredded bags, but they have a coating that prevents them from melting smoothly. If you grate your own cheese, it will melt into a beautiful, gooey blanket. I promise it’s worth the extra two minutes.
The Refried Bean Trick. Don’t skip this. The little pockets of refried beans add a creamy texture that contrasts perfectly with the crunchy chips and gooey cheese. Just make sure to thin them out with a little water so they’re easier to dollop.
Timing is Everything. Have all your toppings prepped and ready before you start assembling. Once the nachos go in the oven, you only have 10-12 minutes before they’re done. You don’t want to be scrambling to chop tomatoes while your nachos are burning.
Let Them Rest. I know you’ll want to dig in immediately, but let the nachos sit on the counter for 2-3 minutes after they come out of the oven. This allows the cheese to set slightly, so it doesn’t slide off the chips when you pick them up.
Personal Failure Story: The first time I made these for a big party, I used way too much salsa during the baking process. The chips turned into a complete soggy mess. It was heartbreaking. Now I always add salsa fresh at the end. Learn from my mistake!
Variations & Adaptations
One of the best things about this recipe is how adaptable it is. You can change it up based on what you have on hand, what your guests like, or what season it is. Here are some of my favorite variations:
Vegetarian Nachos
Skip the chicken and add an extra can of black beans or pinto beans. You can also add sauteed bell peppers and onions for more texture and flavor. I’ve also used sauteed mushrooms, and they add a nice meaty texture that even carnivores enjoy.
Spicy Chorizo Nachos
Cook 1/2 pound of Mexican chorizo in a skillet until browned and crumbly. Drain the excess fat, then sprinkle the chorizo over the chips along with the other toppings. The spicy, smoky flavor is incredible. This is my husband’s absolute favorite version.
Breakfast Nachos
Yes, this is a thing, and it’s amazing. Use the same base, but top with scrambled eggs, crumbled bacon, and shredded hash browns. Bake as directed, then finish with a drizzle of hot sauce and some sliced avocado. Perfect for a lazy Sunday morning.
Low-Carb Nachos
Swap the tortilla chips for pork rinds or cheese crisps. Use a low-carb salsa and sour cream. This version is surprisingly satisfying, and you won’t miss the chips as much as you think.
Seasonal Variation: Summer Veggie Nachos
In the summer, I love using fresh corn cut off the cob, diced zucchini, and cherry tomatoes. The fresh vegetables add a lightness that’s perfect for warm weather tailgates. Just saute the zucchini briefly before adding it to remove some of the moisture.
Personal Variation: My favorite twist is adding a layer of slow cooker football chili under the cheese. It turns the nachos into a full meal, and the chili adds so much depth of flavor. I just spoon the chili over the chips before adding the cheese and bake as directed. It’s a game-changer.
Serving & Storage Suggestions
These nachos are best served immediately, right off the sheet pan. That’s part of the charm. But if you’re planning ahead or have leftovers (unlikely, but possible), here’s what you need to know.
Serving Temperature: Serve the nachos hot, straight from the oven. The cheese should be bubbly and the chips should be warm and crunchy. I like to put the sheet pan on a trivet in the middle of the table and let everyone dig in with their hands. It’s casual and fun.
Presentation: I always add the fresh toppings right after the nachos come out of the oven. The contrast between the hot, melty cheese and the cool, fresh tomatoes and cilantro is beautiful. I also like to drizzle a little hot sauce in a zigzag pattern over the top for color.
Complementary Dishes: These nachos are a meal on their own, but they pair beautifully with other game day favorites. I love serving them alongside sticky honey garlic chicken wings or some crispy bacon-wrapped jalapeno poppers. And if you want to round out the spread, a batch of mini football Rice Krispie treats makes for a fun dessert.
Storage: If you have leftovers, let them cool completely, then transfer them to an airtight container. Store in the refrigerator for up to 2 days. The chips will soften, but the flavor will still be good.
Reheating: The best way to reheat leftover nachos is in the oven or air fryer. Spread them on a baking sheet and heat at 350°F for 5-7 minutes, or until warmed through. The microwave will make them soggy, so avoid it if you can. I’ve also reheated them in a skillet on the stovetop, which works surprisingly well.
Flavor Development: Honestly, these are best fresh. The chips lose their crunch after a few hours. But if you’re making them for a party, you can prep all the ingredients ahead of time and assemble right before baking. That’s the way to go.
Nutritional Information & Benefits
Let’s be real—nachos aren’t health food. But that doesn’t mean they can’t have some redeeming qualities. Here’s a rough estimate of the nutritional information per serving (based on 8 servings):
| Nutrient | Amount per Serving |
|---|---|
| Calories | 380 |
| Total Fat | 22g |
| Saturated Fat | 10g |
| Cholesterol | 55mg |
| Sodium | 720mg |
| Total Carbohydrates | 32g |
| Dietary Fiber | 6g |
| Sugars | 3g |
| Protein | 18g |
Health Benefits: The black beans are a great source of fiber and plant-based protein. The tomatoes and cilantro provide vitamins A and C. And the jalapeños contain capsaicin, which has anti-inflammatory properties. So while these aren’t a salad, they’re not completely devoid of nutrition either.
Dietary Considerations: This recipe can be made gluten-free by using certified gluten-free tortilla chips. It can be made vegetarian by omitting the chicken. For a lower-sodium version, use low-sodium beans and go easy on the salt.
Potential Allergens: This recipe contains dairy (cheese, sour cream). It may also contain gluten, depending on the chips you use. Always check labels if you’re serving someone with allergies.
Personal Wellness Perspective: I believe in balance. I eat salads most days, but on game day, I’m all in. These nachos are a treat, and that’s okay. Food is meant to be enjoyed, and sharing a pan of nachos with friends is one of life’s simple pleasures.
Conclusion
So there you have it—my absolute favorite easy sheet pan nachos for game day. They’re quick, they’re delicious, and they’re guaranteed to make you the hero of any tailgate. I’ve made these more times than I can count, and they never disappoint. The combination of crunchy chips, gooey cheese, and all the fresh toppings is just unbeatable.
I really hope you give these a try. And don’t be afraid to make them your own. Swap in your favorite toppings, adjust the spice level, or try one of the variations I mentioned. That’s the beauty of this recipe—it’s a starting point, not a rulebook. The best nachos are the ones that make you happy.
If you make these, I’d love to hear about it! Leave a comment below and let me know how they turned out. Did you add any crazy toppings? Did your friends devour them? Share your stories—I read every single comment. And if you’re looking for more game day inspiration, don’t miss my ultimate loaded nacho charcuterie board or these easy pretzel bites with beer cheese dip.
Now go forth and make some nachos. Your game day just got a whole lot better.
Frequently Asked Questions
Can I make these nachos ahead of time?
You can prep all the ingredients ahead of time, but I don’t recommend assembling the nachos until right before you bake them. The chips will get soggy if they sit with the toppings for too long. Chop your veggies, shred your cheese, and cook your chicken the day before. Then just assemble and bake when you’re ready to serve.
What’s the best way to keep nachos warm for a party?
If you’re serving these at a party and want to keep them warm, you can put the sheet pan on a warming tray or in a low oven (200°F) for up to 30 minutes. Just keep an eye on them—they can dry out if left too long. Another option is to serve them in a slow cooker on the warm setting, though the chips will soften over time.
Can I use ground beef instead of chicken?
Absolutely! Brown 1 pound of ground beef with some taco seasoning, drain the fat, and use it instead of the chicken. Ground beef nachos are a classic for a reason. You can also use ground turkey or even shredded pork.
Why are my nachos always soggy?
Soggy nachos are usually caused by too much moisture. Make sure you drain and rinse your beans well. Don’t add wet toppings like salsa or sour cream before baking—add them fresh at the end. Also, make sure your oven is fully preheated. A hot oven helps the cheese melt quickly before the chips have a chance to absorb too much moisture.
How do I make these nachos spicier?
If you want more heat, leave the seeds in your jalapeños, add some pickled jalapeños on top, or drizzle with hot sauce before serving. You can also add a pinch of cayenne pepper to the refried beans or use spicy chorizo instead of chicken. For an extra kick, try adding some sliced serrano peppers.
Pin This Recipe!
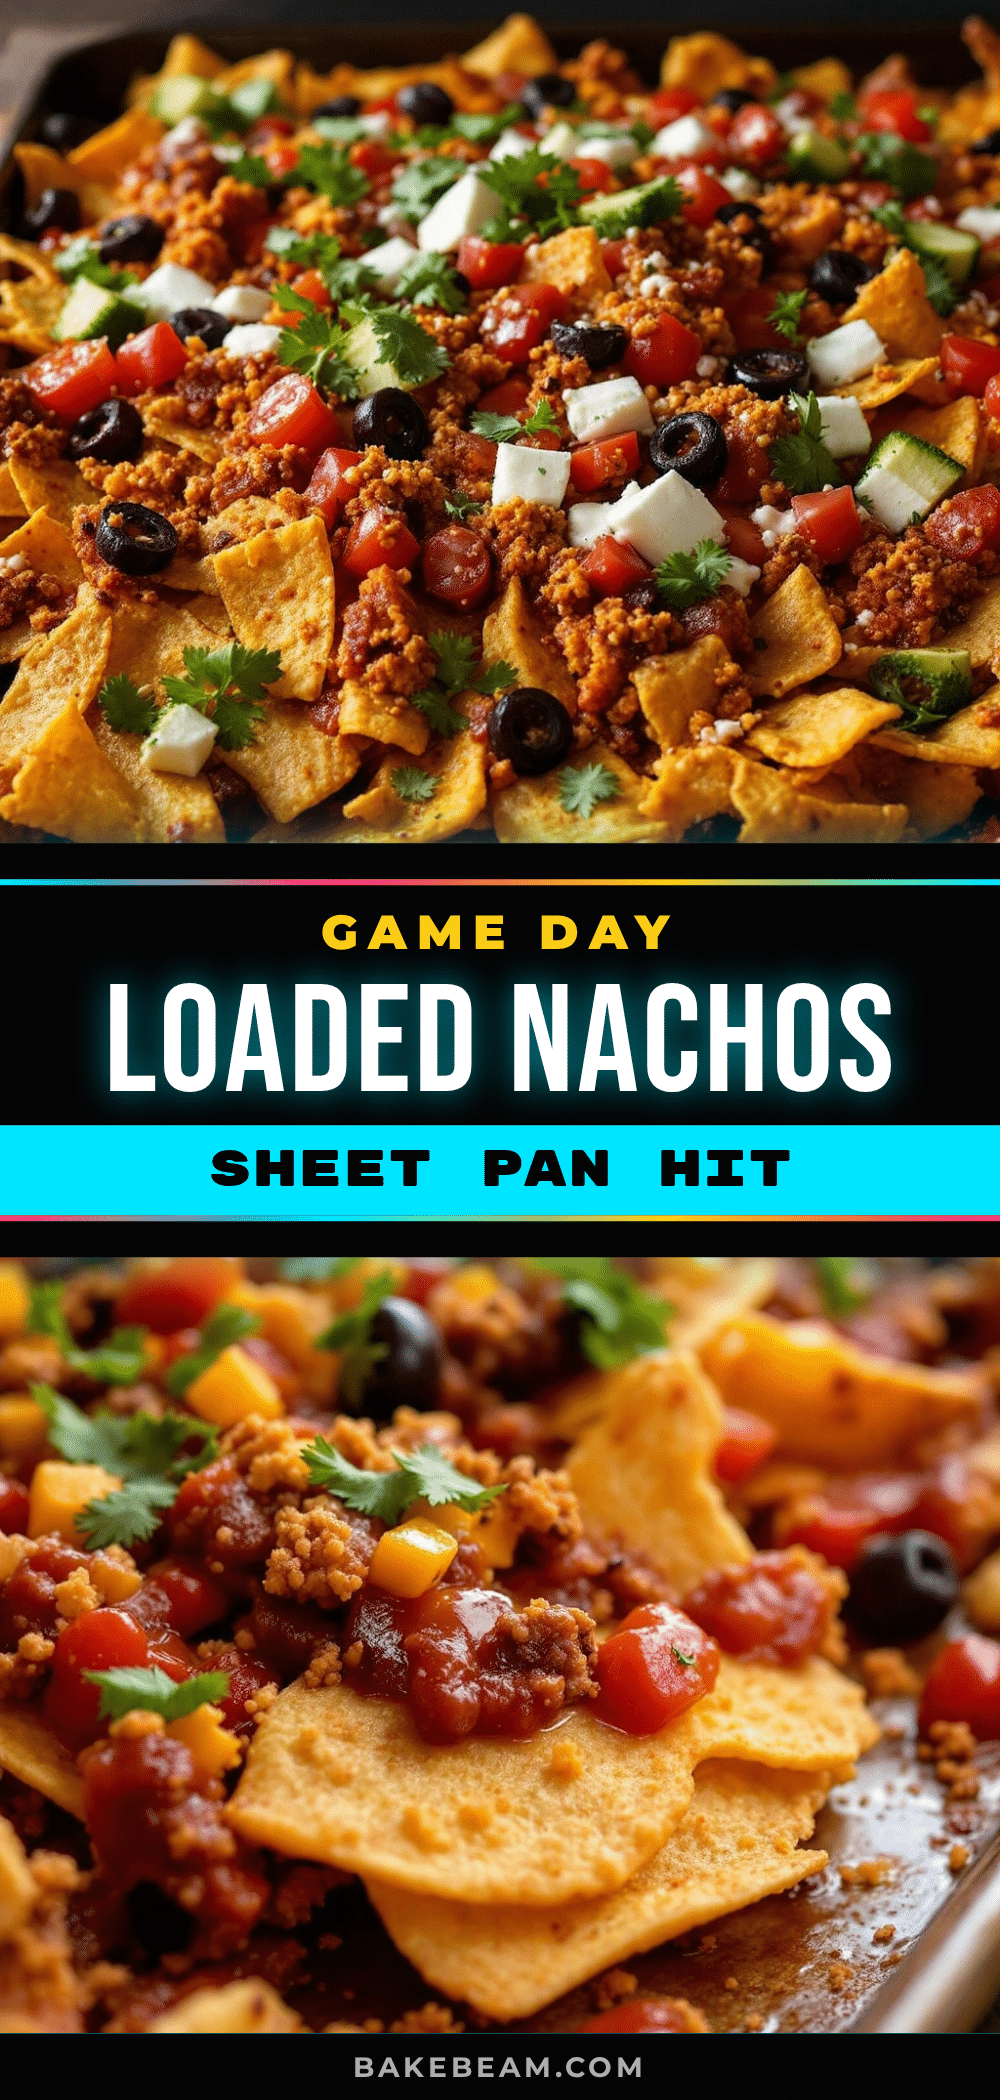
Easy Sheet Pan Nachos: Best Game Day Tailgate Recipe
Quick and easy sheet pan nachos loaded with cheese, black beans, refried beans, chicken, corn, and jalapeños, perfect for game day or any gathering.
- Prep Time: 15 minutes
- Cook Time: 12 minutes
- Total Time: 27 minutes
- Yield: 8 servings 1x
- Category: Appetizer
- Cuisine: Mexican-American
Ingredients
- 1 large bag (13–16 oz) restaurant-style tortilla chips
- 3 cups shredded Mexican blend cheese
- 1 can (15 oz) black beans, drained and rinsed
- 1 can (15 oz) refried beans
- 1 cup cooked, shredded chicken
- 1 cup corn kernels
- 1 large jalapeño, thinly sliced
- 1/2 cup sliced black olives (optional)
- 1/2 cup diced red onion
- 1 large tomato, diced
- 1/4 cup chopped fresh cilantro
- 1/2 cup sour cream
- 1/2 cup salsa
- 1/2 cup guacamole
- 1 lime, cut into wedges
Instructions
- Preheat your oven to 400°F (200°C). Line a large rimmed baking sheet with parchment paper or aluminum foil.
- Prepare your ingredients: drain and rinse black beans, mix refried beans with 2 tablespoons water to loosen, shred cheese if needed, slice jalapeño, dice red onion and tomato, chop cilantro.
- Spread tortilla chips in an even layer on the prepared baking sheet, avoiding too much overlap.
- Sprinkle about half of the shredded cheese evenly over the chips.
- Dollop the thinned refried beans over the chips in small spoonfuls.
- Scatter the black beans and shredded chicken evenly over the chips.
- Add the corn and sliced jalapeño (and olives if using).
- Sprinkle the remaining shredded cheese over everything.
- Bake for 10-12 minutes, until cheese is melted and bubbly and edges of chips are golden brown.
- Remove from oven and immediately sprinkle diced tomato, red onion, and fresh cilantro over the top.
- Serve immediately, adding dollops of sour cream, salsa, and guacamole. Squeeze lime wedges over everything.
Notes
For best results, use room temperature ingredients and grate your own cheese. Avoid adding wet toppings like salsa or sour cream before baking; add them fresh at the end. Let nachos rest 2-3 minutes after baking to allow cheese to set.
Nutrition
- Serving Size: 1 serving (about 1/8
- Calories: 380
- Sugar: 3
- Sodium: 720
- Fat: 22
- Saturated Fat: 10
- Carbohydrates: 32
- Fiber: 6
- Protein: 18
Keywords: sheet pan nachos, game day nachos, easy nachos, tailgate recipe, loaded nachos